Showing posts with label Valentine. Show all posts

Sweet Sugar Hollow Valentine Gift Box...

Good Morning, Afternoon or Evening...
depending on wherever you find yourself reading this post this today.  

This Wednesday over at Heartfelt Creations, we are continuing our tour through
Now, when I first got to see the preview of this collection, the first thing I thought to myself was that this would be the cutest collection to use for Valentine's Day creations!

I decided to create a little heart shaped gift box that one could easily use for chocolates, candies, socks, etc. for that special someone that you would like to surprise.

Here's how the little heart shaped box turned out...


I've used the patterned paper from the collection, and as you can see the inside is just as pretty looking as the outside.  An SVG cutting file cut with my Silhouette Cameo made this a quick and easy project!  I've then used my manual die cutting machine to cut the decorative heart using white card stock and the Timeless Amour Die by Heartfelt Creations.  I've colored the owl image, stamped the sentiment and added some flowers and leafy swirls to complete the project. 

Here's a closer peek...


I do hope I've inspired you today to create a special gift box for your special loved one!
Also, be sure to stop by the Heartfelt Creations blog to see what the rest of the design team have been up to in Sugar Hollow!

Until next time...

Project Supplies and Instructions
 HCDP1-262  Sugar Hollow Paper Collection
HCPC-3716  Sugar Hollow Cling Stamp Set
HCD1-785  Sugar Hollow Tree Die
HCPC-3644  Birds and Blooms Cling Stamp Set
HCD1-757  Leafy Branch Die
HCD2-750  Cut Mat Create 1B Die
HCD1-728  Timeless Amour Die
HCST1-401  Deluxe Flower Shaping Kit
TSMP400  Memento Dye Ink Pad - Rose Bud

Other Products Used:  VersaFine Black Ink, VersaColor Pine Cone Ink, white card stock, scor tape, BigShot die cutting machine, Recollections Micro Beads - Silver, Silhouette Cameo electronic die cutting machine, SVG Cuts - Love Me Do SVG Kit, Ranger Distress Markers -  Vintage Photo, Walnut Stain, Pumice Stone, Faded Jeans, Seedless Preserve, Wild Honey, Peeled Paint, paper trimmer, scissors, pop dots

Choose papers from the Sugar Hollow Collection to use for the top and bottom of the heart gift box.  Cut pieces using SVG files and electronic die cutting machine.  Assemble box as per instructions that are included with SVG Kit cutting files.  Ink all edges of box and also lid heart embellishment using a soft brown colored ink. Trim the Owl Always Love You sentiment strip from the paper collection, ink all edges brown, and adhere around the bottom of the lid of the gift box. Die cut a lace heart from white card stock using the Timeless Amour Die.  Cut another from the light pink patterned paper from within the collection for the solid heart embellishment. Ink die cut with a brown colored ink. Cut several small pop dots in half and adhere lace heart to gift box.  Adhere solid pink heart to box as shown, using pop dots. Cut a label shape from the Cut Mat Create 1B Die set and using black ink, stamp sentiment onto label.  Ink edges with a brown ink and adhere to gift box once again using pop dots.  Stamp the owl image onto white card stock with black ink.  Color using Distress Markers.  Adhere to box as shown using doubled up pop dots.  Using green patterned paper from within the collection, cut two of the leafy swirls from the Cut Mat Create 1B Die set.  Trim one in half, shape and adhere behind owls.  Shape and adhere other swirl on top of lacey heart as shown.  Using a bright pink ink, stamp the flowers from the Birds and Blooms Cling Stamp Set onto a piece of pink floral and birdhouse patterned paper from within the Sugar Hollow Collection.  Shape flowers and adhere to gift box as shown.  Add silver micro beads to centers of each flower. 

Vintage Valentine...

Hello Everyone!
Happy Friday!

I'm here to share with you today a design team project I've created showcasing the lovely Mabel's Diary by Ephemera's Vintage Garden.  If you haven't already visited the beautiful digital collections of Debbie-Anne, you are missing out on some gorgeous nostalgic and vintage papers and ephemera!
And, the beauty is that you print them yourself at home!

The beautiful Mabel's Diary is configured to use as a planner, junk journal or diary type project.  
That being said, I'm a little different than many of the design team as I love using these products for a wide variety of other creations....so, it's my job to try to inspire you to branch out a little and try something new with your printables.  

My first project is a Vintage Valentine Pocket Letter.  
I have a friend in Ontario who I love trading pocket letters with...and I thought it would be nice to surprise her with a Valentine themed letter...and as I paged through my Mabel's Diary print outs, I soon found that it had all the elements I was needing.  

Allow me to take you on a little tour of my creation...and I've even included a quick video for you as well...(now don't be too harsh as I haven't done many videos in the past, but hope to become better at it and create more in the future.)

Let's begin...


As you can see, I've done a lot of fussy cutting in this project.  I will be the first to admit that I love fussy cutting...I love to cut and fit pieces together, creating something beautiful!  While you may be saying that this is only a pocket letter and won't have taken much time...I can assure you that  I spent as much time on this piece as I do on a complex and detailed card. 

Each of the cards in the pocket letter have had their edges inked with a VersaColor Pine Cone Ink to give them a further look of being aged.  I've fussy cut elements from within the digital collection and adhered them to various cards within the pocket letter to add interest and detail.  I've cut the image of the lady up in the corner to make sure that she could be assembled in two of the pockets so she would be standing in the background.  I've used the same technique with the birds in the bottom, however the embellishing on the top of the pockets has hidden part of it.  

I decided that I really wanted this pocket letter to have some dimension, so I've used pop dots on every piece you see adhered to the outside.  

Here's a closer look at the top of the letter...(sorry it's not the best photo...the day I took these photos I just didn't have good lighting and for some reason the focus seems off.)


I've fussy cut all of the roses from the Mabel's Diary Collection.  The two roses in the corner I've aged using Distress Inks -  Vintage Photo and Antique Linen...and of course a little Pine Cone Ink.  I've fussy cut the ribbon banners, as well as the sentiment from the collection as well.  The cameo style sticker in the corner is a 3D sticker from a vintage assembly that I found at the Dollar Tree.  

Moving along to the bottom of the pocket letter...


I chose one of the lovely ladies from the printables that looked like she was just waiting for her Valenine beau.  I've aged her with a bit of ink as well and have fussy cut the heart shape beside her from one of the ephemera printables.  

Now, the whole idea of a pocket letter is to correspond with a pen pal and to include a few gifts in the back of the pockets.  I believe that the back of your pocket letter should always be as beautiful as the front.  So, because I neglected to think about printing these pages double sided, I cut a second set of cards and adhered them with a good paper glue to one another.  

The back looks like this...


Here's a peek at some of the gift ideas that I've included in this creation...


...some fussy cut ephemera pieces, some vintage style 3D stickers, a few flowers and pearls as well as some punched flower shapes created from scraps left over after cutting the pocket letter cards...


...a few tabs from the collection, more ephemera pieces, a small rose card also available in the collection...

So much fun to create and fill with goodies!

I've also included a video tour for you on my YouTube channel should you be interested!


I hope you've enjoyed your tour of my first Mabel's Diary project.  There will be more released throughout the next month...so stay tuned!  Also, be sure to stop by the Ephemera's Vintage Garden store where this collection is currently on sale for a limited time!  I'd love to see how you choose to use this collection.  

Until next time...

A Valentine for You

Good Morning, Afternoon or Evening...depending on where you are!

I decided to pop by with a quick share today!

I had the desire to sit down at my craft table today and create something for Valentines Day.  
I had a fantastic paper pack from Graphic 45 sitting on the shelf for some time now and finally found a few stolen moments to whip up something simple.  

Here's a look...


...and a different pic from a different angle...


I actually tried to keep this card simple, and useable for any occasion...not just Valentines day. 
It would be the perfect card for any one who loves vintage inspired creations as well!

Well, that's all folks...just a quick little post to share what I created quickly this morning!
Thanks for stopping by!

Ready for More Mess?

I'm back today to remind you about the current challenge we have running over at the Unstampabelles this month.  As always, our challenge to you is to make a project using no stamps...no digis, no rubbers, cling mount, etc....and our twist this month is to journal your "mess" of creating along the way.  

Now, we are half way through our challenge and I have another little peek for you of a project that once again was created out of a mess.  Unfortunately I forgot to take pics along the way as this was quite a bit more involved than the last project, which you can see here

Here goes...


For a first attempt at the box and the flowers as well, I thought it came out pretty nicely...although a little more practice would make things look even nicer!  LOL

Those roses, a purchase from the Silhouette Online Store, came in many, many pieces and needed to be glued together.  Once again with that awful Tombow glue I dislike...my fingers were just an awful mess by the time this was completed.  The heart box template was a purchase from SVG Cuts.  It is assembled from quite a few pieces and what I love about SVG Cuts is that they most often have a video showing you the assembly process.  It takes the guess work and frustration out of the project.  Of course the designer paper has been inked with a brown color to give the box an aged feel.  The rose petals and my fingers have also all been inked with the same brown.  LOL

Now I challenge you to get busy in your craft space and "make a mess".  Then link up your messy journey with us at The Unstampabelles...but don't be forgetful like me this time...take your photos along the way!

Until next time...

This project has been shared in the following challenges...
Eclectic Ellapu..."Anything But a Card"
That Craft Place Challenge Blog..."Make or Alter a Box"
Seemacrafts..."Valentines"
LadyBug Crafts..."Be Mine"
LEJ Designs..."Valentine/Love"
Natalie and Amy's Challenge Blog..."Love is all Around"
Scrap it Girl..."Hearts"
Silhouette Challenges..."Box of Any Type"
Sunflowerfield Challenge Blog..."Valentine's/Hearts"
Challenges and Sweets..."One Heart"
Creative Corner Challenges..."From the Heart"
Cut it Up..."Valentine's Day" (die cut file for box and die cut flowers)
Fussy and Fancy..."Be My Valentine"
Polkadoodles..."Love is in the Air"
Stuck on U Sketches..."Something Sweet"...sweetheart box filled with sweets
Totally Paper Crafts..."Valentine/Love"

Update:  This creation placed in the following challenges...


Awards, Wins & Recognitions

Pie Anyone?

Good Evening!

It's been a busy last couple of weeks...but I've still been creating...I've just been a little slow in posting!

I wanted to share with you today some pie boxes that I decorated for an upcoming church event we're hosting on Valentine's Day.  

Let me show you...


I apologize for the photo quality.  I landed up having to take the photo with my cell phone.  

Our church is holding a fundraiser for our local chapter of Cancer Care and we decided it would be fun to include a "pie walk".  I know traditionally it's a "cake walk", but our area is big into pies.  I had a few pie boxes left in my stash that  had purchased new at our local bakery, and offered to dress them up for the homemade pies to be sold off in the walk.  I just thought it would be cute to house those home made pies in a special custom made box.  Just one of those little extras to encourage donations.  As a friend of mine always says..."love is in the details".  LOL

The background paper I used has been printed through my Silhouette Cameo.  The adorable owls and the love puppy scene are also cutting files purchased in the Silhouette Online Store. 
I'm excited to see how this idea will go over with the people who will be attending the fundraiser.  This is the first time we have tried something like this and I'm hoping it will be a great success.  

Well thanks for popping in to see what I've had going on lately.  
The next few days will be crazy as I've been the main organizer getting everything ready and scheduled for the event.  We've painted the church basement, steam cleaned the carpet and are now getting ready to get the meal prep underway.  It's a spaghetti supper with Caeser salad and garlic toast...with cheese cake and a pineapple fluff dessert.  And of course Valentine cupcakes for the kids.  It's a little daunting not knowing how many people will attend.  Thank goodness I have a friend who was a caterer and has been willing to help me out with all the silly questions I've had.  Hopefully I can give you all a great report after the event.  

Until next time...

This project has been shared in the following challenges...

Let's Make a Mess!

It's been a little quiet around here lately!  I've been busy in the craft room, but have had little time to post lately!  Thanks for sticking by me and coming for a visit today!

Today marks the beginning of a new monthly challenge over at the Unstampabelles.  Our challenge is "Dare to Get Dirty"...and our twist was to document the mess along the way with pictures.

We have a wonderful sponsor for this challenge...

Sticker Store Craft Stickers
http://www.stickerstore.com.au/

Be sure to check out the Unstampabelles blog for the prize being awarded!

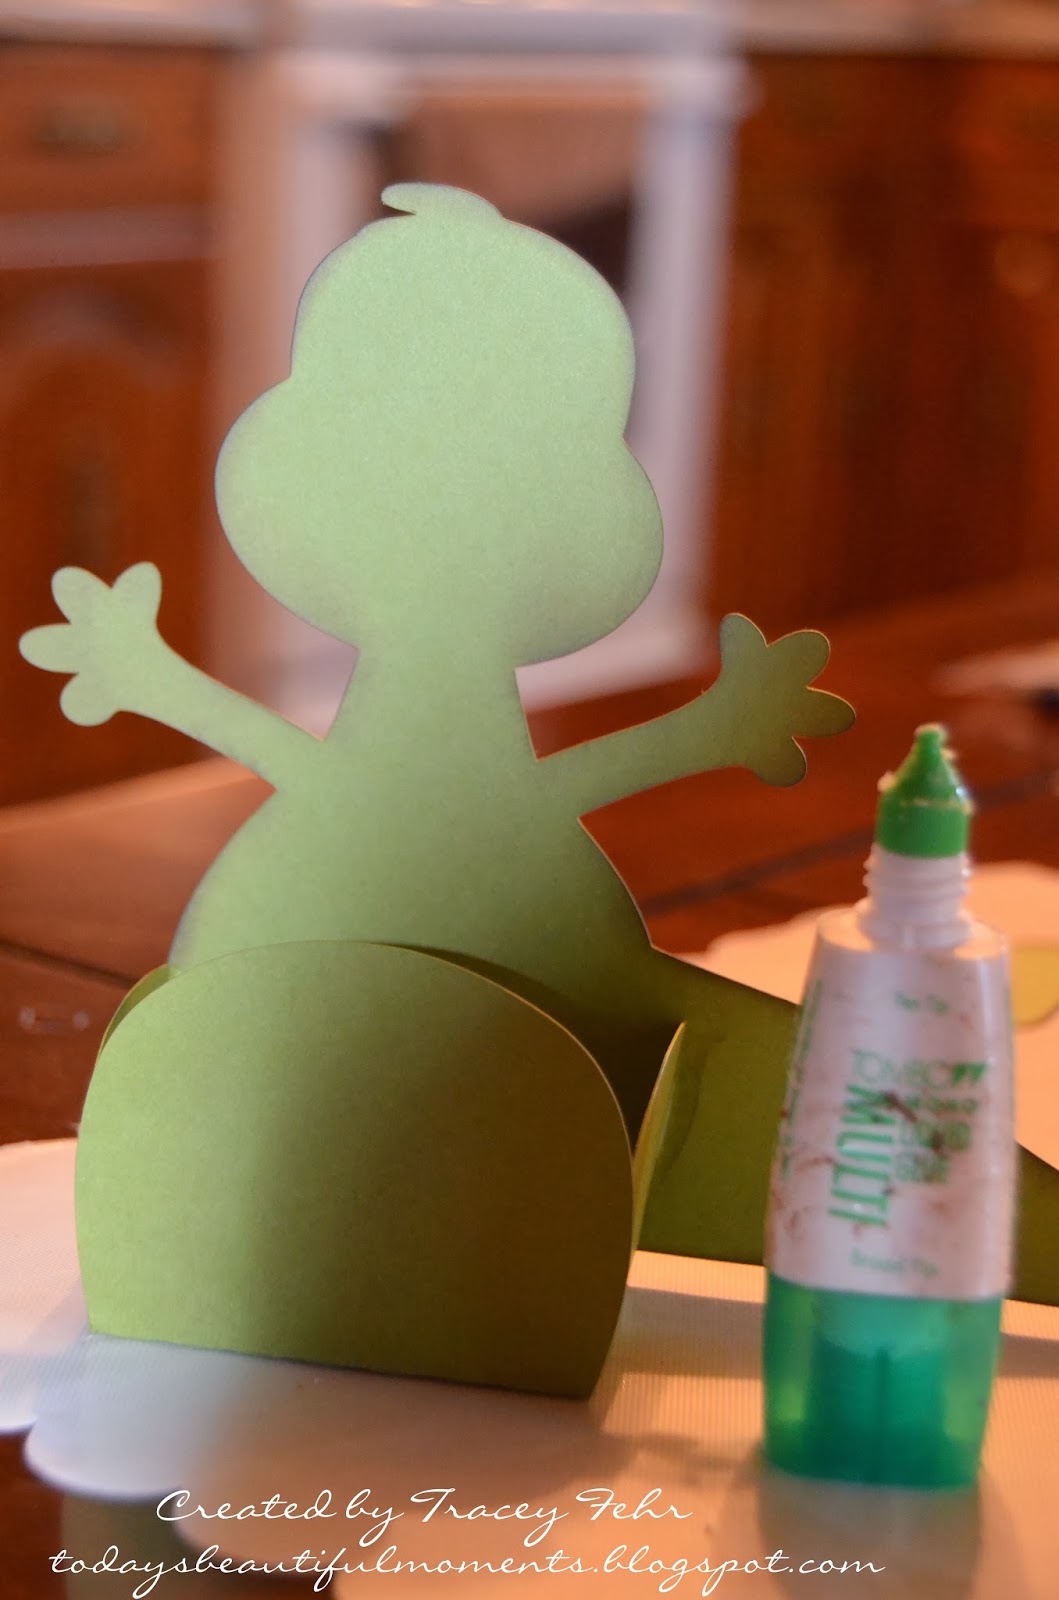
I will confess that I struggled with this one and wasn't sure which direction to go in.  It had been on my mind that my son needed Valentine's for his class party, and the store was not stocking anything that I felt was worthy of giving.  So, to get some inspiration I read over the "Ideas for Creations" which you can find on the tabs on the Unstampabelles challenge blog.  Well, the word "box" just jumped out at me.  I had a cutting file for my Silhouette from My Scrap Chick that I had been wanting to use which was a box treat card all in one! Now cutting with that machine can sure get messy with all the tiny pieces, and all the pieces need to be inked, glued, etc...but my version of "dirty" may be a little cleaner than others...I hope this works for you! 

Let me walk you through this "messy/dirty" process with a few pics...

As you can see, it all starts out in little pieces in a somewhat organized mess...


The next step is to ink each piece individually...my fingers never stay clean in this process...


...and neither does my Splat Mat...


...and the glue...what can I say about this glue other than I despise it!  This glue is so sticky, my fingers are a complete mess by the time I'm done.  As you can see the glue bottle itself is is a complete mess...just from me handling it with the crazy stuff on my fingers.  And, it's almost impossible to wash off your hands when you're done...it sorta rubs off a while later.  But, I bought it...so I must use it!  LOL


We're getting closer to the finished creation...the shape is taking place...


Just let me get my fingers unstuck...I'll add some features and the remaining parts to this little guy....and...

 ...here's the finished project!


I'm happy to report our son loved this and is excited to be handing these one of a kind Valentine cards out in school at his party!  I guess I better get working because I have 16 more to make!

So, dig out those inks, paints, whatever you think you can make a creative mess with and get creating.  Don't forget to link up with us at the Unstampabelles so we can see your mess.  Remember our only rules are that your project needs to be a paper craft and you are not allowed to use any stamps on your creation.  Don't worry, it's not as hard as it sounds!

Until next time...

This creation has been shared in the following challenges...
Ladybug Crafts..."Be Mine"
Seemacrafts..."Valentine/Love"
A Gem of A Challenge..."All You Need is Love"
My Sheri Crafts..."Valentine - Use a Heart"
Open Minded Crafting Fun Challenges..."Show Some Love"
Delightful Challenges..."Anything but a Card...Love Theme"
Decorate to Celebrate..."Valentine Treat Bag"
Little Red Wagon..."Child's Play"
Challenges 4 Everybody..."Anything Goes"
Robyn's Fetish Challenge Blog..."Valentine Cards"

Love Is In the Details...

A second post today...that doesn't happen often anymore here does it?  LOL
If you are looking for my Crafter's Cafe card, please scroll down.  

Love is in the details...there's so much truth in that saying isn't there!  As crafters we go the extra mile putting lots of love and energy into every creation we make.  You will always find love in all those details.
 If you will recall, this is also the name of the local craft store I teach with. Today I'd like to share with you a few creations I have come up with for them to show case a new product line! 
I was so excited to try out this new product line.  It is made and sold exclusively at Love is in the Details....it's the Lasered Edge Chipboard line.  It includes words, snowflakes, hearts, stars and the line is ever expanding!
Here's a few pics of the hearts and the words I had the pleasure of working with...

Chipboard - Hearts - #C2093
Chipboard - Arrow Hearts - #C2092
Chipboard Words - Love Words - #C2090
And now let's take a look at how I was able to use these awesome chipboard pieces...
In these first two cards, I've used some hearts.  They have been cut so that you are able to layer them as I have done in the second card.  In both of these creations, the hearts have been colored with Inka Gold.  I've created a pinkish hue on the first card by using a reddish ink along with the Inka Gold. 
  
For my next examples, I used several of the chipboard words.  On the first card I've inked the chipboard with a touch of brown.  The "love" in the second card has been inked with the reddish ink and Inka Gold as well. 


I'm so glad these chipboard pieces were released when they were, because I've had a great time creating some Valentine's cards with them.  But, never fear...these words and shapes can be used any time of the year!  If you're interested in any of the chipboard items you see, remember that they are also available for online ordering here as well.
Images have been purchased from TLC Creations.

Until next time...

This card collection has been shared in the following challenges...
Handmade Harbour..."Smile" (sentiments on cherub cards)
Crafting with Dragonflies..."Card Anything Goes"
Divas By Design..."Anything Goes"
Fab'n'Funky Challenges..."Words"
Inklings & Yarn..."Anything Goes"
Paper Pretties..."Anything Goes"
The Paper Shelter Challenge Blog..."Digi and Sentiment"
Ruby's Rainbow..."Use a Doily"
Cuttin and Stampin Challenges..."Anything Goes with Arrow"
Created with Love..."Winged Things"
Simon Says Stamp Monday Challenges..."A is for..."  (Amour)
Victorine Originals..."Valentines/Love"
My Time to Craft..."All About the Love"
Creative Fingers..."Anything Goes"
Jo's Scrap Shack..."It's a Love Thing"
Polkadoodles..."Anything Goes/Girl Talk"
Simply Create Too..."Valentines Day/Use Hearts"

Update:  This card collection has placed in the following challenges...

 Top 3 badge


"New Beginnings"...

So glad you could stop by today!

I want to share some exciting news with you...and it fits into the theme of this post perfectly which is "New Beginnings"...

I have a new beginning with a new design team...are you ready?  I'm one of the newest Belles at the UnstampaBelles!  This challenge blog is so unique...the twist is that you cannot stamp on your card in any form...a stretch for sure.  (A small, computer generated sentiment is allowed).  I'm sure I will be challenged and have to think outside the box as these challenges are really designed to get you to use your imagination in a new way and to encourage you to stretch and grow in your crafting talents!

So, our current challenge at The Unstampabelles is "New Beginnings".  We are offering a wonderful prize package to one lucky winner!   Our sponsor this week is Craft Mad!
The prize includes paper tole sheets, foam pads, paper twist, feathers, 2 x packs of stitching card fronts and envelopes, 3d Sticker sets - weddings and babies.  Many of these things are new items to use i.e feather are very trendy at the moment!
Many thanks to Mandy!
Here's a peek...


  I must admit that I've had Valentine's Day on the brain lately, and got to thinking about "new love".  Remember that first Valentine's Day you spent with your "new love"?  You wanted everything to be perfect!  I knew that I had several new toys in my stash that I wanted to play with and they would fit the Valentine theme perfectly.  I was able to use a new print and cut file (the teddy cupid) for my Silhouette Cameo, as well as two new Memory Box dies...the hanging hearts as well as the "love" script.

I've kept the card quite simple...hopefully you'll like it!

Here it is...


I just love that cute little teddy cupid...and I'm sure he will be delivered to someone special.  That envelope looks like it's just packed full of love.

I hope I've encouraged you to play along with our current challenge at The UnstampaBelles.  Challenge yourself to not use any stamps on your creation this time.   I promise...it's not so bad!  LOL

Until next time...

This card has been shared in the following challenges...
Great Impressions..."Something New"
My Time to Craft..."All About the Love"
Jo's Scrap Shack..."It's a Love Thing"
Simply Create Too..."Valentine's Day"
D.L. Art..."Hearts/Valentines"
Card a Day Blog..."Love is in the Air"
Heck of a Challenge..."New" (I used new cut files and new metal dies)
Oozak..."Love/Anything Goes"

Update:  This card placed in the following challenges...

DT Favourites BADGE
 

Thanks for visiting!

Thanks for visiting!