Showing posts with label SVG Cuts. Show all posts

Santa Pants Gift Bag...

Here comes Santa Claus, Here comes Santa Claus....
Right down Santa Claus Lane...
and he's dressed a little differently this year!

Welcome!
I'm so glad you're here!
I have a treat for you today in my new and updated version of a hip and happening Santa Pants 
gift bag!  LOL
I've used the Festive Holly Collection by Heartfelt Creations along with the Sparkling Poinsettia stamp and die set from several years ago.
Are you ready to see how Santa's new tailor designed his newest pair of pants?


I can't tell you how much fun I had creating these!
I can't decide though if these are Santa's dress pants or his pajama pants!  LOL
I love the foiled paper in the Festive Holly Collection and thought it would make such a fun "material" for the gift bag. I chose to fussy cut from one of the decorative papers in the collection to give the bottom of the pant legs some pizzaz.  The cardinals, along with the holly and berries I thought were perfect for something Father Christmas would wear!

Here's a closer peek at the fussy cut images I've used on the bottoms of the leg wear...

Of course, Santa would be sporting the traditional Christmas flower on his best fancy attire!
I chose to use the Sparkling Poinsettia flower which was released by Heartfelt Creations several years ago.  I never tire of that stamp and die set!  It makes the most beautiful flowers.
I've accented around the poinsettia with the leaves from the Large Sparkling Poinsettia Cling Stamp Set along with some of the holly and berry die cuts from the Festive Holly Collection!
And no North Pole clothing would be finished without a touch of snow to those pretty poinsettias.
The frosting powder created by team member Rajni Chawla is the ideal product to give the poinsettias a hint of snow and a powerful punch of Christmas sparkle!

...here's a closer look at those poinsettias...

 I think it would be so much fun to gift someone something special in a unique gift bag such as this!
What would you put inside?

Well, I hope you've enjoyed my little share for our Heartfelt Creations Wednesday!
There are so many amazing creations up on the Heartfelt Creations blog this week...I do hope you take the time to check them out and leave the designers some love!  We all love hearing what you think of our projects...you keep us inspired to keep creating unique and creative projects!

Until next time...
Project Supplies and Instructions
Festive Holly Paper Collection, HCDP1-280
Festive Holly & Cardinals Cling Stamp Set, HCPC-3791
Holly Berry Jingle Cling Stamp Set, HCPC-3793
Festive Holly & Cardinals Die, HCD1-7145
Holly Berry Jingle Die, HCD1-7147
Sparkling Poinsettia Cling Stamp Set, HCPC-3680
Large Sparkling Poinsettia Cling Stamp Set, HCPC-3679
Sparkling Poinsettia Die, HCD1-766
Large Sparkling Poinsettia Die, HCD1-765
Deluxe Flower Shaping Kit, HCST1-401
Stack and Store Daubers - Pack of 30, HCDA2-450
ColorBox Fluid Chalk Ink Pad - Lime Pastel, 71026
ColorBox Fluid Chalk Ink Pad - Olive Pastel, 71012
ColorBox Fluid Chalk Ink Pad - Creamy Brown, 71036
ColorBox Fluid Chalk Ink Pad - Lipstick Red, 71037
Memento Dye Ink Pad - Cantaloupe, TSMP103
Designer Dries Clear Adhesive, 159723
Metal Tip for Adhesive Bottles, 352854
Zip Dry Paper Glue, 273900
Rajni Chawla's Frosting Powder, PGM15016
Crystal Ultrafine Transparent Glitter, 85-glitter

Other Products: ColorBox Fluid Chalk Ink Pad - Mint, VersaFine Black Ink, gold flower centers, Gemini die cutting machine, Silhouette Cameo Electronic Die Cutting Machine, SVG Cuts Santa Pants cutting file, Memento Dye Ink Pads - gold and silver, vintage style silver brads, silver card stock, black card stock, paper trimmer, heat tool, white card stock, scissors

Instructions: Choose patterned papers you wish to use for Santa Pants gift bag. Using Silhouette Cameo and SVG cutting file, cut all pieces for pants gift bag. Assemble using a strong glue following video instructions that accompany purchase of SVG cutting file. Fussy cut a larger cardinals among holly image from within the paper collection and adhere to legs of gift bag as shown. Stamp two inkings of the smaller sized Sparkling Poinsettia cling stamp set onto white card stock using a black permanent ink. Cut using coordinating die, color using sponge daubers and then shape using flower shaping tool kit. Assemble one larger sized double poinsettia for flower cluster on leg, along with two smaller single poinsettias and one medium sized double poinsettia for on suspenders. Stamp two inkings of the leaves from the Large Sparkling Poinsettia Cling Stamp, as well as two of the jingle bell illustrations onto white card stock using black ink. Cut using coordinating dies and color using sponge daubers. Adhere jingle bell straps to suspenders. Shape leaves using flower shaping tools. Adhere poinsettias and leaves to Santa Pants gift bag as shown. Stamp several inkings of holly and berry without cardinals from within the Holly & Cardinals Cling Stamp Set. Die cut using coordinating dies, color using sponge daubers and shape slightly.  Add to poinsettia clusters as shown. Adhere flower centers. Using a dries clear glue, adhere frosting powder liberally to flower petals and then heat set using a heat tool. Apply glitter to holly patterned paper at bottom of pants using a dries clear glue.

Dancing With Roses...

Hello and Welcome!
I cannot believe that it is Wednesday once again!

This is the last week of sharing the Classic Rose Collection by Heartfelt Creations!  Next week we begin showcasing the gorgeous Blushing Rose Collection.  If you have not seen the sneak peeks yet, you can find those here.  

I decided to to create a pair of ballet slipper from a cutting file I had purchased from SVG Cuts!  After all...what goes together better than roses and ballet slippers!  LOL

These paper ballet slippers are the perfect size to create adorable ornaments...imagine these on your Christmas tree!  Even trade up the roses for tiny poinsettias....adorable!!!!

Here's a look at how the project turned out...


I love how these turned out!
The soft pink patterned paper in the paper collection was perfect to create the slippers...and the gorgeous purple hued pattern on the double sided sheet makes the insides pretty as well!  
I decided to go with purple roses to match the inside of the ballet shoes.  

Here's a closer look at the roses...


On this project I've added no sparkle or shine.  I thought it was soft and beautiful just the way it was.

Well, that's all for me today...short and sweet!
Be sure to head on over to the Heartfelt Creations blog to see what the rest of the design team have been up to...such a creative bunch!

Until next time...
Project Supplies and Instructions
Classic Rose Paper Collection, HCDP1-270
Classic Rose Cling Stamp Set, HCPC-3752
Classic Rose Vines Cling Stamp Set, HCPC-3753
Classic Rose Die, HCD1-7110
Classic Rose Vines Die, HCD1-7111
Deluxe Flower Shaping Kit, HCST1-401
Memento Dye Ink Pad-Bamboo Leaves, TSMP707
Memento Dye Ink Pad-Olive Grove, TSMP708
Memento Dye Ink Pad-Elderberry, TSMP507
Memento Dye Ink Pad-Sweet Plum, TSMP506
Designer Dries Clear Adhesive, 159723
Metal Tips for Adhesive Bottle, 352854
Zip Dry Paper Glue, 273900

Other Products Used: BigShot die cutting machine, Silhouette Cameo Electronic die cutting machine, SVG Cuts Claras Christmas Eve SVG Cutting Files, sponge daubers, white card stock, lavender seam binding

Watch this video to learn how to create dimensional roses with the Classic Rose Collection.

Using the Classic Rose Paper Collection and SVG files, cut out all pieces for ballet slippers using electronic die cutting machine.  Assemble using a strong paper glue.  Adhere seam binding to slippers as shown, allowing enough extra ribbon to tie a bow.  Stamp several inkings of the midsized rose petals, as well as the smallest rose petals from the Classic Rose Collection onto white card stock using a dark purple ink.  Apply lighter purple color to petals using sponge dauber.  Die cut using coordinating dies, and then add a darker purple color to each of the edges of each petal.  Shape petals and assemble two medium sized roses and one smaller rose. Stamp two inkings of the leaves from the Classic Rose Cling Stamp Set onto white card stock using a dark green ink.  Apply a lighter green color to leaves and then die cut using coordinating die.  Apply a dark green ink to the edges of all the leaves using a sponge dauber. Shape and then adhere to toes of ballet slippers.  Adhere roses atop of greenery.  Stamp and color the foliage cling stamp set image from the Rose Vines Cling Stamp Set using the same technique you used for the other greenery.  Shape, and then trim apart to fill in areas needing some extra filling around roses. 

It's Beach Time...

The temperatures have finally started warming up, the days are getting longer and I know pretty soon that hot summer sun will let us know it's beach time...and the one thing you can never forget at home is your
 jam packed full beach tote! 
Am I right?
It houses the towels, the sunscreen, the bug spray and of course if you have kids the ever important snacks, water supply and the masses of beach toys!
 We haven't had a trip to the beach lately as we've been experiencing days and days of rain here right now...but that didn't stop me from thinking about the beach when creating my newest creation for Heartfelt Creations featuring their spectacular Under the Sea Collection. 

I hadn't been sure about what type of altered art project I'd been wanting to create with this super fun collection until I spotted the designer paper that boasted nothing but the lovely hibiscus flowers.  
It reminded me of a beach tote!
So online I went and SVG Cuts did not let me down....I found a wonderful beach tote cutting file.

Here's how it turned out...


I just loved the tassel included in the cutting file...and there were other embellishments in the files to create some simple charm dangles...but I opted to use two of the tags from the paper collection instead.  I loved the look of the fish up there on the corner.  Of course if we're thinking tropical beach we need to include a hibiscus!  No other flower screams beach more!

Here's a closer look at the details...


Of course the pocket on the front of the tote gift bag just begged to have a note card added to it...so I obliged!  I made it super simple by creating just a smaller note card with some quick matting and a partial premade card panel that makes creating so fast and easy!  A fun sentiment stamped from the Under the Sea Collection stamped sideways and voila...it was done in just minutes!

Here's a closer peek...


I wanted to give you a quick visual of what the card will look like tucked into the pocket as well!
(Sorry, I know we're on the verge of calling this a picture heavy post!  LOL)


Well, I hope you feel like you've been able to soak up a little sun here today!
Remember to pop on over to the Heartfelt Creations blog to take a look around at the other projects the rest of the design team have created for your viewing pleasure.  And, if you haven't already seen next months release "The Botanic Orchid", be sure to take a tour of the preview!

Until next time...

Project Supplies and Instructions
HCDP1-266 Under the Sea Paper Collection
HCPC-3740 Heartfelt Wishes Cling Stamp Set
HCPC-3736 Tropical Hibiscus Cling Stamp Set
HCD1-796 Tropical Hibiscus Die
HCST1-401 Deluxe Flower Shaping Kit
TSMP400 Memento Dye Ink Pad - Rose Bud
TSMP707 Memento Dye Ink Pad - Bamboo Leaves
ANC852 Bright Ideas Prills
159723 Designer Dries Clear Adhesive
352854 Metal Tip for Adhesive Bottles
273900 Zip Dry Paper Glue

Other Products Used:  Silhouette Cameo Electronic Die Cutting Machine, SVG Cuts File - Luxury Handbags Beach Tote,  BigShot manual die cutting machine, VersaFine Black Ink, gold cord, scor tape, scissors, paper trimmer, 3"x 4.5" small blank white notecard  and matching envelope, Glitter Ritz Transparent Glitter, white tissue paper, eight blue brads, white card stock, sponge daubers, button

Watch this video https://www.youtube.com/watch?v=84Re1-gaq1o for shaping tips and techniques on the hibiscus flowers.

Choose the patterned papers you wish to use for the various pieces of the beach tote SVG files.  Cut with electronic die cutting machine and assemble according to instructions included with file.  Before adhering the front pocket to the tote, ink all edges with a light bown ink, then adhere as shown.  Locate the full page in the paper collection with the "Remembering Beautiful Moments with You" image along with the swirling hibiscus image on the top of the page.  Fussy cut sentiment image as well as image on upper corner, ink all edges on both pieces using a light brown colored ink.  Adhere to tote as shown.  Cut two small tags from the paper collection and adhere to handle along with tassel.  Using black ink and white card stock stamp one inking of the hibiscus flower.  Color, die cut, shape and assemble a double blossom using a large flower and a smaller flower.  Add prills to center and adhere to beach tote as shown.  Choose a small premade card panel, along with a paper to use as a mat and cut down to fit small sized note card.  Ink all edges with a light brown color, stamp sentiment onto card front using black ink, assemble and adhere to card base.  Add a touch of glitter to card front as well as tags on tote.  Adhere button to tote pocket. 

C'mon in to Mushroom Manor...

Welcome to new release day with Heartfelt Creations!
Allow us to introduce to you the "Winking Frog" Collection!
It's sooooo cute!
I really need to put you on high alert as I think this collection will sell out quickly!
Be sure to visit the Heartfelt Creations online store to snatch yours up early!

Anyhoo...here's a little more about the Winking Frogs...

Don your rubber boots, grab your field glasses and come along as we set out to explore picturesque marshes filled with dazzling water florals, glistening dragonflies, miniature forests of cattails and flourishing crops of toadstools! Walk softly and  be aware of your surroundings at all times as the delightful gems we seek are not always easily seen and blend in with their surroundings perfectly.  Pause and listen carefully as the only clues we have to follow, leading us to our destination are the soft and throaty croaks filling the cool evening air.  Follow the quick flickering of the lightning bugs as dusk begins to fall, being careful to not be seen in their shadows.  Now...grab your field glasses...we've discovered the habitat we've been so curious about! Through your field glasses you see them...you have a front row seat to witness their fun and frolic, entertaining antics and flirtatious ways, and can only hope to eventually be invited in to make their acquaintances and join in the laughter and merriment!  Come along side Heartfelt Creations as we discover and reveal the amusing and spirited "Winking Frog" Collection.  Vintage inspired illustrations will bring back memories of classic childhood story books, quick witted sentiments will add a touch of fun, and the serene and calming color palette of the collection is sure to speak to the heart of everyone who ventures here.  The invitation has been sent to join in on the high jinks, so now it's your turn to dive in...try your hand at creating beautiful water florals, hop from lily pad to lily pad on handsome decorative paper, play hide and seek with glorious die cuts and with the little polliwogs among the weeds and cattails....now aren't you glad you listened and wore your rubber boots!

The first thing I thought of when I saw this collection were old fashioned children's books, wedding announcements and a fun toadstool gift box!  It's the latter that I decided to go with to premiere this adorable collection!

Here's a peek...


I wanted this gift box to be something extra special....lots of sparkle, so it looked like something magical out of a fairy tale.  I actually envisioned this as a fun engagement ring presentation.  Imagine receiving your ring from your prince in this fairy tale container!  LOL  Those two wide eyed frogs in love sitting under their own toadstool being "croaked" to by the fiddle'n frog in the front yard of their mushroom manor!  LOL

Here's a closer look...


...and of course one has to include water lilies and lily pads to this swamp style creation...all with a visiting dragon fly...


...and as these close up photos show you, I was completely serious about having this gift box sparkle...

I do hope you've enjoyed my share today!
I hope you've been completely inspired to create a magical fairy tale creation yourself with the new Winking Frog Collection!  Wouldn't it be completely adorable paired up with the owls of Sugar Hollow?  LOL

The rest of the design team has come up with some magical creations of their own!  So be sure to check out the Heartfelt Creations blog to continue your hunt for the Winking Frogs!

Until next time...

Project Supplies and Instructions
HCDP1-264  Winking Frogs Paper Collection
HCPC-3725  Water Lily Cling Stamp Set
HCPC-3726  Fiddle'n Frog Cling Stamp Set
HCPC-3730  Froggy Hangout Cling Stamp Set
HCD1-790  Water Lily Die
HCD1-792  Leaping Frogs Die
HCD1-779  Regal Borders and Pockets Die
HCST1-401  Deluxe Flower Shaping Kit

Other Products Used:  Silhouette Cameo electronic die cutting machine, BigShot manual die cutting machine, SVG Cuts Cotton Tail Village file, decorative moss, Ranger Distress Markers - Peeled Paint, Forest Moss, Shabby Shutters, Bundled Sage, Pumice Stone, Mermaid Lagoon, Vintage Photo, Tea Dye, Wild Honey, and Spun Sugar, Crystal Stickles, VersaColor Pine Cone Ink, VersaFine Black Ink,  Zip Dry Glue, scissors, paper trimmer, red card stock, pop dots, white card stock, teal card stock,  spray bottle, water

Choose the papers you wish to use for the various pieces of the toadstool gift box and cut using electronic die cutter and downloaded svg files.   Ink all edges of all pieces using a brown colored ink and assemble gift box according to instructions with cutting files.  Trim sentiment strip (shown on bottom of box) and mushroom decorative strip (shown on lid of box) from the paper collection, ink all edges and adhere to gift box.  Cut several decorative die cuts from the Regal Borders and Pockets Die using red cardstock and adhere to lid of gift box from the underside to create a decorative border.  Fussy cut the frog couple image from the paper pack, ink with brown ink and adhere to box using pop dots.  Stamp Fiddle'n Frog, dragon fly, water lilies and lily pads onto white card stock using black ink.  Color and cut using coordinating dies.  Using a small spritz of water and the deluxe flower shaping tools, shape one double lily and two lily pads.  Adhere to top of gift box.  Shape dragon fly gently and adhere to top of toadstool.  Adhere frog to side of gift box, as well as a small amount of decorative moss where desired. Cut out some dots for dimensional pieces on top of mushroom using electronic die cutting machine, files and teal card stock.  Adhere to mushroom top with pop dots.  Apply stickles everywhere on gift box to create a magical storybook inspired gift box.

Altered Paper Art featuring the Mabel's Diary Collection...

Wow!  A second post today...that never happens anymore!  LOL
I hope you don't mind!

I'm back to share with you another creation I made using the stunning Mabel's Diary Collection by Ephemera's Vintage Garden!  (This set is on sale for just a few more days, so don't let it slip through your fingers at the discounted pricing!)

I love to create 3D altered art projects using SVG files and my Silhouette Cameo.  I had purchased one awhile back that I had been wanting to play with and finally decided that I would create it using the papers from the Mabel's Diary Collection!  You may have seen a sneak peek of the pieces on Facebook or Instagram if you follow me a few weeks ago!  Well, it's been done and sitting here just waiting to be photographed...but as you know life sometimes gets in the way!  LOL

I decided to create the Dress Form by SVG Cuts! 
I just love their cutting files!

Here's how it came out...


I've used only paper printed from the Mabel's Diary Collection for this project, including the single rose on the shoulder.  I've stamped the rose image and die cut it using the Open Vintage Floret stamp and die by Heartfelt Creations.  

Here's a closer look...


I love how this project turned out, and I will be setting it up as decor in my craft room which was recently redone!

When working with the gorgeous printables by Ephemera's Vintage Garden, I encourage you to think outside the box and use the papers and little bits and bobs to create more than just a journal.  Remember that your scraps will make wonderful pieces to add to your premade planners, the print outs are wonderful for card sets, pocket letters and even stickers and stationery!  (If you haven't seen my previous posts featuring the stationery and stickers, please see here!  Also, I've created a vintage Valentine themed pocket letter using this collection that you can see here!)
The possibilities are endless!

I hope I've been of some inspiration today and that you will now have a multitude of crafty ideas swirling in your head for these printables!  I'd love to hear what you think of the projects, so please feel free to leave a comment!

Until next time...

Thinking about Easter...

Hello Everyone!
I'm so glad you've taken the time to pop by today!
Feel free to linger awhile, relax and enjoy this week's Heartfelt Creations inspiration!

As I schedule this blog post, I'm headed into a crazy busy week!
We have an ice fishing trip planned for Monday, I spend a day in Winnipeg teaching classes on Tuesday,
my dad has hip replacement surgery on Thursday, and both kids have field trips scheduled during this time and the oldest also has a youth retreat on the weekend!  Think I'm gonna take this one day at a time, and one laundry load at a time!  LOL

If you haven't started thinking Easter as of yet, you may want to give it a thought as it comes a little earlier this year....it's coming in March!  When I first saw the initial reveal of the Sunrise Lily Collection, my thoughts immediately turned to spring and the Easter season!  

For today's project I decided to do an egg shaped Easter gift box...or even a centerpiece if you would desire!

Here's how the project turned out...

  
...and a little bit more of a close up...


...and one last quick peek at the floral cluster on top of the packaging...


What could be more spring like than lilies and butterflies?

Well, that's all for me today...so sorry to have hurried you through!
I sure hope you take time to visit the Heartfelt Creations blog to take in all of the other fantastic projects the rest of the design team have come up with!
I promise you won't be disappointed!

Until next time...

Project Supplies and Instructions
HCDP1-263  Sunrise Lily Paper Collection
HCPC-3720   Sunrise Lily Cling Stamp Set
HCPC-3722  Sunrise Lily Swirls Cling Stamp Set
HCD1-787  Sunrise Lily Die
HCD1-788  Sunrise Lily Swirls Die
HCPC-3650  Butterfly Medley Cling Stamp Set
HCD1-759  Butterfly Medley Die
HCST1-401  Deluxe Flower Shaping Kit
159723  Art Institute Glue - Dries Clean
352854  Metal Glue Tip - Art Institute
TSMP808  Memento Dye Ink Pad - Espresso Truffle
TSMP804  Memento Dye Ink Pad - Desert Sand
TSMP704  Memento Dye Ink Pad - New Sprout
TSMP602  Memento Dye Ink Pad - Teal Zeal
TSMP103  Memento Dye Ink Pad - Cantaloupe

Other Products Used:  white card stock, Stampin Up ink - Cameo Coral, VersaColor Pine Cone ink, Stickles - Rose Gold & Crystal, ribbon, Zutter Bow It All, scor tape, SVG Cuts Poplar Street Tulips SVG Cutting File, Silhouette Cameo electronic die cutting machine, BigShot manual die cutting machine, paper trimmer, scissors

For full instructions on how to shape the Sunrise Lily, please see this video.

Using electronic die cutting machine, cut out egg base using white card stock.  Assemble according to cutting file instructions.  Choose patterned paper from in the Sunrise Lily collection for decorative egg panels, and cut using electronic cutting machine.  Ink all edges using a brown colored ink.  Adhere to egg box top and bottom pieces.  Stamp 4-5 varying images of the lily sprays from the Sunrise Lily Swirls Cling Stamp Set onto white card stock using Espresso Truffle ink.  Color, die cut using coordinating dies, shape and adhere images to top of egg until the entire area around the top of the egg has been covered. Once again using Espresso Truffle ink and white card stock, stamp two of the lily flower images.  Color, die cut and shape two large flowers and two small flowers. Adhere to top of packaging as shown.  Shape leaves and add to floral cluster as desired.  Stamp the butterfly images from the Butterfly Medley Cling Stamp Set onto white card stock using a light brown ink, and die cut using coordinating die. Shape slightly, and adhere to packaging. Adhere ribbon and bow to bottom of gift box.  Using your finger tip, apply a liberal amount of Crystal Stickles to butterflies, and a small amount of Rose Gold Stickles to each petal of the lilies.       

December Release with Heartfelt Creations...

Hello!
How are your Christmas preparations coming along?
I have finally started some holiday baking and there are a few wrapped gifts under the tree...and only a few more to purchase!  The lack of snow and unseasonably high temperatures have made it a little hard to get into the Christmas frame of mind this year.  I never thought I'd say it, but I'd take a little sprinkling of snow right about now!  LOL

For those of you who have already seen the sneak peek up on the Heartfelt Creations blog, you know that the new collection is none other than the "Coffee Talk" Collection.  The color palette and illustrations are amazing.

Here's a little about the collection...

It's the beverage that starts our mornings, chases our mid day slumps away, and in the evenings has us gather around the table to enjoy and partake in laughter and light hearted banter, to share treasured memories and deepest dreams and to encourage one another in meaningful friendships...and now we invite you to our table to warm your hands, hearts and souls with the fresh brewed designs of the Coffee Talk Collection by Heartfelt Creations!  Capture and relive those precious moments spent around the kitchen table, or favorite cafe with family and friends shared over the simple pleasure of a cup of  coffee, latte, or cappuccino.  The charming and delightful illustrations of coffee mugs, barista style chalkboard  sentiments and gorgeous patterns in variations of blues, creams and mochas are the perfect blend to get your creative senses percolating, and will allow you to espresso your style perfectly!  The delectable card fronts and dreamy patterned scrapbook pages are splendid for sending well wishes or for displaying those fun and silly selfies taken in the back corner of your favorite coffee shop with your inner circle of friends!  Whether you enjoy your cuppa java black, with cream, milk or sugar, instant or made from freshly ground coffee beans, the Coffee Talk Collection will provide you with the perfect fusion of flavors for all of your paper crafting concoctions.       

I decided that I wanted to create a coffee themed gift box and came across the perfect SVG cutting file at SVG Cuts.  It holds one package of coffee beautifully!

Here's how the project turned out...


I created a folded gift tag in the shape of a coffee cup using one of the stamps and dies from the collection. (A video tutorial is available on how to create a shaped card or tag, and I've put that link into the instructions below.)  I've colored it using distress markers and then hung the tag from the handle using gold cord which I've looped around the box lid several times.  The stacked tea cup image I have fussy cut from the paper collection and added it to the front of the gift box.  Not a hard project at all...but it sure does make a nice presentation!

The design team has really outdone themselves this week again, so be sure to stop by the HC blog for more of a caffeine fix.  The ideas they've brewed up are amazing!
Also, I suspect that this collection is going to be very popular already having seen the comments and delight from the sneak peek last week....so be sure to stop by the HC online store and pick up your "I Want It All Kit" before they disappear!  

Until next time...

Project Supplies & Instructions
Coffee Talk Designer Paper Collection
HCPC-3709  Coffee Talk Cling Stamp Set
HCD1-782  Coffee Talk Craft Dies
SMP001  Stamp Mat Pad
TSMP808  Memento Dye Ink - Espresso Truffle
159723  Art Institute Glue - Dries Clear
352854  Metal Glue Tip - Art Institute

Other Products Used:  BigShot manual die cutting machine, Silhouette Cameo electronic die cutting machine, SVG Cuts File - Santa's Surprises, gold cord, brown ribbon, acetate sheet, Ranger Distress Ink - Antique Linen, sponge daubers, Zutter Bow It All, Distress Markers - Faded Jeans, Walnut Stain & Vintage Photo, hot glue gun, scissors, paper trimmer, white card stock

For full instructions on how to create a shaped coffee cup shaped card/tag, please see video.

Project Instructions:   Begin by choosing the papers from the paper collection that you would like to use for the various pieces of the cutting files.  Cut using your electronic die cutting machine.  Assemble gift box as per instructions that accompany cutting file.  Ink all edges of the gift box using a dark brown ink.  Locate the large stacked coffee cup image in the paper collection, and fussy cut.  Ink all edges with a dark brown ink, and adhere to gift box as shown.  Using a hot glue gun, adhere ribbon and bow to box lid as shown.  Using a piece of folded white card stock and a manual die cutting machine, create a coffee cup shaped tag.  (For full instructions on how to create a shaped card/tag please see video link above.)  Color coffee cup details using distress markers and then lightly sponge a cream colored ink over several areas on the cup itself.  Loop gold cording around gift box lid several times and then through coffee cup tag handle.  Tie cording so tag is visible on front of gift box. 

Box It Up

Good Morning, Afternoon or Evening depending where you are!

Today starts a new challenge over at Unstampabelles.
This month we are challenging you to ...

"Box It Up"

with the twist of doing a tutorial and showing us how you made it. 
Feel free to use pictures or video!
I just can't wait to see what you come up with!

We are sponsored this month by...


Be sure to check out the Unstampabelles blog for the prize being offered!
I needed to make a baby gift package the other day and I thought this would be the perfect challenge to do it with...I needed a box anyway!

I started browsing through my SVG cutting files and found the "Big Boutique Boxes" kit from SVG Cuts!  I love their cutting files!
For the real tutorial on this cutting file be sure to check out their website in the link above.
I promise that it is much better than the photo tutorial I'm about to show you!  LOL

First I must apologize for the poor quality photos...it was evening and I needed to get them done and the lighting was less than great.

Ready...

The first step was to get the Cameo humming!
I hope no one feels I cheated as I didn't make my box by hand!  LOL

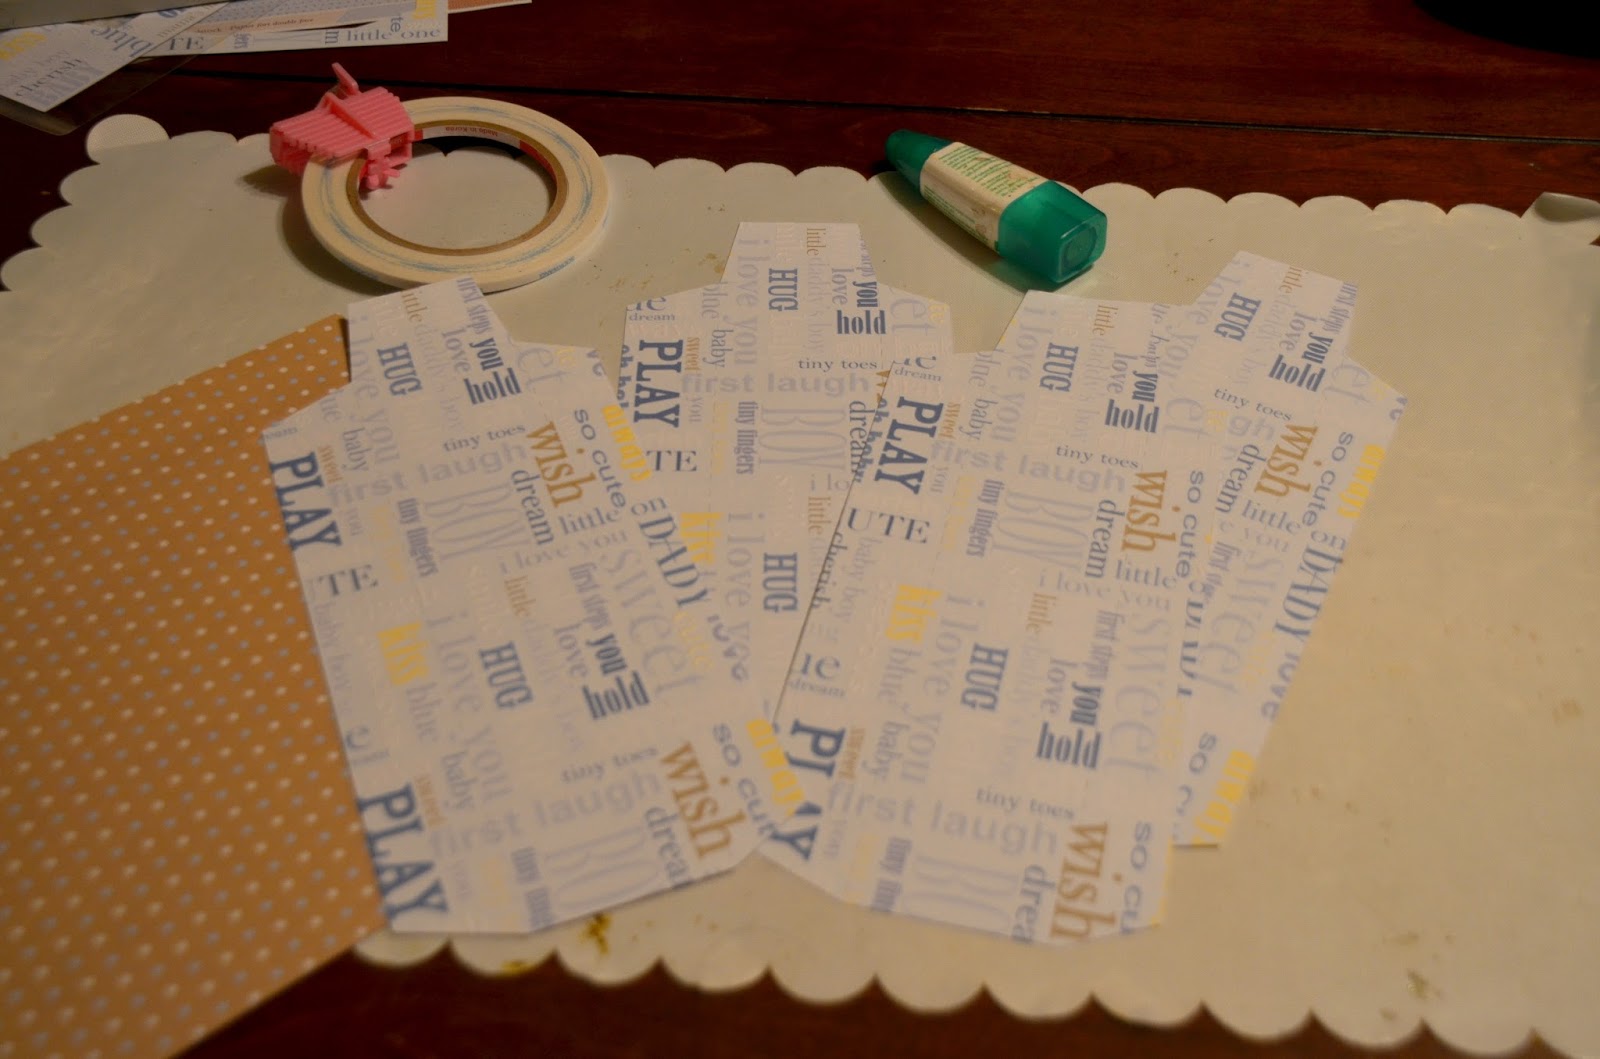
As the pieces were being cut I started setting them aside, separating them into box top pieces and box bottom pieces.  (I'll only show you the assembly of the box top as the bottom is a repeat and I'm sure you'll get it!)


Then it was time to start folding the pieces for the top of the box...


....and then the fun and gluing began...


The box skeleton started taking shape...


...and then came time to add the top panel to the creation...


....here's a shot of the top of the box glued and finished...


...and then the real fun began..
the embellishing!
I had a few baby files from the Silhouette Design Store and decided to created a baby banner as well as a pair of baby booties.  Topped off with some flowers and buttons...I thought it came out pretty cute!

Here's a look at the completed project...


and how about a close up of the embellishing...


I hope you've been inspired to create a box of your own. 
Then be sure to link it up with us at Unstampabelles...just remember NO stamping on the project!
It's really not as hard as it seems!
You only have time until the end of the month...so get working!

Until next time...

This creation has been entered in the following challenges...

Join Me for a Cup of Tea...

Welcome!
I'm so glad you could stop in today!
I'm about bursting at the seams...because I'm finally able to share some very exciting news with you!
So grab you favorite beverage, snuggle up in a big chair and make yourself comfortable...this post is bound to get a little long and hopefully has you doing a happy dance along with me by the time we're finished!

For those of you who have been following along with me for some time, you will remember that I sent in two submissions to the Heartfelt Creations design team call.  You will also recall that I had my dream come true being selected as a semi finalist. (You can read about that here!)   Just making it onto the short list was amazing to me!

Well today is the day!
If you are a follower of the Heartfelt Creations blog, you will know that today the finalists have been announced...and I am so flattered and excited to say that I am lucky and blessed to be among them!
(Insert happy dance here!) 

I have always loved Heartfelt Creations ...the papers, the dies, the beautiful projects that their design team create.  However, the one thing that I admire most about the owners of Heartfelt Creations is their faith.  They are open, never afraid to share about it and even incorporate it into their products.  
I am honored to work with a company who shares so openly about our Lord and Saviour. 
God is good!

Now, you will all remember that I was required to submit two projects as a semi finalist to send directly to Heartfelt.  I've been sitting on posting these creations and am so happy to finally be able to share them with you today.  

I was sent some products from the "Classic Sunflower Collection".  
This collection is absolutely breathtaking!
And, it was just so fitting as I love sunflowers and country/vintage type papers, etc.
When I looked at the collection, I was immediately struck by the idea of cooler autumn days...and along with that cozy sweaters and warm beverages.  With that inspiration, my first creation was born!

Let's have a tea party!
Please join me for a warm and soothing beverage...

 *cutting files purchased from SVG Cuts

How about I take you on a bit of a closer tour!
Let's start with the tea pot...

*cutting files purchased from SVG Cuts

...each of these flowers has been hand colored and hand shaped!
The entire tea pot has been covered with designer paper from the "Classic Sunflower Collection".

Moving along...you can't have tea without a cup and saucer...

*cutting files purchased from SVG Cuts

...and what good would a tea bag be without a specially created matching tag?
Again, all designer papers are from this stunning collection.  Even the tag is included in the paper pack and was just begging to be fussy cut!

And how will we display the tea bags and keep them all collected in one place?
Don't worry, I have you covered with that as well!

*cutting files purchased from SVG Cuts

The image on the tea bag dispenser has been hand stamped and hand colored with one of the stamps included in the "Classic Sunflower Collection".  I've colored it with my Spectrum Noir pencils.

I had so much fun making these projects. 
Here are some detailed instructions for you should you be wanting to try your hand at this beautiful tea setting...

Classic Sunflowers Collection Tea Party Setting

Products Used:

Project Instructions:

Other Products: tan colored cardstock, deep yellow colored cardstock, white cardstock, distress markers (mustard seed, wild honey, vintage photo, tea dye, rusty hinge), watercolor pencils, brown ink, black ink, embossing powder, heat gun, Tombow glue, raffia ribbon, clear acrylic stamp block, BigShot die cutting machine, Silhouette Cameo, Tea Pot 3D SVG cutting file template, cup & saucer 3D SVG cutting file template, tea bag dispenser 3D SVG cutting file template, tea bags, 4 gold colored brads

Instructions: 
Begin with cutting out the base pieces of the tea pot with the tea pot SVG cutting file and your electronic cutting machine using white cardstock.  Build tea pot according to the file directions allowing time for the pieces to dry.  Select the matching patterned paper that you wish to work with from the Classic Sunflowers Paper Collection, and begin cutting the decorative coverings for the altered art project.  Ink all of the edges on each piece with brown ink.  Adhere to 3D tea pot base shape as per file instructions, allowing pieces to dry.  Locate the rooster image panel in the paper collection and fussy cut and adhere to the centre of the tea pot.

Stamp the Classic Sunflower PreCut background set several times on tan, and deep yellow cardstock depending on how embellished you’d like the altered art to be.  While still wet, cover the image with embossing powder.  Remove excess powder and set with the embossing powder on the images with heat gun.  Do this until all images you have stamped are completed.  Next, proceed to coloring with distress markers and shaping flowers.  For an excellent instructional video on how to shape the flowers in this collection, please go here.  Set them aside and allow them to dry. *Please note that you may have to repeat this step several times until you are happy with the flower arrangement on your altered art*

Once flowers are dry and you are ready to design, begin with tying a raffia ribbon around the knob of the tea pot and begin adhering flowers one by one to the lid.  Once you are happy with the design, and have decided the flow of the floral cascade begin working down the tea pot layering flowers of all sizes and repeating the process to create more if necessary. 

Proceed to the second project in the collection which is the tea cup and saucer.  As you did with the tea pot, begin cutting out the base pieces using white cardstock and assemble. Allow time to dry between pieces.  Once again choose the decorative paper you wish to use and begin cutting the decorative covering pieces, ink all edges with brown ink, and adhere them to the 3D base of the altered art piece.  Using flowers that are left over from the tea pot project, choose two and adhere them to the saucer alongside the tea cup.  Take two tea bags and create paper tags for the end of them by fussy cutting two sentiment ticket stub images from the paper collection for each tea bag. Ink all edges with brown ink and proceed to glue them onto the end of the tea bag.

Lastly, move onto creating the tea bag dispenser.  Choose the designer paper you wish to work with and cut out the 3D tea bag dispenser template with you electronic die cutting machine.  Assemble according to the file instructions. Take a piece of matching designer paper and stamp the butterfly and flower image from the Summers Day PreCut set.  Size to the front of the dispenser and then stamp the image onto the paper.  Once the image has dried, proceed to coloring with watercolor pencils and adhere to the front of the dispenser. 

Set up display as a centerpiece, and invite friends and loved ones to a special tea party! 

********
 
Well, I just couldn't stop there and kept on playing with this gorgeous floral collection.  There were so many more elements I wanted to use and explore.  

I decided I just had to create several cards as well.  Card making is my passion after all!
I loved the rooster image I had fussy cut and used on the tea pot, and had also been sent this image in a rubber stamp.  I decided it would be so much fun to color....so I got busy creating a card based on that image as well.

Here's how it turned out!


...and a bit of a closer peek...


Here are the project instructions for this card...

Birthday Blessings Rooster Card

Products Used:

Project Instructions:

Other Products: tan colored cardstock, deep yellow colored cardstock, white cardstock, Ranger distress markers (mustard seed, wild honey, vintage photo, tea dye, rusty hinge), watercolor pencils, brown ink, black ink, embossing powder, heat gun, Tombow glue, double sided tape, 5”x7” pre folded card base, 3D foam dots, raffia ribbon, clear acrylic stamp block, BigShot die cutting machine, chipboard swirls

Instructions: 
Begin with a 5”x7” pre folded card base.  Select a smaller decorator panel from the Sunflower Paper Collection page which could be used as a photo mounting scrapbook background. Mount the rooster stamp on your acrylic stamp block and stamp image onto card panel using black ink.  Allow to dry.  Locate your Classic Sunflower PreCut background stamp and stamp in black ink several times onto tan colored card stock as well as a darker yellow colored card stock covering with embossing powder while still wet.  Heat with heat gun to set embossing powder. (You will need enough images to create a large 3 layered sunflower, a large 2 layered sunflower, a mid sized 2 layer flower and a small 2 layered flower.  Keep the tiny single flowers handy as you will use them for layering as single images later on).

Once all stamped images are dry, you are ready to proceed with cutting and coloring.  Returning to the handstamped rooster image, proceed to coloring with watercolor pencils.  I opted to blend the colors while just coloring with the pencils rather than watercoloring.  Moving along to your Sunflower PreCut set images, using a manual die cutting machine cut the flower images using the Classic Sunflower Die.  Once all elements you are wanting to use have been die cut, proceed to coloring with distress markers.
It is now time to begin shaping you flowers.  For an excellent instructional video on how to shape the flowers in this collection, please go here.  Set them aside and allow them to dry. 

Returning once again to the rooster panel, choose two coordinating papers to use as matting backgrounds.  One to cover the 5”x7” card front, and the second slightly larger than the stamped image panel itself.  Ink all of the edges of the pieces with a brown ink.  Assemble and adhere to front panel of pre folded 5”x7” card.  On the same scrapbook page you cut the blank photo panel from, fussy cut the large corner sunflower image and ink the edges with brown ink as well.  Adhere this cut out piece to a white piece of cardstock.  This will allow the back of the card to look completely finished as it will now match the white cardstock.  Allow to dry, then position on the corner of the card. Once happy with the layout adhere to the card being careful to not put glue on the portions of the fussy cut image that will extend beyond the card. 

Locate the paper embellishments, sentiments, leaves, etc. you wish to use on the card in the paper pad.  Fussy cut them and once again ink all edges with brown ink.  Create your raffia bow and ink your chip board flourishes. Begin working with the flowers to determine positioning.  Glue to card, starting with your larger 3D flowers, being sure to use a strong paper glue. Adhere small one dimensional flowers as needed in areas needing filling.  Adhere corner image (sentiment) and bow now as well.   Curl several of the leaf images you fussy cut so that once glued down they will look like they are curling up from behind flowers.  Determine placement for chip board swirls. Once you’ve determined all of the placements for all of the elements, proceed to securing them down.   Select sentiment strip and adhere to bottom portion of card.  Lastly, adhere the main focal sentiment fussy cut image (ticket stub) with 3D pop up dots. 

Send your special birthday creation to a friend or loved one!

********

 Are you still with me?  LOL
I told you this would be an intense post!
We're just about to the end though...you won't want to miss this last card either...so keep forging ahead!

Here it is...

 
 ...let's have a closer peek...


 Interested in creating something similar?  
Here's the project instructions...


Butterfly Dreams Any Occasion Card

Products Used:

Project Instructions:

Other Products: tan colored cardstock, deep yellow colored cardstock, white cardstock, Ranger distress markers (mustard seed, wild honey, vintage photo, tea dye, rusty hinge, fired brick, dried marigold and spiced marmalade), brown ink, black ink, embossing powder, heat gun, Tombow glue, double sided tape, 5x7 pre folded card base, 3D foam dots, raffia ribbon, clear acrylic stamp block, BigShot die cutting machine, thin gold cording, scissors

Instructions:
Begin with a pre folded 5”x7” card base.  Select a large 5”x7” blank decorator panel from the Sunflower Paper Collection pack.  Select a smaller sunflower and butterfly image panel as well as a piece of designer paper to use as matting behind the sunflower image panel.  Lastly, choose a tag image that you wish to incorporate into the design as well as a sunflower strip and several leaves from a panel that you will fussy cut to use along the bottom of the creation and a sentiment.  Proceed with inking all of the edges of these pieces with a brown ink.  Put pieces aside and move on to stamping the large Classic Sunflower PreCut background.  Cover it with embossing powder, remove excess and then heat with heat gun.  Use distress markers to color flowers.  You will need one midsized double layer flower, two midsized single flowers and 2 small single sunflowers.   Shape flowers.  For an excellent instructional video on how to shape the flowers in this collection, please go here.  Set them aside and allow them to dry.  Shape the leaves you have fussy cut at this time as well.  Take two of the small ladybug images that have been die cut when you die cut the flowers from the background stamp, color them red and set them aside.  Stamp butterfly image twice and set aside to dry. 

Going back to the base card panels, take the sunflower image you have fussy cut and adhere to the bottom of the card background panel as pictured.  Then adhere the background to the 5”x7” card base. Taking the image panel and the matting designer paper which is just slightly larger than the image panel, proceed to adhere them together.  Measure out some thin gold cording by looping it around the image panel you have just matted approximately 4 times.  Tie tag on with cording.  Position the sentiment you have chosen above the sunflower image and adhere to panel.  Adhere the decorator panel to the card front with 3D pop up dots. 

Arrange shaped and dried flowers loosely on the card until you are happy with the arrangement, adding in several leaves you have fussy cut and shaped as well.  Adhere them to the card.  Adhere the two ladybug die cuts tucked in among the flowers and leaves.

Returning to the two stamped butterfly images, color them exactly the same with distress markers.  Attach one on top of the other by gluing only the body of the butterfly, allowing wings to bend up so the butterfly becomes 3D and resembles the insect in flight.  Place in the top corner of the card above the tag with 3D pop up dots as pictured. 

Send to a friend or loved one to enjoy!


 ********
 Well, thanks so much for sticking with me to the end of this post....and a huge thank you to everyone who has supported me in this adventure of a life time.  Your words of encouragement, your votes during the semi finalist announcement...they all mean more to me than you will ever know.  
Be sure to check out the HC blog to see the full list of very talented and creative new design team members.  You are sure to find some wonderful inspiration.  

Until next time...

These creations have been shared in the following challenges...

Thanks for visiting!

Thanks for visiting!