Good Morning, Afternoon, Evening!
I'm so glad that you're able to join me today! It's been awhile since we've met here in blogland hasn't it! I've missed connecting here on the blog, so I thought it might be fun to try to be more consistent here and share some crafty creations with you!
I've been spending some time in the craft room thinking about Christmas! Are you someone who likes to have your holiday cards completed before December...or are you a bit of a procrastinator like me?
Well, the NEW Festive Poinsettia Collection from Heartfelt Creations has finally arrived...and I just couldn't resist making some vellum poinsettias with it!

The sizing on this newest poinsettia is absolutely amazing and will work beautifully for any size card you're wanting to create as there are a great selection of sizes for you to create with! I wanted to keep things quick and EZ, so I've used a piece of the decorative paper from the paper collection to create a background mat and then have used the Courtyard Elegance Die to add some interest and texture to the card!
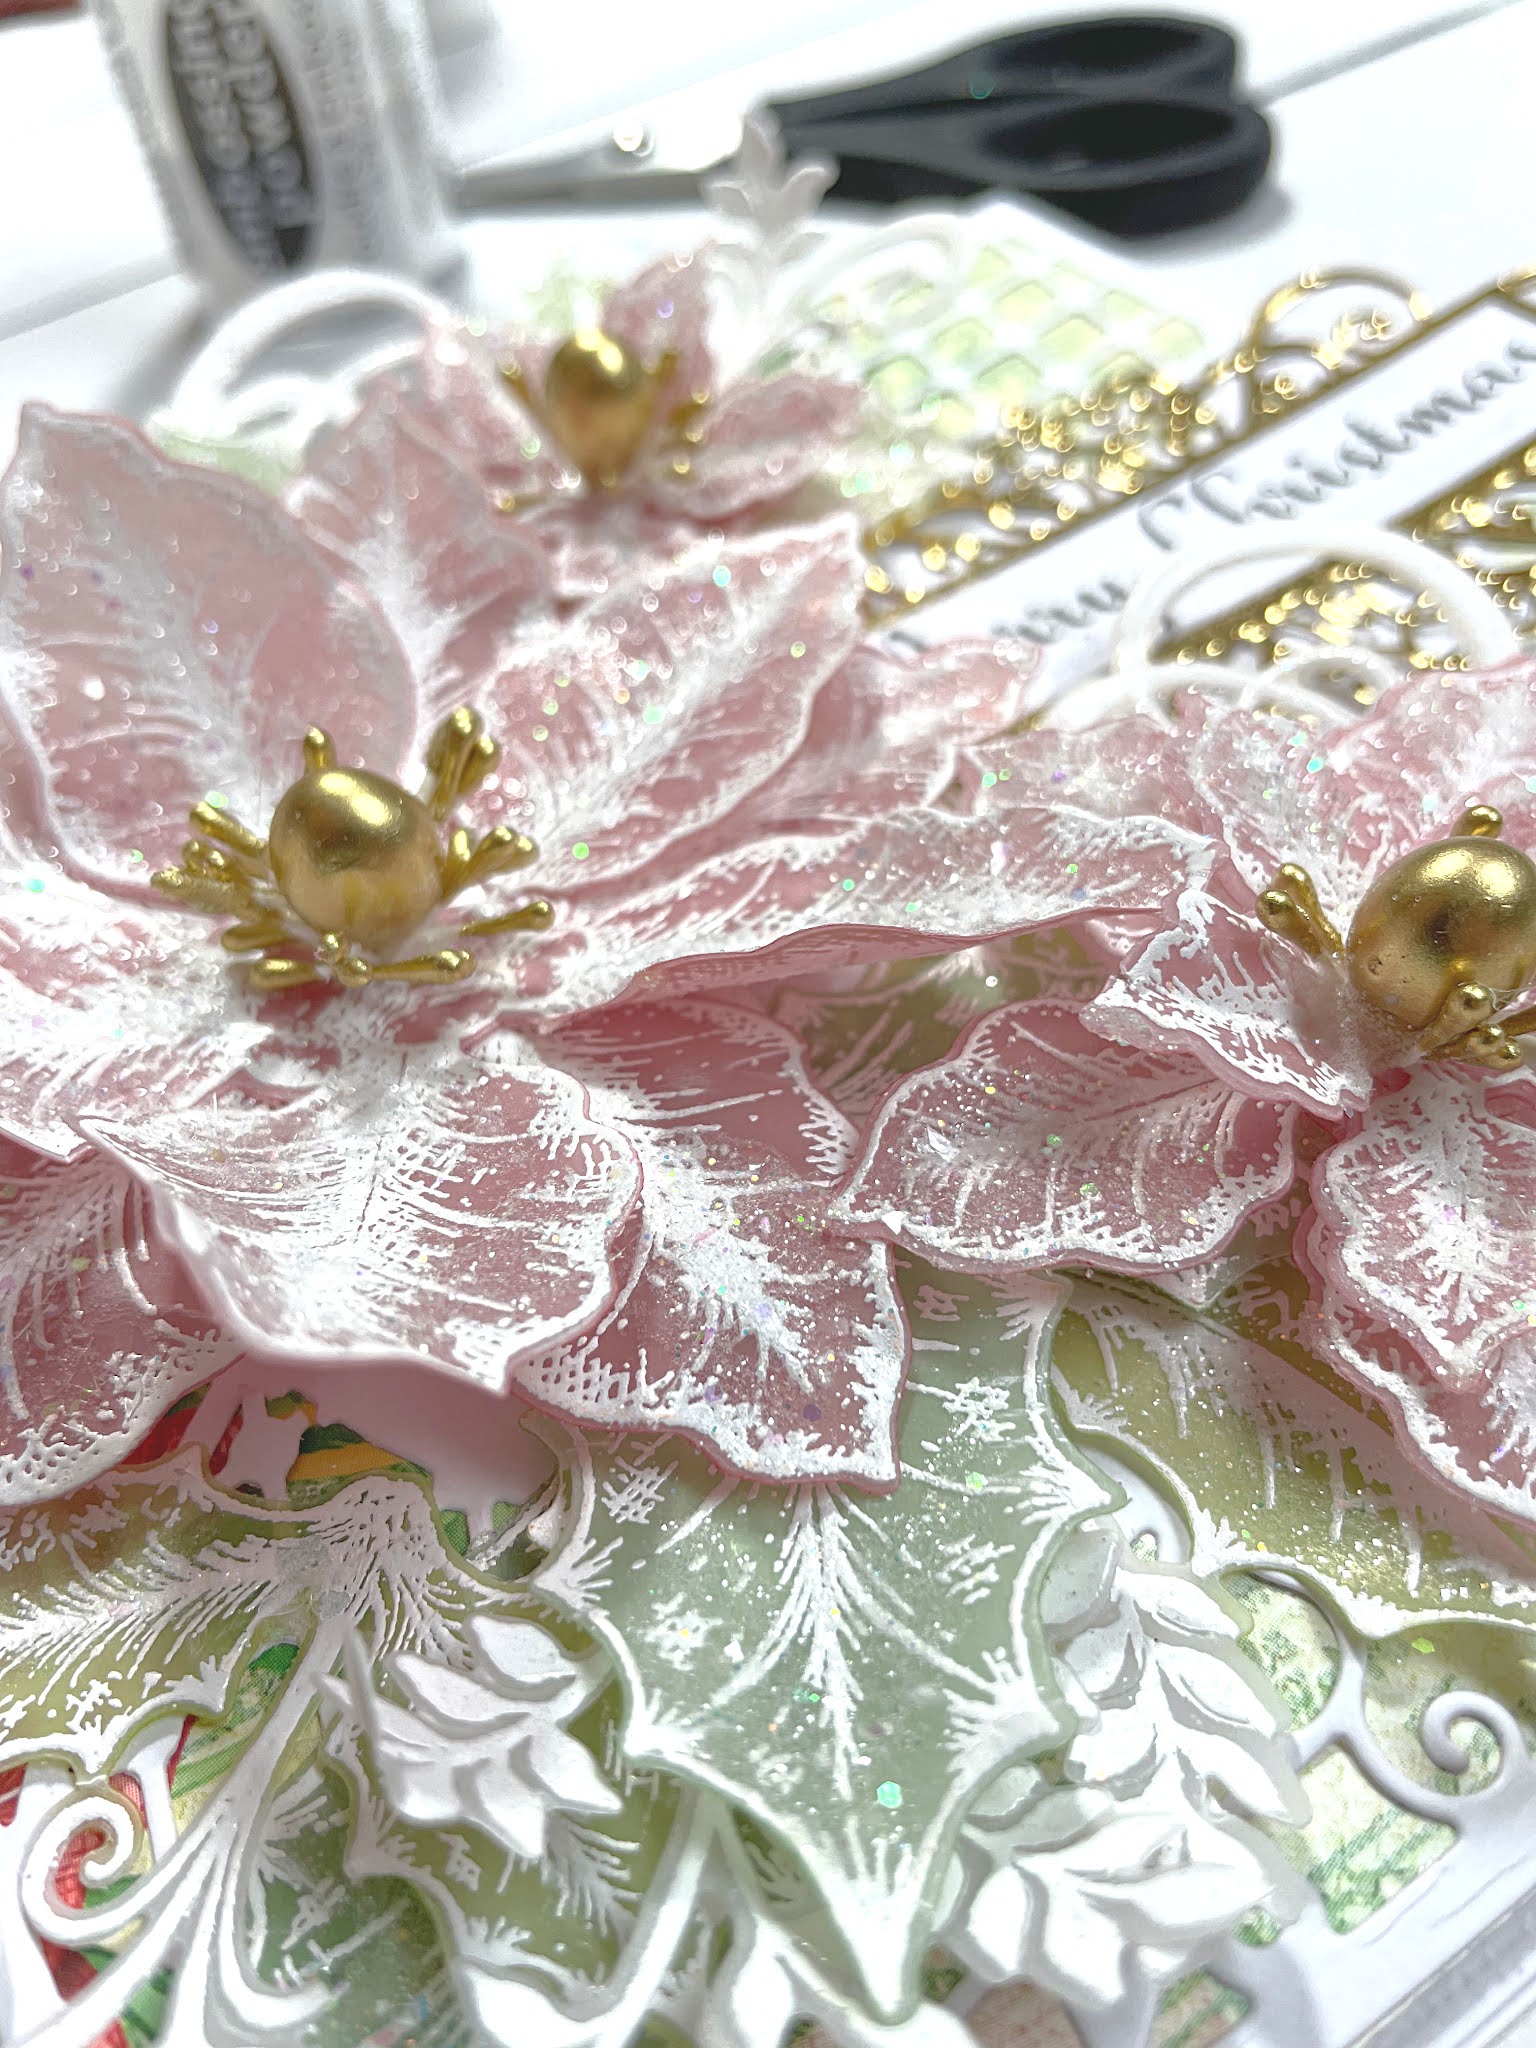
The poinsettias have been created using Rajni Chawla's Flowerite Vellum...a beautiful heavy weight vellum that's perfect for all of your flower shaping needs! I've stamped the images in White VersaColor Ink and have sprinkled it with Stampendous White Embossing Powder and then heat set it with my heat tool! I've colored the flowers from the back using Ranger Archival Ink and have then shaped them using the 3D Festive Poinsettia Shaping Mold!

I've given the flowers an extra hint of glamour by adding some gold colored stamens in several sizes! The gold color stamens will blend in nicely with the Luxe Gold Card Stock I've used for the sentiment die cut backing! You'll notice that the larger Rose Hip Stamens work beautifully in all sizes of the poinsettias that were created for this project, while the smaller pearl stamens add some interest and texture to the flower centers!
The finishing touch and the icing on the cake has to be the gorgeous sparkle from the glitter I used! I opted to sparkle the different poinsettia layers with Rajni Chawla's Crystal Clear! It's an amazing glitter that adds such a wow factor to your flowers. I've simply used a paint brush to apply the Dries Clear Adhesive to the layers in the poinsettia one by one and have sprinkled the glitter on before moving to the next layer!
I love how this card came together...it's so soft when you see it in person! The various die cut elements and swirling accents give it such an airy feel...and it's not the run of the mill holiday card! It will certainly stand out among the rest that stand on the mantle during the holiday season!
If vellum flowers are something that have intimidated you or you have questions about how to create these soft and romantic poinsettias, feel free to catch the replay of the live stream here... where I shared all of my favorite tips and tricks to creating these beauties...from what type of vellum to use, which ink and embossing powder to minimalize flaking, as well as shaping and assembling techniques! It's the perfect recipe for success and beautiful results when working with vellum each and every time!
I'd love to hear what you think about this card as well, so please do feel free to leave a comment below!
Until next time...


