Showing posts with label pocket letter. Show all posts

Vintage Valentine...

Hello Everyone!
Happy Friday!

I'm here to share with you today a design team project I've created showcasing the lovely Mabel's Diary by Ephemera's Vintage Garden.  If you haven't already visited the beautiful digital collections of Debbie-Anne, you are missing out on some gorgeous nostalgic and vintage papers and ephemera!
And, the beauty is that you print them yourself at home!

The beautiful Mabel's Diary is configured to use as a planner, junk journal or diary type project.  
That being said, I'm a little different than many of the design team as I love using these products for a wide variety of other creations....so, it's my job to try to inspire you to branch out a little and try something new with your printables.  

My first project is a Vintage Valentine Pocket Letter.  
I have a friend in Ontario who I love trading pocket letters with...and I thought it would be nice to surprise her with a Valentine themed letter...and as I paged through my Mabel's Diary print outs, I soon found that it had all the elements I was needing.  

Allow me to take you on a little tour of my creation...and I've even included a quick video for you as well...(now don't be too harsh as I haven't done many videos in the past, but hope to become better at it and create more in the future.)

Let's begin...


As you can see, I've done a lot of fussy cutting in this project.  I will be the first to admit that I love fussy cutting...I love to cut and fit pieces together, creating something beautiful!  While you may be saying that this is only a pocket letter and won't have taken much time...I can assure you that  I spent as much time on this piece as I do on a complex and detailed card. 

Each of the cards in the pocket letter have had their edges inked with a VersaColor Pine Cone Ink to give them a further look of being aged.  I've fussy cut elements from within the digital collection and adhered them to various cards within the pocket letter to add interest and detail.  I've cut the image of the lady up in the corner to make sure that she could be assembled in two of the pockets so she would be standing in the background.  I've used the same technique with the birds in the bottom, however the embellishing on the top of the pockets has hidden part of it.  

I decided that I really wanted this pocket letter to have some dimension, so I've used pop dots on every piece you see adhered to the outside.  

Here's a closer look at the top of the letter...(sorry it's not the best photo...the day I took these photos I just didn't have good lighting and for some reason the focus seems off.)


I've fussy cut all of the roses from the Mabel's Diary Collection.  The two roses in the corner I've aged using Distress Inks -  Vintage Photo and Antique Linen...and of course a little Pine Cone Ink.  I've fussy cut the ribbon banners, as well as the sentiment from the collection as well.  The cameo style sticker in the corner is a 3D sticker from a vintage assembly that I found at the Dollar Tree.  

Moving along to the bottom of the pocket letter...


I chose one of the lovely ladies from the printables that looked like she was just waiting for her Valenine beau.  I've aged her with a bit of ink as well and have fussy cut the heart shape beside her from one of the ephemera printables.  

Now, the whole idea of a pocket letter is to correspond with a pen pal and to include a few gifts in the back of the pockets.  I believe that the back of your pocket letter should always be as beautiful as the front.  So, because I neglected to think about printing these pages double sided, I cut a second set of cards and adhered them with a good paper glue to one another.  

The back looks like this...


Here's a peek at some of the gift ideas that I've included in this creation...


...some fussy cut ephemera pieces, some vintage style 3D stickers, a few flowers and pearls as well as some punched flower shapes created from scraps left over after cutting the pocket letter cards...


...a few tabs from the collection, more ephemera pieces, a small rose card also available in the collection...

So much fun to create and fill with goodies!

I've also included a video tour for you on my YouTube channel should you be interested!


I hope you've enjoyed your tour of my first Mabel's Diary project.  There will be more released throughout the next month...so stay tuned!  Also, be sure to stop by the Ephemera's Vintage Garden store where this collection is currently on sale for a limited time!  I'd love to see how you choose to use this collection.  

Until next time...

Home Sweet Home

Welcome!
So glad you're here!

I'm back today with a project for Scrapbooks by Design!
Did you know that they carry a bunch of all the latest and greatest paper collections?
If you've never stopped by their online website...what are you waiting for!

Now, if you've been a follower of my blog for awhile, you will already know that I am a huge fan of all things Graphic 45.  When I saw the "Home Sweet Home" collection I knew that I absolutely needed to do something with it!

So, I decided to do a pocket letter!
If you have not heard of this new trend of pen pal-ing and swapping you really must check it out!  There is a whole website dedicated to it when you can sign up and find people to swap with, and Facebook has pages as well!

Ok, so I'm going to give you a little hint as to why I like buying whole paper collections versus single sheets of random patterned paper....absolutely everything works together and I think that leads to less waste....and not to mention it makes creating a project quick and stress free because you're not sifting through everything to find items that go together.

Such is the case with the paper collection I've chosen to use today!
The "Home Sweet Home" collection has small image cards that can be cut down and used perfectly for a pocket letter. These along with the patterned paper make for some colorful and gorgeous pockets!

So, the first thing you will need is a baseball trading card page.  (I purchase mine at the dollar store)
Each of the nine pockets in the page measures 2 1/2" x 3 1/2".

So the first thing you will do is start trimming the image panels and decorative paper you wish to use!


Now I like to layer some of my pockets.  For instance, I've layered the above image onto some patterned paper as I had to trim it down smaller than the pocket.  I also like to use some scraps to embellish the pocket cards as well....pocket letters are such a great way to use up those little bits and pieces in a collection that would otherwise go to waste!

Here you can see I've chosen my images and patterned papers and have started inserting them into the pockets.  


The other thing I love about purchasing a paper collection is the fact that all of these papers are double sided and will look just as awesome on the back as they do on the front...take a peek!


...and don't worry about those scraps on the side...there is a plan for them yet!

Pocket letters often include small crafty gifts inside of them for the recipient and even tea, garden seeds, etc.   (Wouldn't garden seeds be just perfect to include in this country themed letter?)
I know you're going to get tired of my saying this....but with a coordinating paper collection you can even make your own!

Here's a few I created to enclose in this letter...


The tags pictured here have come from the coordinating chipboard journaling collection as well as the tags and pockets collection.  The vegetable images as well as the other image panels have been cut from one of the patterned papers in the collection and the recipient can use them in their smash book, planner, etc.  Lastly, I've used some of the chipboard pieces to create a topper for a paper clip.  I've also fussy cut two cute shapes from one of the patterned papers and used them to create a paper clip topper as well! 

Ready for a peek at the finished project?


As you can see I've also done a little more embellishing!
I've used some stickers from the coordinating sticker collection to add to the outside of the letter itself.  I've used the alphas on the top pocket, and several sentiments.  I've cut a decorative strip with the chicken images and adhered it to the quilt patterned pocket.  I've also added two decorative strips along the bottom of the top row as well as the top of the bottom row of pockets.  I've included some of the goodies I created in the front and some in the back so there is interest and a surprise on both sides.  All that's left to add is the letter for the recipient!

I promise that you will love making pocket letters and projects with coordinating collections!
Putting a project together quickly has become so easy since I have started purchasing this way!
Scrapbooks by Design has a great selection...whether you like the vintage feel of Graphic 45 or the more fun and bright collections of Doodlebug Designs and Simple Stories!
Be sure to check them out!

I'd love to know what you think about this creation...please don't be shy...feel free to leave me a comment!

Until next time...

"Spring Flowers"

Good Morning, Afternoon or Evening!
I'm so glad to visit with you today!
Today's post is an exciting one as I am guest designing for Crafting by Designs!
I'd like to thank them for having me!

Their challenge for this go round is "Spring Flowers"!
 Don't you just love spring flowers?  The roses, the daffodils, tulips and daisies!
Well I decided to go with a rose theme!

Now if you're a follower of my blog, you know that I have been busy creating some pocket letters lately!  I find these are a wonderful way to use up paper collections and scraps that I haven't touched in awhile!


I made several of these using the Graphic 45 Collection "Botanical Tea".  While they have all been created from the same paper pack, each of the letters itself is different and has taken on a personality of it's own and each has been packed with different gifts.  This one will be/has been sent to New Mexico to a pen pal who loves pink!

Now the rest is up to you!
It's your turn to get yourself immersed in spring flowers and join the challenge over at Crafting by Designs!  You can find all the challenge details and prizes being offered on their blog!

Until next time...

Guest Designing for Crafty Boots

Hello!
  I'm so excited to say that Crafty Boots Challenge blog invited me to guest design for them in their current challenge "Things with Wings".

Now if you've been following me for the last little while, you know that I have jumped onto the Pocket Letter bandwagon....so I decided to do a pocket letter page showcasing some things with wings!

Here is how it turned out...


We've got several birds and some butterflies as well!
I love this page from the Graphic 45 Collection "Botanical Tea".
I decided to just add some pearl corners, some Glitter Ritz to the rose and then let the picture be the beauty that it is.  My little RAK gifts will slip in behind the image on this one...because I just cannot bear to distract from this image!  (Or maybe I'll just keep this one for myself and make it the cover page for my binder!  LOL)

I do hope you'll head on over to the Crafty Boots Challenge blog for a peek at what the other guest designers have created for the mid posting of the current challenge.  Maybe you'll even be inspired to create something to enter as well...there's still a little time left!  You may be their next guest designer!

Until next time...

This creation has been shared in the following challenges...
All Crafts Challenge..."Anything But a Card"
Crafting from the Heart..."Anything Goes"
Not Just Cards Challenges..."Anything Goes"
Whoopsi Daisy Challenges..."Things with Wings"
613 Avenue Create..."Anything Goes with optional twist of Feminine"

Pocket Letter Craze

Hi Everyone!
Thanks for stopping by today!
It's Wednesday, which means I'm here to share with you another Heartfelt Creations project!
I have a quick question for you...have you jumped on the band wagon with the pocket letter craze?
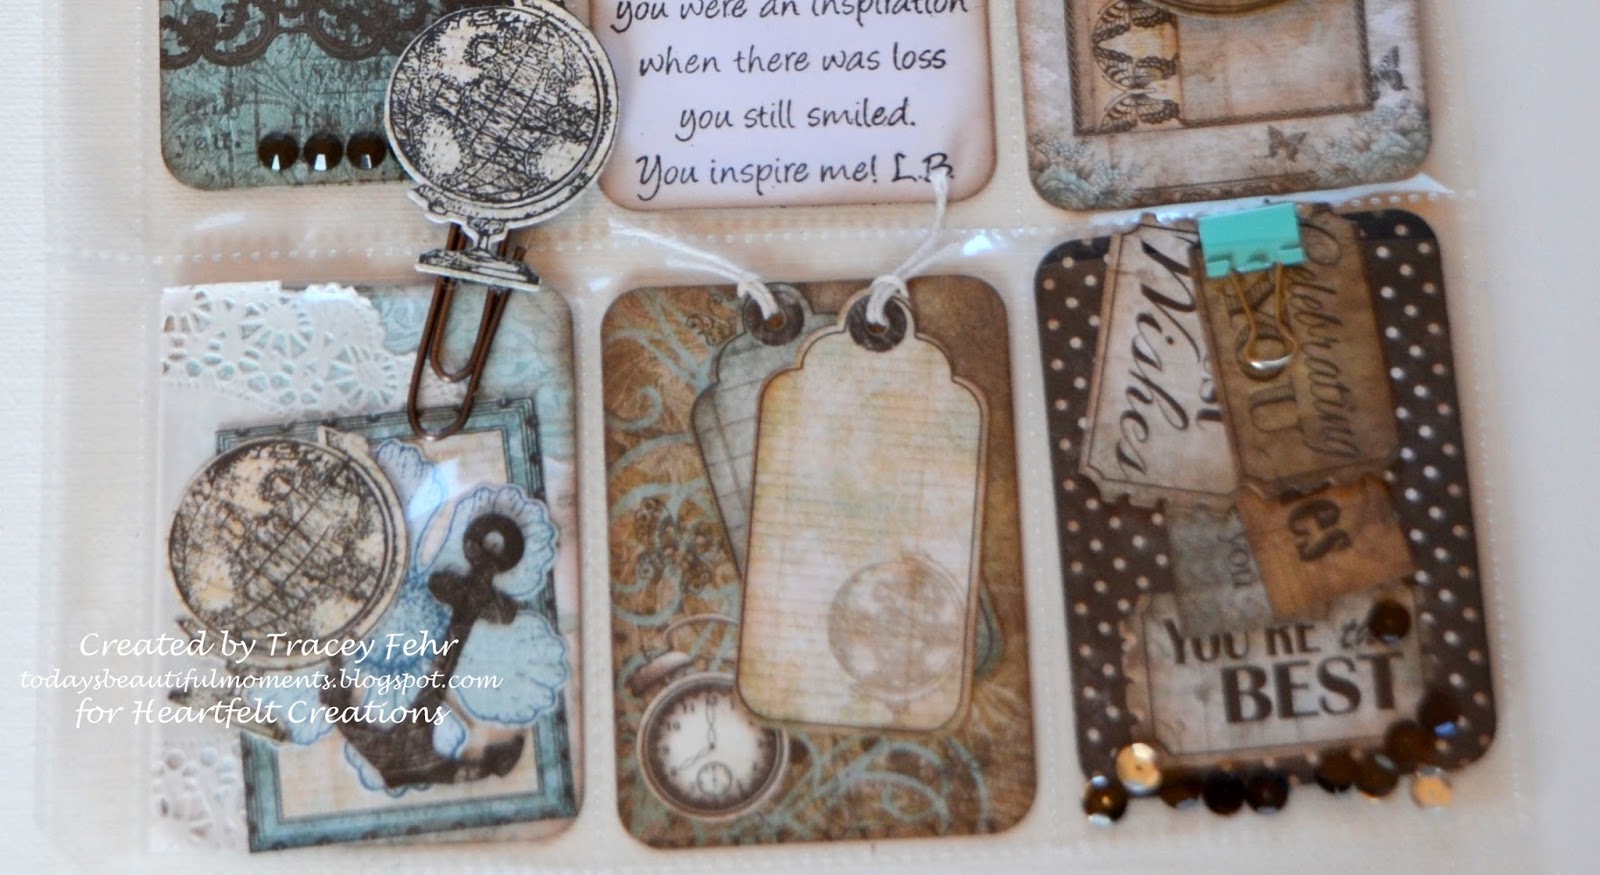
I just recently discovered this new addiction and thought this would be a great way to showcase the Heartfelt Creations "Everyday Heroes" collection!

I had a few scraps laying around from the collection that were the perfect size to use in a pocket letter.  Using the Cut Mat Create 1B die cut set, I was able to cut the pieces out quickly to the perfect size I was needing for the pockets. I set about to embellishing them and started adding small gifts to send in the letter.  The gifts make this so much fun...and the possibilities are really endless!  Great items to include are buttons, washi tape, ribbons, die cut...and how about a tea bag, or even flower seeds!

Here's a peek at how it turned out...


I think this collection makes a beautiful color palette for a pocket letter!

Here's a few more close up pics as well...


Now I suppose I should put a disclaimer on this blog post...if you decide to venture out into this pocket letter craze, be very aware that it is addictive!  They are so much fun to make!

Lastly, I decided to try making a YouTube video tour of this project!
Now be kind...this is my first video and I know it is not perfect...but ok for a first attempt I hope!
Feel free to come see!

https://youtu.be/J_NXvEBRYO


And remember, the Heartfelt Creations blog holds so many more creative ideas for you to browse today!  Be sure to take some time to head over there and take a peek...and maybe leave some blog love for the designers.  I know we all appreciate it!

Until next time...

Project Supplies and Instructions
HCDP1-253  Everyday Heroes Paper Collection
HCD1-761  Everyday Heroes Die
HCD1-745  Luggage and Tags Die
HCD2-750  Cut Mat Create 1B Die
HCD1-758  Botanical Wings Die
HCPC-3667  You Inspire Me Cling Stamp Set
HCPC-3663  My World Cling Stamp Set
HCPC-3662  My Anchor Cling Stamp Set
HCPC-3651  Botanical Rose Cling Stamp Set

Other Products Used:  scor tape, Stampin Up Basic Black Ink, scissors, Big Shot Die Cutting Machine, Electronic Die Cutting Machine, Silhouette Design Store Design ID #50783, VersaColor Pine Cone ink, metal clip, paper clip, twine, sequins, buttons, washi tape, star brad, mini clothespin, charm, doily, ribbon, black gems, seam binding ribbon, Stampin Up small circle punch

Assemble all of your left over papers from the Everyday Heroes paper collection and using the 2 1/2" x 3 1/2" die from the Cut Mat Create 1B die set, cut 8 assorted patterned papers to use as your base cards.  Embellish each card as you wish, keeping in mind that when the small gifts have been removed from the Pocket Letter the cards will remain visible and you want them to be visually appealing.  Die cut one of the large tags from the paperpack to use as a journaling card to include questions for your pen pal. Add ribbon to the tag. Ink all of the edges on the cards on both front and back using a brown colored ink. Once you have created and embellished all of your pocket cards,  begin arranging and including the small tokens.  You may add buttons, sequins, ribbon, charms, etc.  Use the circle die and sentiment stamp from the Everyday Heros collection to spool your ribbon in an interesting way.  Include stamped die cut images, die cut ticket sentiments from the paper collection, die cut tags, flowers, etc.  Create a cute paper clip by gluing on a stamped die cut globe image to the paper clip with a hot glue gun.  Add a small circle punch in matching paper on the back of the image covering the mechanics of the paper clip.   Using an electronic die cutting machine, cut the envelope pattern and assemble.  You are now ready to bless someone with a beautiful pocket letter anywhere in the world.

Thanks for visiting!

Thanks for visiting!