Old Fashioned Snailmail Stationery...

I'm back today with a post for the awesome online craft store Scrapbooks by Design!
I've recently gotten into the old art of handwriting snailmail letters to several pen pals, and I have to say it's such a nice surprise when you open your mailbox to find "happy mail" that makes you smile...and not just computer generated junk mail and bills. 
However, the problem I have encountered is purchasing cute stationery sets to write my letters on.  
I was browsing the web one day when I came across a stationery tutorial by Under a Cherry Tree.
I started reading some of the tutorials when I came across one that explained how to use your Silhouette Cameo to create your very own and unique stationery.  (You can find the tutorial here.)
Well, problem solved!  The tutorial was very clear and easy to follow and I got about to creating!

I purchased the graphics that I wanted to use through Lettering Delights, and the white copy paper was a Costco purchase.  When it comes to copy paper for a project like this, my suggestion is to go with a bright white and higher quality brand.  The cheap regular Costco brand we use for everyday printing is very thin...this last trip I purchased just one package of the bright white high quality copy paper and the printed designs did not shine through the back of the paper as it did with the cheaper version.  It just looked so much more professional! The remaining supplies I needed I was able to purchase through Scrapbooks by Design...including the white sticker paper that I also had never worked with before. 

Here's how the stationery set turned out...


I created two different paper designs as well as a cute matching envelope.  
Since this particular set was going to be sent out to a pen pal for a birthday gift, I made 4 pages of each design and 8 envelopes.  

Here's a closer look at each of the stationery pages...


I also created a few stickers to go with the collection.  Another tutorial I found at Under a Cherry Tree!  You can find the sticker tutorial here
Here's a peek at the coordinating stickers...


I can hardly wait until my pen pal received this in her mailbox and to hear what she thinks of it!
I hope she will enjoy using it, and that the recipients of her letters will enjoy the fun little notes as well.  (Edit:  my pen pal has received the set and absolutely adored it...just as I hope she would!)

That's all for me today!
I hope you've enjoyed my little project!
Be sure to stop by Scrapbooks by Design online store for all your stationery and sticker making supplies!

Until next time...

More Packaging Ideas with the Farmers Market Collection...

Hello and Welcome!

I'm sure by now you've seen the wonderful packaging that I've been able to create with the Heartfelt Creations "Farmers Market" Collection.  (..and if you haven't you can see them here as well as here.)

Well, I'm back this week with two more unique and inspiring ideas for you!
Nothing says Farmers Market more than bushel barrels and clear jugs and jars!  
That's where my creativity took me for this weeks posting...

Let's take a look...


Both of these packaging ideas were very quick and simple to complete!
For the barrel basket, I've done quite a bit of fussy cutting from the paper pack.  
The jar image on the oil jar has been stamped from one of the many beautiful stamps within this remarkable collection.  

Here's a close up of each of these items...


...and of the bushel barrel...


In many parts of the world, summer is winding down as well as the local Farmers Markets.  Wouldn't this just be an adorable idea to give to your favorite vendor who always has that special product waiting for you week after week!  Slip some seeds into the basket for the next upcoming growing season, and how about some pretty wildflowers neatly arranged in the oil jar for a beautiful display!  The ideas are limitless!

Well, that's all for me today!
Do be sure to stop by the Heartfelt Creations blog to see the fantastic creations the rest of the design team have come up with for your enjoyment this week!  And...I'm pretty sure there may be a sneak peek of the new September collection waiting for you there as well...maybe...

Until next time...

Project Supplies and Instructions
HCDP1-257  Farmers Market Paper Collection
HCPC-3687  Jug of Herbs Cling Stamp Set
HCPC-3626  Classic Sunflower Cling Stamp Set
HCD1-753  Classic Sunflower Die
HCDP1-247  Classic Sunflower Paper Collection
HCST1-401  Deluxe Flower Shaping Tool Kit
SMP001  Stamp Mat Pad
273900  Zip Dry Glue

Other Products Used:  Silhouette Cameo electronic die cutting machine, BigShot manual die cutting machine, Silhouette Design Store Design ID #41389 & Design ID #33329, scissors, paper trimmer, lace trim, raffia ribbon, VersaFine Black Ink, VersaColor Pine Cone ink, Spectrum Noir Blending Pencils 084, 086, 107, 103, 062, 065, 031, 046, 108, 117, 120, Spectrum Noir Blending Stumps & Blending Solution, brown and gold seed beads, Yellow Stickles, 3D pop dots, scor tape, water, mist bottle, kraft card stock, hot glue gun

Oil Jar Instructions:  Using the designer paper from the Farmers Market collection as shown , cut the jar base design using your electronic die cutting machine.  Assemble using a strong adhesive.  Once assembled, ink all edges using a brown colored ink.  Locate label image, fussy cut and ink all edges with a light brown ink.  Adhere to bottle.  Locate decorative strips, ink all edges with brown colored ink and adhere around body of bottle using a strong adhesive.  Stamp image using black colored ink and proceed to color using blendable pencils.  Fussy cut and adhere to bottle.  Stamp an inking of the Classic Sunflowers cling stamp onto a yellow patterned paper from the Classic Sunflowers Paper Collection with black ink.  Die cut using the coordinating Classic Sunflower Die.   Shape three small double flowers using the Deluxe Flower Shaping Tool Kit along with a spritz of water.  Add seed beads to each flower centre and adhere to bottle as shown. Apply Stickles to each flower.  Lastly, tie some raffia ribbon around the neck of the bottle.

Bushel Barrel Instructions:  Begin by cutting the barrel shape using your electronic die cutting machine using kraft card stock.  Assemble and ink all edges using a light brown colored ink.  Locate the blue design strip in the Farmers Market Paper Collection, cut, ink all edges with brown ink and adhere around barrel using a good adhesive.  Next adhere lace trim to top of barrel using a hot glue gun.  Fussy cut  the vegetable image from the Farmers Market Paper Collection and attach to barrel using 3D pop dots.  Locate the sentiment image from in the paper collection and fussy cut as well.  Once again, using 3D pop dots attach sentiment image over vegetable image.  Stamp the Classic Sunflower cling stamp image onto the same yellow patterned paper you used for the sunflowers on the oil jar. Die cut flowers using the coordinating Classic Sunflower die.   Shape one large double sunflower and two single sunflowers using a spritz of water and your deluxe flower shaping tool kit.  Apply seed beads to centres of each flower.  Adhere flowers to barrel as shown.  Lastly, apply Stickles to each flower.   You now have two adorable gift packaging ideas ready for your next celebration!

A Berry Happy Birthday...

I hope you've been enjoying the new Farmer's Market Collection by Heartfelt Creations.
As mentioned last week, this has to be one of my all time favorite collections!
When I first opened the sweet package of goodies, I had so many ideas running through my head, and couldn't wait to get creating!

One of the ideas I had was for a Birthday Gift Set of little note cards, presented in an adorable berry basket.  I thought it would be super cute paired with a homemade jar of jam, or a nail polish that was named after raspberries. 

Well, needless to say I got the Silhouette Cameo humming and chose some of those fabulous pre made card panels that Heartfelt does so well and whipped up this little set in no time.

Here's a peek...


Wouldn't you just love to receive a little package like that!?!?
I know I sure would have fun giving a little package like that!

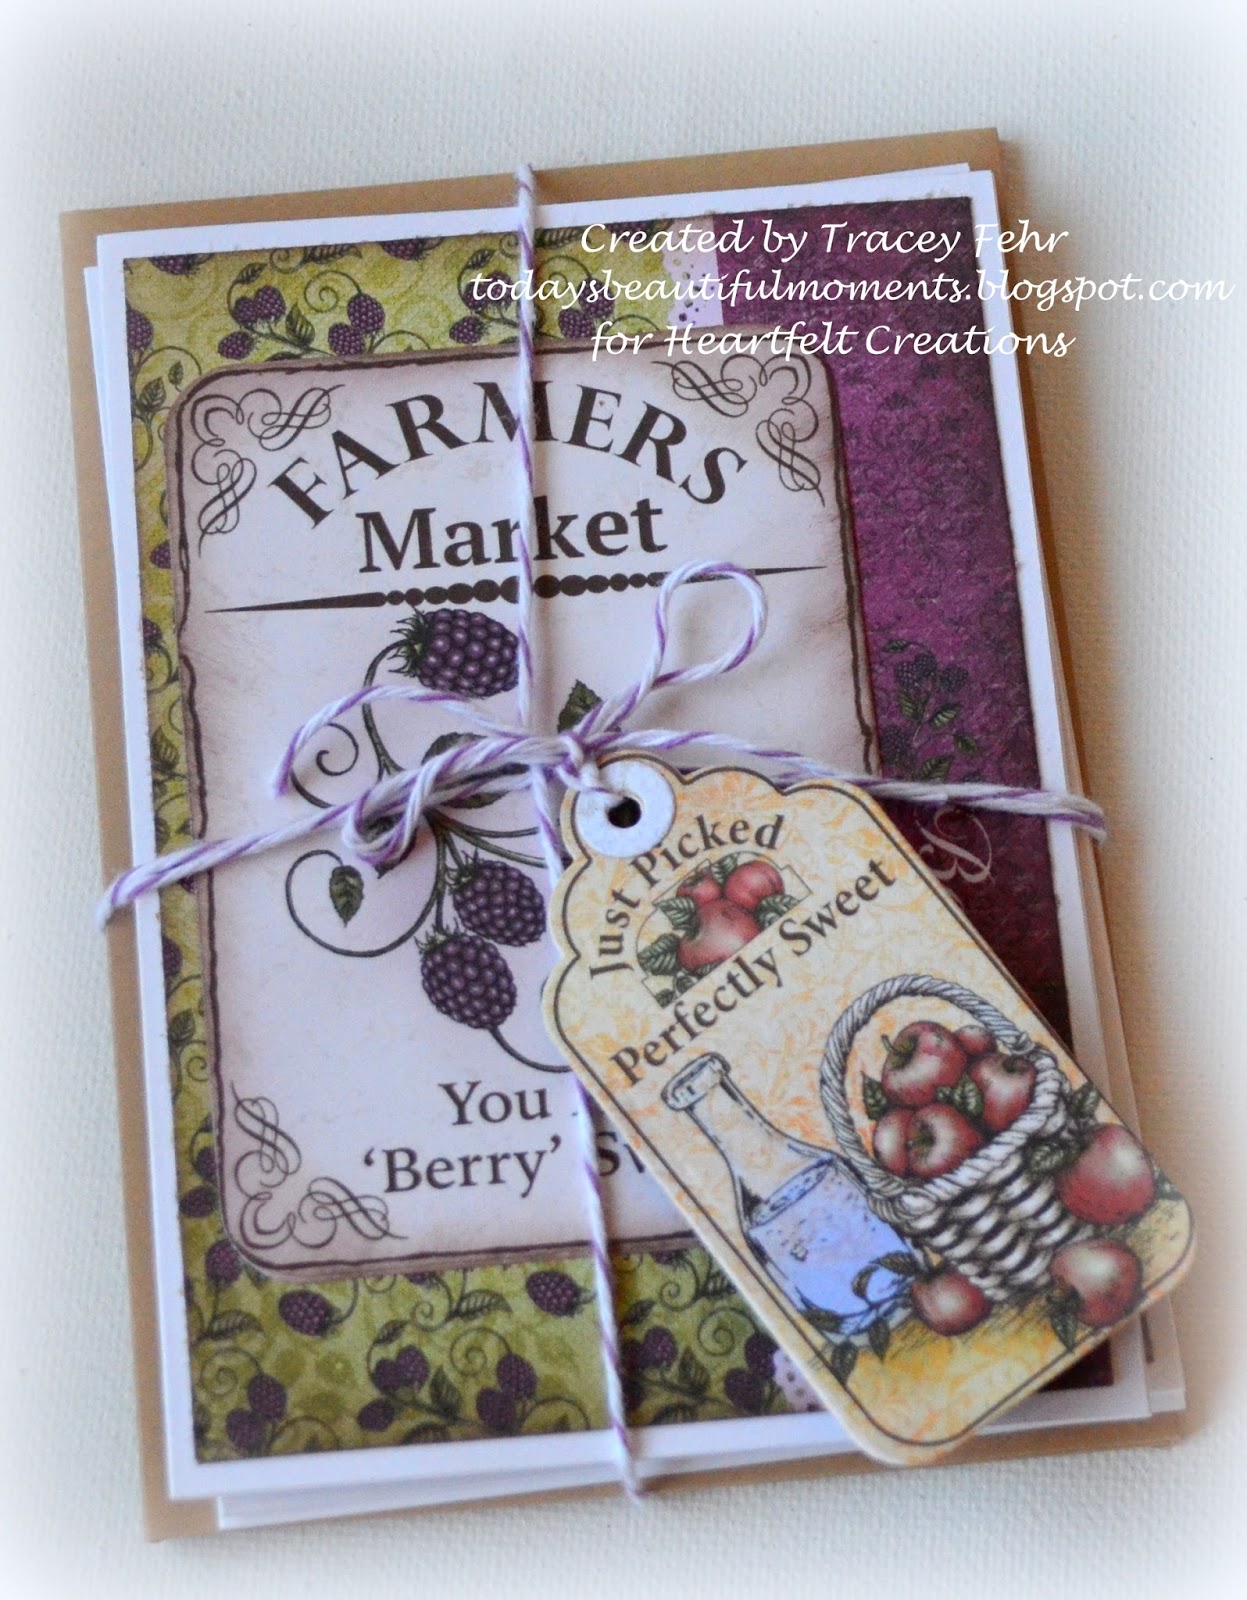
As you can see, I've bundled the cards together with bakers twine as well as one of the adorable tags that comes from the Farmers Market collection itself.  


And, here's a look at the three cards I've included in the gift set...


I love giving card sets as gifts...it's something that most people will use (hopefully) and are consumable rather than being more clutter that needs to be dusted, etc.  
The little premade card panels in this collection make these sweet little cards so quick and easy to make!

And who can forget those beautiful ripe raspberries on the vine!
I thought they would look perfect flowing out of the basket...


I thought some pretty lace and some moss as a finishing touch made this project adorable!
Hopefully you agree!

I do hope you've been inspired and you give this a go yourself the next time you are needing a garden party idea, or are wanting to gift a special someone who loves to garden or has a raspberry addiction!  It can be used for so many different occasions by just changing the sentiment you use on the container.  And, if raspberries is not the fruit you're calling for...Heartfelt has you covered in the apple and peach department as well in this collection!

Be sure to check out the Heartfelt Creations blog if you have not done so already today!
This collection has brought out all the extra creative juices in the design team and they have all done an amazing job with the Farmers Market products!
(P.S. Don't wait too long to purchase yours as I do believe this is gonna be extremely popular!)

That's all for me today!
Thanks for stopping in for a visit!
I'd love to hear what you think of this little project, so don't be shy...feel free to leave me a comment below!

Until next time...

Project Supplies & Instructions
 HCDP1-257  Farmers Market Designer Paper Pack
HCPC 3685  Jars and Vines Cling Stamp Set
HCPC 3689  Berries and Peaches Cling Stamp Set
HCD1-767  Jars and Vines Die
HCD1-777  Farmers Market Fruit Die
HCD1-745  Luggage and Tags Die
HCD2-750  Cut Mat Create 1B Die
HCST1-401  Deluxe Flower Shaping Tool Kit
SMP001  Rubber Stamp Mat Pad
273900  Zip Dry Paper Glue

Other Products Used:  blank note sized cards and envelopes, kraft card stock, VersaFine black ink, Silhouette Cameo electronic die cutting machine, Silhouette Design Store Design ID #30632, ruffled lace trim, bakers twine, moss, VersColor Pine Cone ink, scissors, paper trimmer, BigShot manual die cutting machine, scor tape, 3D pop dots, Spectrum Noir Pencils 107, 093, 094, 095, 097, 103, 031, 041, 042, 046, 047, 053, 058, 108. 120, Spectrum Noir blending stump and blending solution, water spritz bottle, water

Berry Basket - begin by cutting basket file with your electronic die cutting machine and kraft colored paper.  Assemble basket according to file directions. Once adhesive has dried ink all edges with a light brown ink.  Locate the image strip in the paper collection that you wish to use as the decorative edge on the basket.  Trim to size, ink all edges with light brown ink and adhere to berry basket using foam 3D pop dots.  Adhere the flat side of the  ruffled lace trim to inside of container with the ruffle facing the top of the basket.  Fill with decorative moss.  Stamp one inking of the larger raspberries image, and several of the smaller raspberry image.  Color using Spectrum Noir blendable pencils and blending solution, and then die cut using manual die cutting machine and coordinating metal dies.  Shape berries ever so slightly using deluxe flower shaping tools and a light mist of water.  Stamp several vine images, color and once again die cut using the coordinating metal die.  Shape with a light spray of water and the deluxe flower shaping tool kit.  Adhere large raspberry cluster to berry basket, allowing it to droop over to the inside as well giving them the appearance of tumbling out of the basket.  Add in several of the smaller raspberry clusters over top using foam 3D pop dots.  Add vines to berry clusters as desired.  Locate sentiment you wish to use on the gift box, trim from paper pack and ink all edges using a light brown ink color.  Adhere to gift box using foam 3D pop dots.

Cards:  Locate the three smaller pre made card panels as shown, and die cut using the Cut Mat Create die.  Choose the background paper you wish to use and trim slightly smaller than the card front to leave a small white border all the way around the background paper.   Ink edges of all card pieces with a light brown colored ink. Adhere background papers to card fronts, and then adhere small pre made card panels to coordinating card using foam 3D pop dots.  Using the Luggage and Tags die, die cut the tag you wish to use to attach to the card set.  Bundle card set using bakers twine and adhere tag.  Place cards in berry basket, and present to a special friend or loved one who is celebrating a "berry" special birthday!

Let's Visit the Farmers Market...

Hello everyone!
Welcome!

As I sit here and schedule this post, I look at the calendar and cannot believe that August is passing as quickly as it is.  We have a trip scheduled to Washington DC this month for the annual SnapOn Convention/Buying Show and I'm excited to go as we've never been to Washington, however that means when we return that school is starting just around the corner and regular routine will once again be slowly setting in!

Speaking of trips...
I'd like to take you on a little trip...actually the new release being revealed today at Heartfelt Creations has inspired me to plan this little trip for you!

For those of you who haven't seen the new collection previews...its a gorgeous collection called "Farmers Market"...and this collection just makes me giddy!  I love all of Heartfelt's Collections, but this one speaks to my soul!

  Are you ready to head to the farmers market with me?  
Let's go!

Now, one of my favorite things to look at when browsing the market is the rows and rows of canning and preserves.  That is what has inspired today's project that I will be sharing with you!
Mason jars are all the rage right now and I thought I would incorporate this into my design as well.

Are you ready?


I cannot tell you how giddy I was to discover these SVG cutting files...I knew they would be perfect for this fantastic collection.  

All of the pieces with the exception of the crate have been created with designer paper within the new release paper collection.  I love love love the colors and patterns in this gorgeous paper!
The "Home Grown with Love" has been cut from one of the papers in the paper collection as well.
And who could resist that stamped image of the apples!  Gorgeous!
Of course I had to add some of the die cut vines included with this collection and a few small white "apple blossoms".  
The apple image has been colored with my Spectrum Noir blendable pencils...and I love how the colors blended together to give those apples a realistic look.  

Here's a closer peek at the crate...


...and how about these adorable preserves...


These lovely mason jars are actually gift boxes and would be perfect for holding small gifty items such as a lip balm, nail polish, chocolates, etc.  for that special someone...and they are perfect for presenting in the adorable crate.  Not only will your recipient be left with a few small surprises, but they will have a cute little display leftover with the altered art set!
(For full instructions on how to create this set, please see the end of this blog post.)

I hope you've enjoyed our trip to the Farmers Market today!
Should you still find yourself with some time and wanting to continue to stroll, please be sure to stop by the Heartfelt Creations blog for more wonderful Farmers Market inspiration!

Until next time...

Project Supplies & Instructions 
 HCDP1-257  Farmers Market Designer Paper Collection
HCPC 3690  Apple Harvest Cling Stamp
HCPC 3685  Jars and Vines Cling Stamp Set
HCPC 3689  Berries and Peaches Cling Stamp Set
HCD1-767  Jars and Vine Dies
HCPC-3644  Birds and Blooms Cling Stamp Set
HCD1-757  Leafy Branch Die
HCD1-745  Luggage and Tags Die
HCST1-401  Deluxe Flower Shaping Tool Kit
SMP001  Rubber Stamp Mat Pad
273900  Zip Dry Glue

Other Products Used:  Silhouette Cameo Electronic Die Cutting Machine, Silhouette cutting mat,  Silhouette Design Store File Design ID #66549 - 3D Wooden Crate Box, Design ID #81153 - Mason Jar Box, BigShot Manual Die Cutting Machine, two doilies, scissors, paper trimmer, raffia ribbon, lace ribbon, VersaColor Pine Cone Ink, VersaFine Black Ink, Spellbinders Labels 20, Spectrum Noir Blendable Pencils 007, 084, 085, 086, 107, 024, 025, 026, 093, 094, 095, 097, 103, 031, 041, 042, 046, 047, 053, 058, 108. 120, Spectrum Noir blending stump and blending solution, white embossing powder, heat tool, white card stock, kraft card stock, dried moss

For full instructions on how to shape the blossoms from the  Birds and Blooms Collection used on this creation, please see video tutorial here (https://www.youtube.com/watch?v=JFrj2XialLs)

Crate Instructions:  Begin by cutting out the crate file with your electronic die cutting machine and kraft colored card stock.  Assemble pieces as per instructions.  Before assembling the crate itself, ink all edges of all the pieces with a brown colored ink.  Begin assembly piece by piece, allowing drying time between each new piece added. Locate the 12" x 12" designer paper within the collection that has the pictured sentiment.  Cut down the sentiment to apply to the bottom of the crate as shown.   From the same designer sheet, cut three more side panels the same length you have cut your sentiment and apply one to the remaining piece on the front, and the others to the back of the crate.  Adhere  a doily hanging over the side of the crate as shown on both the front and back sides.  Fill the crate with moss.  Stamp one inking of the apple image as well as several images of the vines from the collection using a black ink.  Color using blendable pencils and blending solution.  Fussy cut apple image, and die cut vines using the coordinating die.  Adhere die cut images to crate.  Stamp one inking of the flowers from the Birds and Blooms Cling Stamp Set and add white embossing powder while ink is still wet.  Set embossing powder with heat tool and proceed to die cut and shape flowers using the coordinating die and deluxe flower shaping tool kit.  Adhere blossoms to images as desired.

Mason Jar Instructions:  Begin by cutting out the mason jar files with your electronic die cutting machine and your choice of papers from the Farmers Market Designer Paper Collection.  You will cut the same file twice, only for the second jar you will decrease the size of your file slightly so it will be somewhat smaller.  Glue and assemble all pieces. Once dry,  ink all edges of the 3D jars with a brown colored ink.  Adhere a piece of white lace ribbon to the top of the largest mason jar, ensuring that the lid is still able to close snuggly over top or it.  Using you manual die cutting machine, cut a smaller die cut from the Spellbinders Labels set.   Stamp the small raspberry image onto the label die cut as well as the sentiment.  Color berry image and adhere to jar.  Choose a tag from within the paper collection and die cut using coordinating die.  Loop through raffia and tie onto smaller jar.  Add raffia ribbon to larger jar as well.  You now have a perfect gift box set ready to fill and bless that special someone who loves to garden, do home canning or sells at the local Farmers Market!

Are You One of God's Strongmen?

It's been awhile since I've popped in with a random blog post, however  I thought I'd share the Bible study I did this morning as well as where it led me with journaling in my Bible.  

I've been using the Illustrated Faith Genesis Kit study for the last little while, and this morning the reading was in Joshua chapeter 1.  God is speaking to Joshua and explaining to him how He wishes to bless him and use him.  He commands Him to be strong and courageous, to remain true to Him and  His Word and also reminds him that He is with him always!  

As I was reading this passage, the vision of a strongman popped into my head.  The circus strongman, and even the modern day bodybuilder is always bold, courageous and confident when performing on stage.  God calls us to be those things in our everyday walk in life as well...and even though we may not be "performing on a stage", we represent Christ everyday and are being watched by people constantly.  Our lives are to show who God is, as well as to witness that our strength, courage and boldness come only from Him.  

However, just as the strongman is not always on stage, should you meet him on the street you would definitely still see that he is strong and bold.  God has not called all of us to be bold and courageous in a noticeable way all of the time...just as the strongman does not spend every moment of his entire life being boisterous and entertaining people 24/7.  There are times when we will be put into circumstances where God calls us to speak up and show others the strength and courage He gives us.  But at other times, He will use us in the smallest ways to show others those traits...maybe a journaling page or craft you've created will speak to someone...maybe those kind acts you do when you think no one is watching are not really going unseen and speak to someones soul.  I know at times I get discouraged because I'm not living the loud "strongman" life....being involved in the big picture of far away mission work, changing my community in a large way...however I have learned that just because the strength, courage and boldness I have may look different than what God has given someone else doesn't say that I am ineffective!  I think all too often Satan uses comparisons between people to separate us from the plan that God has for us....and all too often I seem to fall for it!

I think that God simply calls us today to the same things that he called Joshua to do.  
To walk with Him, to meditate on His words, to be bold and courageous in God's time and with His strength...and most of all to cling to the promise that He is with us all of the time, never leaving our side!

So, with all of that being said, here is how my creative side moved in my journaling...


I remembered that I had a strongman die cut in my stash from an older October Afternoon collection that I had purchased a long time ago.  I loved it that he was faceless...to me it represented that this could be any of us who are God's children.  I fussy cut him him so he would fit onto the side of the margin (I still like to be able to read all of the words in my journaling Bible as I do still take it to church and use if for Bible Studies), and fussy cut the sentiment which was also a piece of the same die cut.  I love the sentiment...with God in our lives, we truly are the strongest men and women!
  
This is the first time that I've used gelatos in my Bible and I love how it turned out!  I didn't do dark colors as I just wasn't sure how the process was going to work...but with a few scribbles of the gelatos and a slightly damp paper towel (I must remember to add baby wipes to the shopping list as I'm out) I have to say they blended beautifully!  A quick spray of some gold Lindy's Stamp Gang spray and I was ready to add the die cut and stickers after the page dried.  I've used a MAMBI sticker along side the strongman image which says courage, and the rest of the stickers I've used are from Illustrated Faith.

Here's a bit of a closer look...


Well, that's all for today my friends!
I hope that there was a message in here that spoke to even just one!

If you haven't started Bible journaling, let me encourage you to do so.  
It's a great way to delve back into the Word if you haven't for awhile and also to retain the knowledge that you've gleaned during your study!  Somehow it just sticks better when you've pondered it and mulled it over as you created!

If you feel that creating in a Bible just isn't for you, please don't let that deter you from starting a special journal where you can be creative during your study time.  It's not the book you use that is important...it's the time that you spend with God building your relationship with Him!

Until next time...

Christmas Party Gift Idea with Heartfelt Creations...

Welcome Back!
It's Wednesday...so you know what that means!
I'm back today with another Heartfelt Creations project that hopefully you will enjoy!

This is the last week that I will be creating with the "Sparkling Poinsettia" collection...but don't worry, I'm sure as Christmas approaches you'll be seeing more from this collection here on the blog!

Before we head over into the creative part of the post, I have a quick question for you...do you like holiday office parties, church parties, etc. that require you to bring a $5-$10 gift to be swapped in a game? I'll be brutally honest here...I detest these types of things!  I detest getting the cheap box of chocolates or the dollar store junk that will make it straight into the good will pile in my home. After all what can you really find for $5-$10 that appeals to everyone in the circle as the gifts get passed from person to person.  Or even better yet, how about those parties where you need to bring a recycled gift...LOL.
 Today, I hope to be able to help you out with both of these kinds of holiday problems!

About four months ago, my mom and I took a trip to our local thrift store when I found a Christmas lantern that I thought held some altering potential!  I knew it would be perfect to alter when the Heartfelt Creations Christmas collection was released.  This lantern has sat in my living room on my work table just waiting to be re purposed...and today I've finally completed it!

Here's the lantern as it was...thrift store price tag and all!  LOL


The one thing that really attracted me to this lamp was the bulb.
It has a centre that is shaped like a wick, and when lit it actually flickers exactly the way
a candle burns!


Moving along, as I don't want to keep you in suspense any longer...

 ...here's the transformation...


 ...by simply adding some beautifully shaped poinsettias and some sparkle, you can see that this $5 lantern now looks like it's worth so much more!  What a great way to re purpose something and then feel good about re gifting it at one of those parties!  Or maybe by the time you're done it will be the perfect holiday addition to your mantle!  *wink wink*

Here's a close up of the top flower cluster...


As you can see in this close up photo, the lantern itself had been brushed with a gold color.  I decided to bring that out in several ways.  I've chosen to use a brighter tone of gold glitter on the cream colored poinsettias and I've also created darker golden poinsettias.  I think they complement one another very well.  I've added different color microbeads to each of the two colors of flowers. The Sparkling Poinsettia flowers are so easy to shape...so don't let a fear of tackling them stop you from creating with this fabulous collection.  Heartfelt Creations has created a wonderful instructional video tutorial which you can see here.  
I've also brought out the gold hues by using a cream colored wire ribbon that has gold edging.

...and a closer look at the bottom floral cluster...


I've also created a coordinating tag for this project.  This way you can write your holiday message on the back and hang the tag from the top of the lantern.  It's all finished and perfect to hand off at one of the holiday upcycling parties!

Here's a closer look at the tag...


So, I hope I've inspired you to keep your eyes open the next time you visit a thrift store!
You can find some amazing items just looking to be re purposed and provide them with new life!

Be sure to stop by the Heartfelt Creations blog for more fresh and inspiring projects this week!
Also, have you seen the preview of the upcoming release "Farmers Market"?
I simply love this new collection, and I have some treats in store for you with the gorgeous gathering of papers, stamps and dies!

Until next time...

Project Supplies & Instructions
 HCDP1-256  Sparkling Poinsettia Paper Collection
HCPC-3679  Large Sparkling Poinsettia Cling Stamp Set
HCPC-3680  Sparkling Poinsettia Cling Stamp Set
HCPC-3684  Sparkling Poinsettia Notes Cling Stamp Set
HCD1-765  Large Sparkling Poinsettia Die
HCD1-766  Sparkling Poinsettia Die
HCD1-745  Luggage and Tags Die
HCST1-401  Deluxe Flower Shaping Kit
TSMP805  Memento Dye Ink Pad - Toffee Crunch
159723  Art Institute Glue - Dries Clear
352854  Art Institute Metal Glue Tip
309196  Essential Glue Pad
SMP001  Stamp Mat Pad

Other Products Used:  second hand Christmas lantern, gold card stock, cream card stock, Martha Stewart Smoky Quartz Glitter, clear embossing powder, sponge daubers, Lindy's Stamp Gang Golden Sleigh Bells, Recollection Micro Beads - Champagne & Antique Copper, cream and gold wired ribbon, hot glue gun, heat tool, Glitter Ritz, water mist bottle, Modge Podge, sponge paint brush, gold detail embossing powder, gold cord, Ranger Distress Ink - Antique Linen & Vintage Photo, VersaColor Pine Cone Ink

For full instructions on how to shape and create the poinsettias on this project, please see instructional video here.


Purchase a second hand Christmas lantern or holiday item of your choice that you are wish to upcycle.  Using cream card stock and your Essential Glue Pad, stamp several images of the Poinsettia Cling Stamp Set, sprinkling the fine glitter on the images as you go and before glue dries.  Stamp several images of the Large Poinesttia Cling Stamp Set and repeat the steps you have just completed with the smaller Poinsettia Cling Stamp Set.  Set aside to dry.  Using gold colored card stock and a light brown ink, stamp several images of the small Poinsettia Cling Stamp Set and sprinkle with clear embossing powder.  Set embossing powder using a heat tool.  Die cut using the coordinating die and shape into double blossoms using the deluxe flower shaping tools and a light mist of water.  Once gold flowers have been shaped and assembled, apply a small amount of glue to each petal edge using a fine metal glue tip and sprinkle with Glitter Ritz.  Allow to dry completely and then spray lightly with Lindy's Stamp Gang spray.  Moving back to the glittered flowers, die cut using the coordinating die, add a touch of light brown ink to the centres of the petals using a finger sponge dauber, and then proceed to shape without water.  Shape the flower images just using the deluxe flower shaping kit and no water as you do not want to loose all of the glitter you have applied.  Once shaped, create double blossoms.  (Note:  some of your glitter will fall off of the flowers during the color application, shaping and assembling process,  however due to the nature of the project being an upcycled art piece, the look of the blooms being a little dated, antiqued and faded is the perfect finishing touch.)Using a sponge paint brush, lightly apply a thin layer of Modge Podge to each of the glittered flowers and set aside to dry.  Once all flowers are dry, add the micro beads to the centres of each blossom.  Create your loopy bow and adhere to piece you are altering with a hot glue gun.  Begin arranging flowers in the clusters as you desire, and once happy with placement adhere to piece with hot glue gun.
To create tag, stamp image onto a cream colored card stock and emboss with gold detail embossing powder.  Die cut using the large tag in the Luggage and Tags Die set.  Distress tag using distress inks.  Locate sentiment piece in the paper collection and distress with distress inks and spray with Lindy's Stamp Gang spray.  Ink all edges of the tag as well as the sentiment piece with a light brown ink.  Adhere flower and sentiment to bottom of tag as shown.  Loop gold cording through tag.  You are now ready to present a beautiful upcycled piece of altered art to someone special...or maybe keep and display on your own mantle!

Bible Journaling with Heartfelt Creations

Hello and Welcome!

It's another Heartfelt Creations Wednesday, and I've decided to do something a little different with the gorgeous "Sparkling Poinsettia" collection this week!  I'm super excited, and I hope you will be by the end of this post as well!  While you visit, I want you to keep people in mind who would enjoy this idea...because what I'm about to share with you coupled with a beautiful card will make one special gift for someone on your holiday list this year!

Have you heard of Bible Journaling?  I don't just mean writing notes in your Bible or a separate journal...I mean adding artwork...whether it be your own hand drawn art or by using rubber stamps, scrapbooking papers, etc.  

I recently purchased an ESV Journaling Bible and decided to give this a try.  The one benefit that I have found with studying the Bible this way is that while you are creating, you really have the time to meditate on what you've read and what the Word has spoken to you.  I also find that I recall what I have read much better!

Now, it dawned on me one day that there were images in the "Sparkling Poinsettia" collection that would be perfect for Bible Journaling!  I decided to use several stamps, and to fussy cut some images from within the paper pack to show you just how well both of these methods would work!

Let's take a look...


As you can see, I've stamped the babe in the manger image and also used one of the sentiment strips from the paper collection.  I've added a sequin to the centre of the star and added some Stickles to the star as well as the word "gift".  

Here's a closer peek...


Now how about a look at the second page...


I once again used a stamp from the collection and decided to fussy cut some of the smaller images from the paper collection.  I've once again added sequins and Stickles to the sentiment image.  

Here's a close up...


I have to admit a little secret...I cannot draw, and when I first saw Bible Journaling, I was a tad disappointed thinking it would not be for me!  Then I started seeing that a few people were using stamps...and I thought I could certainly handle that...and why not use some paper from paper collections that would fit into the devotionals I was doing.  After all, there is not a wrong way of doing this as far as I can tell.  It's time spent with God while using your creative side!

Now, at the beginning of this blog post I mentioned pairing this with a beautiful holiday card.  Imagine presenting someone with a Journaling Bible this holiday season in which you have already added a few embellishments and images as a personal touch and gift from you along with a card from the same paper collection.  Wouldn't that make a great gift idea for a granddaughter, grandson, prayer sister, etc.  The reason I say to you to add in a few images already completed is because you cannot imagine how many of us have sat and stared at our journaling Bibles for weeks before daring to make that first entry!  LOL  

Here's the Christmas card I created for this set!
I loved the sentiment which was on a premade card panel!
It totally went with the idea that I was wanting to portray in the journaling in the Word.  

 Here it is...


I decided to cut the sentiment into strips so I could arrange it the way I wanted to around the fussy cut image I added to the square premade card panel.  I fashioned two poinsettias and some leaves.
I did make a tiny boo boo with my flowers this go round.  I had wanted to add glitter to them before adhering them to the card...and I forgot.  As I sat in my craft room, I spied some glitter hairspray from my daughters old dance days.....welllllll....you know me.....you can try anything once!  LOL
And, I sprayed those flowers with that glitter hairspray!  Ha, ha, ha!
Well, it wasn't enough glitter for me as it was soooo  very fine....so I spotted a small container of gold glitter way back in the back of my shelving....wellll.....yup, I dumped some on there while the hairspray was still wet!  Now we have sparkle!  Now the hairspray I was using was Walmart Halloween discount junk...it was good enough for those dance recitals where you needed to use one spray can a recital.  However, I wasn't sure it would hold that gold glitter on...soooooo...off to the bathroom I went to give those flowers a good spritz of my salon hairspray!  
I know...by now you think I've lost it and I'm certifiable!

Here's a close up of those glitzy and sparkling poinsettias...

I added the card front to a 6"x6" card base and decided to place a matching panel inside this time as well, complete with a sentiment cut apart from another premade card panel.

Here's a peek...


And there you have it!
I hope I've inspired you today!
Maybe I've even given you a Christmas gift idea...or maybe you want to put this on your Christmas wish list!

Thanks for stopping by and sharing Christmas in July with me!
Hope you pop in again soon!
And, don't forget to stop by the Heartfelt Creations blog to take in the beautiful Christmas in July projects the rest of the incredible and talented design team have created!

Until next time...

Project Supplies & Instructions

Bible Journaling Pages
 HCDP1-256  Sparkling Poinsettia Paper Pack
HCPC-3683  Joy To The World Cling Stamp Set

Other Products Used:  VersaFine Black Ink, VersaColor Pine Cone Ink, Xyron Sticker Maker, Spectrum Noir Blendable Pencils 024, 097, 103, 007, 085, 086, 065, 047 & 050, Spectum Noir blending stumps & blending solution, Stickles - Crystal & Gold, Illustrated Faith Alpha Stickers & Bible mat, sequins, paper trimmer, scissors, Journaling Bible, small glue dots

The passage that has been journaled here is the birth of Christ in Luke chapter 2.  First Page Instructions:  Begin by stamping the babe in a manger image onto the corner of your journaling Bible page. (Note:  you must use a permanent ink for this application and it will show through slightly on the other side of the page.)  Color using blendable pencils and blending solution.  Locate the sentiment strip pictured in photo and cut to size to accent the side of the margin as shown.  Ink all edges with a brown colored ink.  Adhere to Bible margin.  Choose the color, size and font of alpha stickers you wish to use and stick within the white space of the Bible margin as shown.  Fussy cut a small section of poinsettias from within the paper collection and add to bottom of sentiment strip joining the stamped image and the sentiment strip together.  Using a small glue dot, adhere sequin to the centre of the star.  Apply gold Stickles to the star image and crystal Stickles to the word "gift" and allow to dry.  (Your pages may wrinkle slightly where you have applied the glitter, however once dry and after having the Bible closed several days your pages will actually lay quite flat once again.)
Second Page Instructions:  Once again begin by stamping the Sentiment stamp as shown.  Color around the lettering using the pencil colors of your choice.  Locate the small images shown from within the paper collection and fussy cut, along with the same sentiment strip you used on the first page.  Ink all edges of the fussy cut pieces with brown ink.  Adhere all fussy cut pieces, slightly overlapping as shown to the margin of your journaling Bible.  Using small glue dots, adhere three sequins to the top of the stamped sentiment.  Outline the top decoration of the sentiment with gold Stickles.  Apply crystal Stickles to the letters of the sentiment.  Allow to dry.  You have now completed the decorating portion of your journaling Bible for Luke 2 - take time to reflect on the story and the gift that was given as you complete this project.  You may now also add any personal notes you wish journal about in and around the embellishments.  Coupled with a beautiful card, this would make a wonderful Christmas gift for a loved one, friend or prayer partner.


Coordinating Christmas Card
 HCDP1-256  Sparkling Poinsettia Paper Collection
HCPC-3680  Sparkling Poinsettia Cling Stamp Set
HCD1-766  Sparkling Poinsettia Die
HCST1-401  Deluxe Flower Shaping Tool Kit
TSMP707  Memento Dye Ink Pad - Bamboo Leaves
TSMP708  Memento Dye Ink Pad - Olive Grove
TSMP301  Memento Dye Ink Pad - Rhubarb Stalk
TSMP103  Memento Dye Ink Pad - Cantaloupe
TSMP808  Memento Dye Ink Pad - Espresso Truffle
SMP001  Stamp Mat Pad
273900  Zip Dry Glue

Other Products Used:  VersaFine Black Ink, VersaColor Pine Cone Ink, Memento Dye Ink Pad - Angel Pink & Lady Bug, Aged Ochre Embossing Enamel, BigShot manual die cutting machine, gold edged pearls, glitter hairspray, regular hairspray, heat tool, Martha Stewart fine gold glitter, scissors, paper trimmer, gold seed beads, Viva Decor InkaGold metallic paint, white card stock, Xyron Sticker Maker, sponge finger daubers, water, mist bottle

Locate the premade card panel shown within the Sparkling Poinsettia paper collection, as well as the image located on the left side of the card and the sentiment strips as shown on the top and bottom of the card. Fussy cut the shepherd image and trim sentiment strips to the correct size.  Ink the edges of all the pieces including the premade card panel with a brown colored ink.  Adhere sentiment strips and fussy cut image to card panel as shown. Using a heat tool, melt your embossing enamel to the upper corner above the image as well as the opposite lower corner.  Next locate the small greeting card panel that has the verse as shown.  Cut the verse into strips and ink all edges with a brown colored ink.  Adhere to card front.  Next ink one stamping of the Poinsettia Cling Stamp Set in Memento Expresso Truffle.  Using a finger dauber, start building your pink and red tone inks onto the stamped images.  Die cut using the coordinating die.  Using a small spritz of water and the deluxe flower shaping tool kit, shape two double poinsettias.  Using your finger tip, apply just a small amount of the Viva Decor Gold Metallic paint to various areas on the flowers.  Add gold colored seed beads to the centre of each bloom. Adhere to card front.  Stamp one inking of the holly leaves again using the Espresso Truffle ink.  Once again using finger daubers, build your green ink colors onto the images working from lightest to darkest tones.  Shape using a spritz of water as well as the deluxe flower shaping tool kit.  Melt a small amount of embossing enamel onto each leaf using a heat tool.  Adhere among the flowers as shown.  Apply a few sprays of glitter hairspray to each flower.  While the hairspray is still wet, sprinkle a tiny amount of fine loose glitter to each bloom.  Then set with a strong hairspray.  To finish add three large gold trimmed pearls as shown. Adhere card front to a 6"x6" card base.  
To complete the inside of the card, locate the matching premade card panel that you've used on the front of the card and trim down slightly so you will have a white border around the panel when mounted. Ink all edges using a brown colored ink.  Locate the "Christmas Blessings" sentiment strip and cut to size to add to the top and bottom of the inside card panel, mimicking the way the front sentiment strips have been applied.  Locate the small premade greeting panel with the verse pictured.  Cut into strips as you did previously with the front verse.  Ink all edges with a brown colored ink.  Adhere to card as shown.  Using a heat tool, melt embossing enamel onto the card panel as you did with the card front.  Adhere card panel to the inside of the card. 
This card has been created to complement the Bible Journaling pages showcased on todays post.  Coupled with a personalized Journaling Bible this would make an excellent holiday gift set for that special loved one, friend or prayer partner on your holiday list.


A Heartfelt Creations Surprise...

Did you see the little write up that Emma Lou from Heartfelt Creations left on the HC blog last week about having a little secret surprise for today's post?
If you read it, did you catch the hint and come up with any idea of what it might be?

Here's a quick hint...it's something that the Heartfelt Creations customers were asking for and ties in with the Peacock Paisley Collection.  
That's right, there have been three new dies added to the collection that have been released today!
There are two dies that coordinate with the peacock images in the collection, and a coordinating die for the peacock feather as well!
Woo Hoo...now didn't Heartfelt Creations come through!

So, to celebrate the new release, I've created a card using one of the new dies!

Here's a peek...


I've created my own background paper using just white card stock, the Peacock Paisley stamp, my Spectrum Noir Blendable Pencils and some blending solution.  A designer paper strip from the paper collection along with a sentiment strip make quick additional interest elements to the card.  I've used a dark blue ink to stamp the image on the centre of the pre made card panel.  I've stamped the peacock image in black ink and colored with my blendable pencils as well.  I decided to make this peacock extra regal by actually using the flowers on his tail, with the largest bloom acting as plume feathers along with the shaped leaves in the background.  The colors of the flowers on this card had me working wwwaaayyy out of my comfort zone.  I am one of those people that likes my flowers to look like those in nature...daisies are white, yellow, mauve, etc.  It used to drive me crazy when I worked at the florist shop when we would spray paint real flowers all sorts of odd, out of the ordinary colors.  I think in the case of this card, the odd and out of the ordinary flowers seem to work and I'm ok with how they came out!  LOL  

Here's a closer look...


Of course such a regal bird deserves some shimmer and sparkle.  I've used several different colors of Stickles on the flowers and added some sequins around the bird image itself.  The centres of the flowers are simply gold colored seed beads purchased at the local Dollar Tree. 
(For full detailed instructions, please see end of blog post)

Well, I hope you've enjoyed the surprise that we at Heartfelt Creations have had for you today!
These new dies were highly requested ideas from HC customers, and I have no doubt that they will be well received...so don't wait too long before you snatch yours up! 
The Heartfelt Creations blog is chalked full of fantastic creations again this week, so be sure to stop by there on your way to the online store!

Until next time...

Project Supplies and Instructions
 HCDP1-252  Peacock Paisley Paper Collection
HCPC-3660  Peacock Swirls Cling Stamp Set
HCPC-3658  Daisy Flourish Cling Stamp Set
HCPC-3656  Delightful Daisies Cling Stamp Set
HCPC-3659  Peacock Paisley Cling Stamp Set
HCD1-760  Delightful Daisy Die
HCD1-771 Peacock Paisley Die
HCST1-401  Deluxe Flower Shaping Kit
TSMP607  Memento Dye Ink Pad - Nautical Blue
TSMP602  Memento Dye Ink Pad - Teal Zeal
TSMP701  Memento Dye Ink Pad - Cottage Ivy
SMP001  Stamp Mat Pad
273900  Zip Dry Glue

Other Products Used:  5" x 7" premade card base, white card stock, VersaFine Black Ink, Memento Dye Ink Pad - Dandelion, Spectrum Noir Blendable Pencils 011, 046, 053, 059, 062 & 072, Spectrum Noir Blending Stumps & Blending Solution, Stickles - Ice Blue & Diamond, gold seed beads, Big Shot manual die cutting machine, sequins, acrylic stamp block, washi tape for masking, 3D pop dots, sponge daubers, water, mist water bottle, scor tape

Cut a 5" x 7" piece of white card stock.  Create your own background paper on the white card stock using black ink and the Peacock Paisley stamp.  Color using blendable pencils and blending solution.  Locate the small pre made card panel in the paper collection as shown, as well as the small blue floral piece of designer paper. Using a dark blue ink, stamp the floral image in the white  centre area of the pre made card panel after masking off the areas that you do not wish to have the image overlap.  Mat the card panel using the blue floral paper as the background.  Now, locate the decorative strip as shown on the side of the card along with the sentiment strip.  Trim each to fit card as shown.  Adhere decorative strip to side of the card, following with the matted premade card panel.  Next adhere the sentiment strip as shown.  Using black ink and white card stock, stamp one peacock image.  Color and blend using pencils and blending solution.  Cut using a manual die cutting machine and the coordinating peacock die.  Adhere to card front as shown using 3D pop dots.  Using dark blue ink and white card stock stamp one inking of the Delightful Daisies Cling Stamp Set.  Using finger sponge daubers, first apply yellow ink to the centres, teal to the mid section of each bloom and then a dark green to the edges of each flower gently blending the colors as you go.  Cut using the coordinating die and manual die cutting machine.  Shape using a mist of water and the deluxe flower shaping kit.  Build each double bloom and adhere to peacock image as shown. Apply gold seed beads to the centres of each flower.  Using a piece of bluish green patterned paper from the paper collection, stamp two images of the small leaf in the Delightful Daisies set using a dark blue ink.  Shape using a mist of water and the deluxe flower shaping tool kit.  Adhere both leaves behind the large flower on the peacock image.  Add sequins around the peacock as desired.  Using your fingertip, apply Ice Blue Stickles to the centres of each of the petals on all of the flowers.  After the initial stickles have dried, apply Diamond Stickles to each of the tips of the flower petals using the tip of the bottle.  Also apply some Diamond Stickles to the body of the peacock as well. Lastly adhere your card front to a 5" x 7" white card base. You now have an any occasion card ready to bless someone special.

This card has been shared in the following challenges...
Crafting from the Heart..."Anything Goes"
Craft Your Passion..."Anything Goes"
Incy Wincy Designs..."Things With Wings"
Love to Scrap..."Anything Goes"
Whoopsi Daisy..."Bling it On"
Through the Craft Room Door..."Anything Goes"

He has Called My Name & I Am His...

Good Morning, Afternoon or Evening depending on where you call home!
I'm glad you're here!

It seems like such a long time since I've done a post about something I do just for me, so 
I thought I would show you what I worked on last night!

I recently purchased a Journaling Bible along with the Illustrated Faith "Genesis" collection from Bella Boulevard.  They have been sitting in my home for almost two weeks and I have been eager to get started however also trembling in fear to begin!  LOL
My perfectionist tendencies definitely have kicked in on this one and I really need to move forward...it's ok if it won't be perfect!

So, I started to read the first section of the "Genesis" Bible Study...you may think that it's the study of the first book in the Bible...but actually it's not.  
The first verse that was listed to focus on was in Isaiah 43.  I decided to go with the entire chapter, and it was actually verse one that my attention was drawn to...especially the last statement or promise...

"I have called you by name and you are Mine"

Here's how my very first journaling page turned out in my Journaling Bible...


I've used some of the stickers to journal out the verse that were included in the kit.  Now since I cannot draw at all...LOL...I've used a Prima Doll Stamp for the image.  I thought she looked like she was really owning the promise...something I need to do more often.  I've colored her with my Spectrum Noir blending pencils and blending solution.  The image does show through on the other side of the page, as I feared it would...see here is where I have to let go of the perfection...however I really was not wanting to use clear Gesso to prep the page...so I guess I cannot expect perfection then.

The funny thing about perfection is that it also works it's way into your relationship with God.  I tend to feel that I am not worthy and fail in so many ways in my walk with Christ...which often leads me to setting aside my Bible reading and prayer...after all if I can't do it perfectly, why do it at all.  Now, I know that's not the right and I know that God is not asking for perfection.  It is just simply a tool that Satan uses to try to separate us from our Saviour...and I fall for it all too often.
The verse that spoke to me clearly says that I belong to God...it does not have any clauses attached to it...there is no perfection expected!

Here's a bit of a closer look at the page...


Well that's all for me today!
I hope you've enjoyed what I've shared with you!

Until next time...

This journaling page has been shared in the following challenges...
Word Art Wednesday..."Anything Goes"
All Crafts Challenge..."Anything Goes"


Candle in the Window...

As I sit here scheduling this blog post, I've just finished creating and have been listening to Christmas music as I worked.  Seems too funny as the weather outside is frightful...but in a very hot sort of way!  LOL

Thanks for stopping by to visit with me today!
I'm so glad you're here!
Did you catch the new release last week of the "Sparkling Poinsettia" Collection by Heartfelt Creations?  It is certain to make all of you holiday card creating or memory preserving a simple task this year!

I'm showcasing the collection with another card this week.  
I love the tradition that some people have of putting up candles in their windows during the holiday season.  It's not something I do as we live in a rural area, and no one would take notice...but I love driving around in the local towns and villages in the evening and seeing those pretty candles all a glow.  This tradition is what has inspired my project this week.

Shall we take a peek...


I wanted to give the card the appearance of snow softly falling across the window panes and used white embossing enamel, and Diamond Stickles to achieve that effect.  I've also used some of the Aleene's Glitter Snow where the "window sill" would be.  (And yes, it discolored on me again as it wicked up the color from the Distress Stain I used on the window frame...I had to get a little creative and throw in some Diamond and Gold colored Stickles!  I really need to find a different snow product...but you know you gotta use up what you have first, right?)

I've stamped the image on a premade card panel that you find in the paper collection.  It was perfect as the white space was off to the side where I wanted the candle to peek through the window.  
For the poinsettias I've used several different colors of Memento Inks and love how the color combination came out!

 A close up of the flowers shows a better view of the color scheme and the shimmer on the tips of the petals. 


 Of course, since I wanted the appearance of the weather to be "snowing" I just had to incorporate the Arianna Lace die cuts!  They are just so very beautiful and just make the card seem extra delicate.  Top of the card with a ribbon and a few berry clusters and I was good to go...and add sparkle of course!  I just cannot create a Christmas card that does not have some element of sparkle to it...and maybe I've gone a tad overboard on this one!  Ha, ha, ha.

Well, now it's your turn!
Set your air conditioner to frosty, get the holiday carols playing and cook up a mug of hot chocolate! Get a jump start on creating those Christmas wishes you want to send out early December.  
And of course, if you're looking for more wonderful inspiration, be sure to check out the Heartfelt Creations blog as well!  The amazing team of designers work so hard to give you fresh and new ideas each week!

Until next time...


Project Supplies & Instructions
 HCDP1-256 Sparkling Poinsettia Designer Paper Collection
HCD1-765  Large Sparkling Poinsettia Die
HCPC 3679  Large Sparkling Poinsettia Cling Stamp Set
HCD1-766  Sparkling Poinsettia Die
HCPC 3680  Sparkling Poinsettia Cling Stamp Set
HCPC 3681  Sparkling Poinsettia Candle Cling Stamp
HCD1-747  Arianna Lace Die
HCST1-401  Deluxe Flower Shaping Kit
272486  Cameo Sparklets
TSMP801  Memento Dye Ink Pad - Potter's Clay
TSMP708  Memento Dye Ink Pad - Olive Grove
TSMP707  Memento Dye Ink Pad - Bamboo Leaves
TSMP301  Memento Dye Ink Pad - Rhubarb Stalk
TSMP103  Memento Dye Ink Pad - Cantaloupe
SMP001  Rubber Stamp Mat Pad
273900  Zip Dry Glue

Other Products Used:  white card stock, Silhouette Cameo electronic die cutting machine, BigShot manual die cutting machine, Memento Dye Ink Pad - Love Letter, Silhouette Design Store Design ID #12956, Tim Holtz Distress Stain - Walnut, ribbon, Spectrum Noir Blendable Pencils - 025, 026, 093, 094, 058, 108, 084, & 107,  Spectrum Noir Blending Solution, Spectrum Noir Blending Stumps,  Stickles - Patina, Champagne, Diamond, Cranberry & Gold, Aleenes Glitter Snow, VersaFine Black Ink, scissors, sponge daubers, Stampendous White Embossing Enamel, 3D pop dots, heat tool, scor tape, mist bottle, water, washi tape for masking

Using your Silhouette Cameo and design program, size your card base and window frame to a 5" x 7" card base.  Cut both base and frame from white card stock using your electronic die cutting machine.  Apply a thin coat of Tim Holtz Distress Stain to the window frame and set aside to dry.  Locate one of the 5"x7" pre made card panels within the paper collection that has white space off to one side.  Decide where you would like to stamp candle image and mask off any area you do not wish to have the image appear.  Before stamping, be sure to double check that placement of the candle image will appear as you want it to in the window.  Stamp image and color using blendable pencils and blending solution. Next, drop small amounts of white embossing enamel onto the pre made image panel and stamped image.  Set with heat tool.  Continue this process until you have achieved the "falling snow" look you desire.  Add several areas of white embossing enamel to the brown window frame itself and heat set as well.  Next build up several layers of Aleene's Glitter Snow to the bottom of the window ledge, allowing each layer to dry slightly in between.  Adhere window frame to image panel.  Next, moving along to the handshaped flowers, stamp as many poinsettia images as you wish to incorporate. (In this example, the largest poinsettia has been created using the large poinsettia image and coordinating die, as well as the largest image and die from the multiple image set.  Then a complete set of the multiple images have been used to create the other two smaller poinsettias.) Using sponge finger daubers and your Memento inks, begin building your colors on top of one another. Spritz with a tiny bit of water and shape using flower shaping kit.  Assemble flowers and set aside to dry.  Cut one of each of the snowflake shapes in the Arianna Lace Die set.  Place the largest one on the bottom corner where you will place your largest poinsetta, and the second one at the top of the card as shown.  Adhere your flowers to your card base over your lace die cuts as pictured. Adhere ribbon to card base.  Stamp two sets of the holly leaves and once again die cut and color using your Memento inks and sponge daubers.  Arrange and adhere around floral arrangements and bow once happy with placement.  Once again using the Arianna Lace Die, cut four of the swirls in the collection using white card stock.  Adhere over and around leaves as shown.  Locate your die cut berry clusters and color using Memento ink.  Shape and adhere to card base around several poinsettias and to centre of bow. Locate small square panel with the pictured sentiment image on the tags and embellishments page in the paper collection.  Fussy cut and apply using 3D pop dots.  Now it's time to bring on the sparkle...apply Champagne Stickles to the edges of the Poinsettia leaves, and a Cameo Sparklet to the centre of each flower.  Apply Diamond Stickles to the Arianna Lace snowflake die cuts, and Patina Stickles to the Arianna Lace swirl die cuts. Also apply some Diamond Stickles to the Aleene's Glitter Snow for some added shimmer.  For the berry clusters, add just a touch of red and gold stickles to the tops.  Lastly, apply some Gold Stickles around the outside of the window frame, and also a touch to the snow on the window sill as well...and just a touch of a few spots of Diamond Stickles among the white embossed enamel snow to give it a hit of shine.  You are now ready to dazzle someone this Christmas with a poinsettia card that brings out the sparkle of the holiday season!

Thanks for visiting!

Thanks for visiting!