Showing posts with label snowflakes. Show all posts

Frosty Friend Gift Bag...

Welcome friends to another Heartfelt Creations Wednesday!
This week I have a super quick and easy project to share with you...it's a Christmas gift bag!
I've used my Silhouette Cameo and a cut file from SVG Cuts which you can find here!

Here's how my project for the week turned out...


The snowflake die paired with the skating snowman stamp and die combo made super quick and easy decorating!  I've added some Stickles to give it that holiday sparkle, and I've robbed the handles to use in my gift bag from a purchased one that had seen better days and was ready to be recycled.
I decided that it would be fun to create matching tissue paper, so I stamped the skating snowman image multiple times onto white tissue paper using a dark blue ink.  

Quick, simple and yet effective enough to gift those Christmas items that you had to purchase because you didn't find the time to do handmade...or you have a few people in your list who don't appreciate a handmade gift but would use a handmade gift bag to pass along another gift!  LOL

Well, that's all for me today...short and sweet!
I hope you've enjoyed today's project...and be sure to stop by the Heartfelt Creations blog for more holiday inspirations showcasing the lovely Snow Kissed Collection!

Until next time...
Project Supplies and Instructions
Snow Kissed Paper Collection, HCDP1-269
Frolicking Frosty Cling Stamp Set, HCPC-3750
Frolicking Frosty and Spruce Die, HCD1-7107
Snow Kissed Flakes and Tag Die, HCD1-7108
Memento Dye Ink Pad - Nautical Blue, TSMP607
Designer Dries Clear Adhesive, 159723
Metal Tip for Adhesive Bottles, 352854
Zip Dry Paper Glue, 273900

Other Products Used:  Silhouette Electronic Die Cutting Machine, SVG Cuts Happy Holidays File, BigShot manual die cutting machine, white card stock, navy card stock, VersaFine Black Ink, Ranger Distress Markers - Aged Mahogany, Dried Marigold, Pine Needles, Evergreen Bough, Stickles - Cranberry, Ice Blue, Pine, white tissue paper, handles recycled from older purchased gift bag, pop dots

Choose designer paper combinations for gift bag from Snow Kissed Collection.  Using electronic die cutting machine and purchased gift bag file, cut pieces and assemble using a strong paper glue.  Die cut snowflake background from white card stock and decorative portion from navy card stock.  Adhere together and adhere to gift bag using pop dots.  Apply Patina Stickles to entire decorative portion of snowflake and allow to dry.  Stamp snowman onto white card stock using VersaFine Black ink.  Color using Ranger Distress Markers.  Die cut using manual die cutting machine and coordinating die.  Adhere to snowflake using doubled up pop dots for added dimension.  Remove handles from a purchased gift bag that is ready to be recycled and add to gift bag.  Stamp snowman image repeatedly onto white tissue paper using blue ink and stuff gift bag. 


Winter Wedding Favor Box...

Hello!
How are you this morning, afternoon or evening!
If you've been following me for awhile you'll know that every Wednesday brings a 
special creation featuring Heartfelt Creations!

For this week I've decided to use the wonderful little box die that comes in the Snow Kissed Collection.  I had an idea for a winter themed wedding or shower with this little box paired with the gorgeous window die from the Botanic Orchid Collection.  

Let's take a look...


I chose to add some bridal type stamens to the poinsettias for this project to keep with the bridal theme.  I've heat embossed the flowers with white embossing powder along with the snowflakes.
The flowers have been stamped on a light blue patterned paper from the paper collection and then inked lightly with a blue ink.

Here's a bit of a closer look at the flower arrangement...

 
 The snowflakes have also been heat embossed and then inked with a platinum color ink to give them some shine.  The wooden word has been lightly painted with a white distress paint and then sponged with the platinum ink as well.

Here's a closer look without the little tulle drawstring bag of Hershey Kisses...


I can just picture a crafty bride and her bridesmaids sitting in a room where they've gathered together their manual die cutting machines, a bunch of inks in the colors of the wedding color palette and of course their shaping tools...ready to create these as table favors for their guests.  The beauty of this project is that you can change up the colors, flowers, etc. to match the theme of your wedding!  This would be equally as stunning using orchids, fuchsias, and even daisies!

I hope you've enjoyed today's share!
Pop on over to the Heartfelt Creations blog to see many more stunning winter and Christmas themed creations featuring the Snow Kissed Collection.

Until next time...

Project Supplies and Instructions
HCDP-1269 Snow Kissed Paper Collection
HCD1-7108 Snow Kissed Flakes and Tag Cling Stamp Set
HCD1-7108 Snow Kissed Flakes and Tag Die
HCD1-7109 Gift Box and Mini Snowflakes Die
HCD1-7100 Botanic Window Die
HCPC-3680 Sparkling Poinsettia Cling Stamp Set
HCD1-766 Sparkling Poinsettia Die
HCST1-401 Deluxe Flower Shaping Kit
159723 Designer Dries Clear Adhesive
352854 Metal Tip for Adhesive Bottles

Other Products Used:  BigShot die cutting machine, white embossing powder, heat tool, ColorBox Chalk Ink - French Blue, textured white card stock, plain white card stock, snowflake embossing folder, VersaFine Black Ink, Brilliance Dew Drop - Platinum Planit, sponge dauber, white flower stamens, wood cut out - Love, Ranger Distress Paint - Picket Fence, water, spritz bottle

Watch this video for shaping tips and techniques on the Sparkling Poinsettia flowers.

Die cut gift box and window pieces using textured white card stock.  Assemble box and adhere window to back of box.  Trim a panel piece, just slightly smaller than the front of the gift box from plain white card stock.  Dry emboss using manual die cutting machine and snowflake embossing folder.  Adhere to box front.  Locate a piece of light blue patterned paper from the Snow Kissed Paper Collection, stamp one inking of the Sparkling Poinsettia Cling Stamp Set and heat embosss using white embossing powder and heat tool.  Color using sponge daubers and a touch of blue ink.  Die cut using coordinating die.  Using flower shaping tools and spritz of water, shape one large double poinsettia and one smaller.  Once dry, pierce the flower centers with piercing tool and slip stamens through and adhere to back.  Adhere flowers to bax as shown.  Stamp one inking of the snowflake cluster from the Snow Kissed Flakes and Tag Cling Stamp Set onto plain white card stock.  Apply white embossing powder and heat set.  Sponge lightly with Platinum colored ink.  Die cut using coordinating die and adhere to box as shown.  Paint wood cut out word with white paint, allow to dry and then sponge with platinum ink.  Adhere to box.  

A Recipe for You...

Welcome!  Grab a beverage, take a seat and get yourself comfortable.  
Today I'd like to share a recipe with you!
Don't get too excited...I mean a card recipe, not a cooking recipe!  LOL

Our current challenge at The Crafter's Cafe is a recipe challenge...
2 designer papers
ribbon
3 die cuts
4 pearls or rhinestones
Think you can do it?  Need a little encouragement?  How about the chance to win some awesome prizes from our sponsors for this challenge...

http://squigglefly.com/

and

Treasured Times.

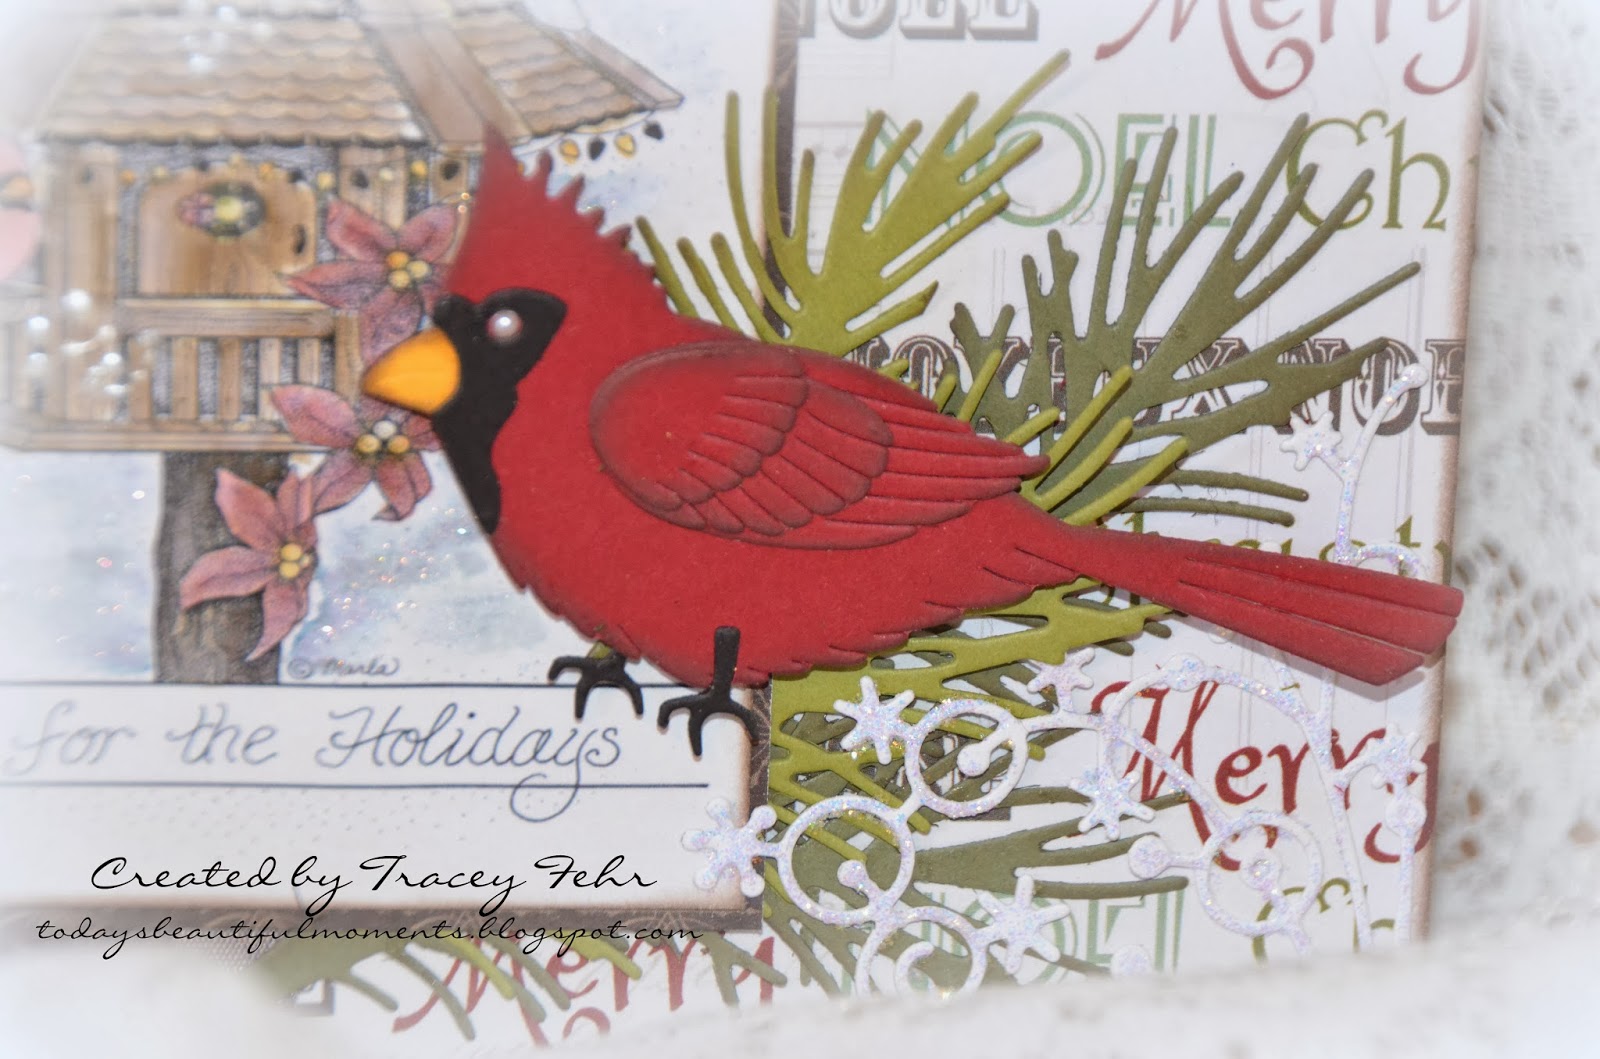
Now I must confess that I usually don't use card recipes as I find them absolutely challenging. However, I was kind of excited to be pushed out of my comfort zone this time.  I was so happy to be using the Squigglefly image "Cardinal Birdhouse".  I know... you're thinking why would you choose a Christmas image?  I have good reason, I need to keep preparing for the annual craft show I'm in and Christmas cards are my greatest sellers.
Here's a peek...and we'll go through the details in the next few photos...


As you can see, I managed to find two fantastic designer papers to use on this card!  I married them together with the ribbon to make nice joint where the two styles meet. 


I've colored up this gorgeous digi with my Tim Holtz Distress markers.  I added some glitter ritz around the birdhouse to give the illusion of shimmering snow...wish you could see it better.  Then I've added some liquid pearls for some dimension...and put 3 pearls on the background and one pearl for the cardinals eye.  That takes care of the 4 pearls or rhinestones portion of the recipe.  


Lastly, there were the 3 die cuts to take care of.  They are the cardinal, the pine leaves and in the very bottom corner you will see the snowflake swirl corner which I stickled in diamond Stickles to give it some shimmer.  
This came together quite quickly and I quite like the end result.  

Now, I hope I've encouraged you to tackle this recipe.  It was so much fun when I got down to it!  Don't forget to check out the projects the other DT members have created at The Crafter's Cafe.  We can hardly wait to see what you cook up!

Until next time...

This card has been shared in the following challenges...


Thanks for visiting!

Thanks for visiting!