Some Exciting News!

Hi Everyone!  
I'm just popping in today to share some exciting news with you!  

Early in January I sent in my application for a DT call at Christmas Stampin' All Year Long.  I love making Christmas cards, and they are always my best sellers at the craft show that I attend.  I thought to myself, what better way to keep up with making Christmas cards than to try to join this awesome design team.  Well, a few weeks ago I received word from the blog owner that I had been accepted as one of the new DT members!  I nearly jumped for joy!  I am so excited to be designing with this team.  

So, keep your eyes open for the challenges to begin at CSAYL shortly (Friday, March 07)...and be sure to drop by their blog to meet the other new fabulous design team members!  

I look forward to creating Christmas with you all year long and checking out your awesome seasonal creations!

Until next time...

A Little More Vintage...

Hello Everyone...Welcome Back!

Here's my second post for the today!
If you are looking for my {Pin}spirational Challenge Blog submission, please scroll down.

I was so very excited when I saw what this weeks challenge was at The Crafter's Cafe Challenge Blog!  It's all about the Vintage!  WooHoo!

We are sponsored this week by none other than... 


...who is offering one lucky winner an awesome prize.  Be sure to check out The Crafter's Cafe Challenge Blog for details.

I fell in love with the digi entitled "Isabella Meet Me in St. Louis".  I loved the way she was dressed. I thought about heading into the Valentine theme with this little sweetie, but then the thought of vintage fashion came to mind.

Here's a look at how that idea came out... 


I had a fabulous page from Heartwarming Vintage and decided to use that as my background.  All those elegant ladies dressed in vintage hats and dresses made the perfect way to start.  Of course I had to distress the outer edges and ink them in a dark brown as well.   I colored up Isabella with my Tim Holtz Distress markers and popped her up to give the card some dimension.  I had an awesome quote that I purchased from TLC Creations which I thought suited this card perfectly.  I again roughed up the edges and inked the image to give it a vintage look.  I used some cream colored lace to make a bow, which I adhered to the 1/2 doily on the upper corner and added some flowers and a hair pin.  In the bottom corner, I adhered a strip of lace as well as 3 small flowers to finish the card. 

I hope I've inspired you to go back in time and produce a project that reflects eras gone by.  I'd love to come to your blog for a visit to see what you were inspired to create.  And, of course don't forget to link up with us over at The Crafter's Cafe...and while you're there take a look around the Cafe and see what the other fabulous DT have created to share with you.

Until next time...
 
This card has been shared in the following challenges...
Crafting from the Heart..."Anything Goes/Use Flowers"
Craft Your Passion..."Girly Girl"
Lexi's Creations..."Monochromatic"
Love To Scrap..."Anything Goes"
Ooh La La Challenges,,,"Fashionista"
Without Words..."Occupations" (fashion model)
Pile it On..."Sentiment as the Focus"
Open Minded Challenges..."Monochrome"
DL Art..."Vintage"
MilkCoffee Challenges..."Girly"
Penny's Paper Crafty Challenges..."Monochrome"
Crafty Sentiments Designs..."Anything Goes"

Need an Umbrella?

One does have to wonder how a person can have all of their design team projects due all in the same week! The blog stays quiet for a week...and then boom...all of a sudden there's been some more creating going on! LOL

I'm glad you're back with me today!

I want to share with you the new challenge over at {Pin}spirational Challenges this week...I know it's one of your favorites...ready?


Yup...it's a free for all this week with "Anything Goes"

Our fantastic sponsors this week are...

Crafty Sentiments

offering one lucky winner 3 digis of their choice!

...and

Di's Digi Downloads

offering one lucky winner a $12 gift voucher

....and last but not least

 A & T Digital Designs
 
offering one lucky winner 2 digis of their choice!

I had the priviledge of choosing a digi from A&T Digital Designs and fell in love with the fairy image called "Pip".  I decided to use the image of the "Anything Goes" photo and the water droplets in this image were perfect!

Here's a peek...


...and here's a closer look at the sweet little fairy...


I water colored her with my Tim Holtz Distress Markers.  I was looking through a Recollections vintage stack and found this paper that totally matched the colors I had used and also reminded me of water droplets!  Then as luck would have it, TLC Creations posted this free sentiment for "Umbrella Day"...did you know it gave such a day...I did not!  LOL
I loved the sentiment though and thought it would be perfect to send to a close friend...it just suited the digi perfectly!

I finished the card off by inking the edge with a green color, put some Glitter Ritz on the fairy's wings and then I added some Glossy Accents to the rain drops.  The finishing touch was to add the 3 rhinestones under the sentiment. 
Not a complicated card, but rather simplistic and straight forward!

Now it's your turn!
Please join us at {Pin}spirational Challenges this week where "Anything Goes".
Looking forward to see what you create!

Until next time...

This card has been shared in the following challenges...
Created with Love Challenges..."Friends"
Stamping Sensations..."Wings"
Crafts Galore Encore Challenge Blog..."Bling"
Digi Galore..."Wings"
Winter Wonderland..."Fairies"
Creative Card Crew..."Keep it Simple and Sweet"
Tuesday Throwdown..."Wings"


Ready for More Mess?

I'm back today to remind you about the current challenge we have running over at the Unstampabelles this month.  As always, our challenge to you is to make a project using no stamps...no digis, no rubbers, cling mount, etc....and our twist this month is to journal your "mess" of creating along the way.  

Now, we are half way through our challenge and I have another little peek for you of a project that once again was created out of a mess.  Unfortunately I forgot to take pics along the way as this was quite a bit more involved than the last project, which you can see here

Here goes...


For a first attempt at the box and the flowers as well, I thought it came out pretty nicely...although a little more practice would make things look even nicer!  LOL

Those roses, a purchase from the Silhouette Online Store, came in many, many pieces and needed to be glued together.  Once again with that awful Tombow glue I dislike...my fingers were just an awful mess by the time this was completed.  The heart box template was a purchase from SVG Cuts.  It is assembled from quite a few pieces and what I love about SVG Cuts is that they most often have a video showing you the assembly process.  It takes the guess work and frustration out of the project.  Of course the designer paper has been inked with a brown color to give the box an aged feel.  The rose petals and my fingers have also all been inked with the same brown.  LOL

Now I challenge you to get busy in your craft space and "make a mess".  Then link up your messy journey with us at The Unstampabelles...but don't be forgetful like me this time...take your photos along the way!

Until next time...

This project has been shared in the following challenges...
Eclectic Ellapu..."Anything But a Card"
That Craft Place Challenge Blog..."Make or Alter a Box"
Seemacrafts..."Valentines"
LadyBug Crafts..."Be Mine"
LEJ Designs..."Valentine/Love"
Natalie and Amy's Challenge Blog..."Love is all Around"
Scrap it Girl..."Hearts"
Silhouette Challenges..."Box of Any Type"
Sunflowerfield Challenge Blog..."Valentine's/Hearts"
Challenges and Sweets..."One Heart"
Creative Corner Challenges..."From the Heart"
Cut it Up..."Valentine's Day" (die cut file for box and die cut flowers)
Fussy and Fancy..."Be My Valentine"
Polkadoodles..."Love is in the Air"
Stuck on U Sketches..."Something Sweet"...sweetheart box filled with sweets
Totally Paper Crafts..."Valentine/Love"

Update:  This creation placed in the following challenges...


Awards, Wins & Recognitions

Pie Anyone?

Good Evening!

It's been a busy last couple of weeks...but I've still been creating...I've just been a little slow in posting!

I wanted to share with you today some pie boxes that I decorated for an upcoming church event we're hosting on Valentine's Day.  

Let me show you...


I apologize for the photo quality.  I landed up having to take the photo with my cell phone.  

Our church is holding a fundraiser for our local chapter of Cancer Care and we decided it would be fun to include a "pie walk".  I know traditionally it's a "cake walk", but our area is big into pies.  I had a few pie boxes left in my stash that  had purchased new at our local bakery, and offered to dress them up for the homemade pies to be sold off in the walk.  I just thought it would be cute to house those home made pies in a special custom made box.  Just one of those little extras to encourage donations.  As a friend of mine always says..."love is in the details".  LOL

The background paper I used has been printed through my Silhouette Cameo.  The adorable owls and the love puppy scene are also cutting files purchased in the Silhouette Online Store. 
I'm excited to see how this idea will go over with the people who will be attending the fundraiser.  This is the first time we have tried something like this and I'm hoping it will be a great success.  

Well thanks for popping in to see what I've had going on lately.  
The next few days will be crazy as I've been the main organizer getting everything ready and scheduled for the event.  We've painted the church basement, steam cleaned the carpet and are now getting ready to get the meal prep underway.  It's a spaghetti supper with Caeser salad and garlic toast...with cheese cake and a pineapple fluff dessert.  And of course Valentine cupcakes for the kids.  It's a little daunting not knowing how many people will attend.  Thank goodness I have a friend who was a caterer and has been willing to help me out with all the silly questions I've had.  Hopefully I can give you all a great report after the event.  

Until next time...

This project has been shared in the following challenges...

A Recipe for You...

Welcome!  Grab a beverage, take a seat and get yourself comfortable.  
Today I'd like to share a recipe with you!
Don't get too excited...I mean a card recipe, not a cooking recipe!  LOL

Our current challenge at The Crafter's Cafe is a recipe challenge...
2 designer papers
ribbon
3 die cuts
4 pearls or rhinestones
Think you can do it?  Need a little encouragement?  How about the chance to win some awesome prizes from our sponsors for this challenge...

http://squigglefly.com/

and

Treasured Times.

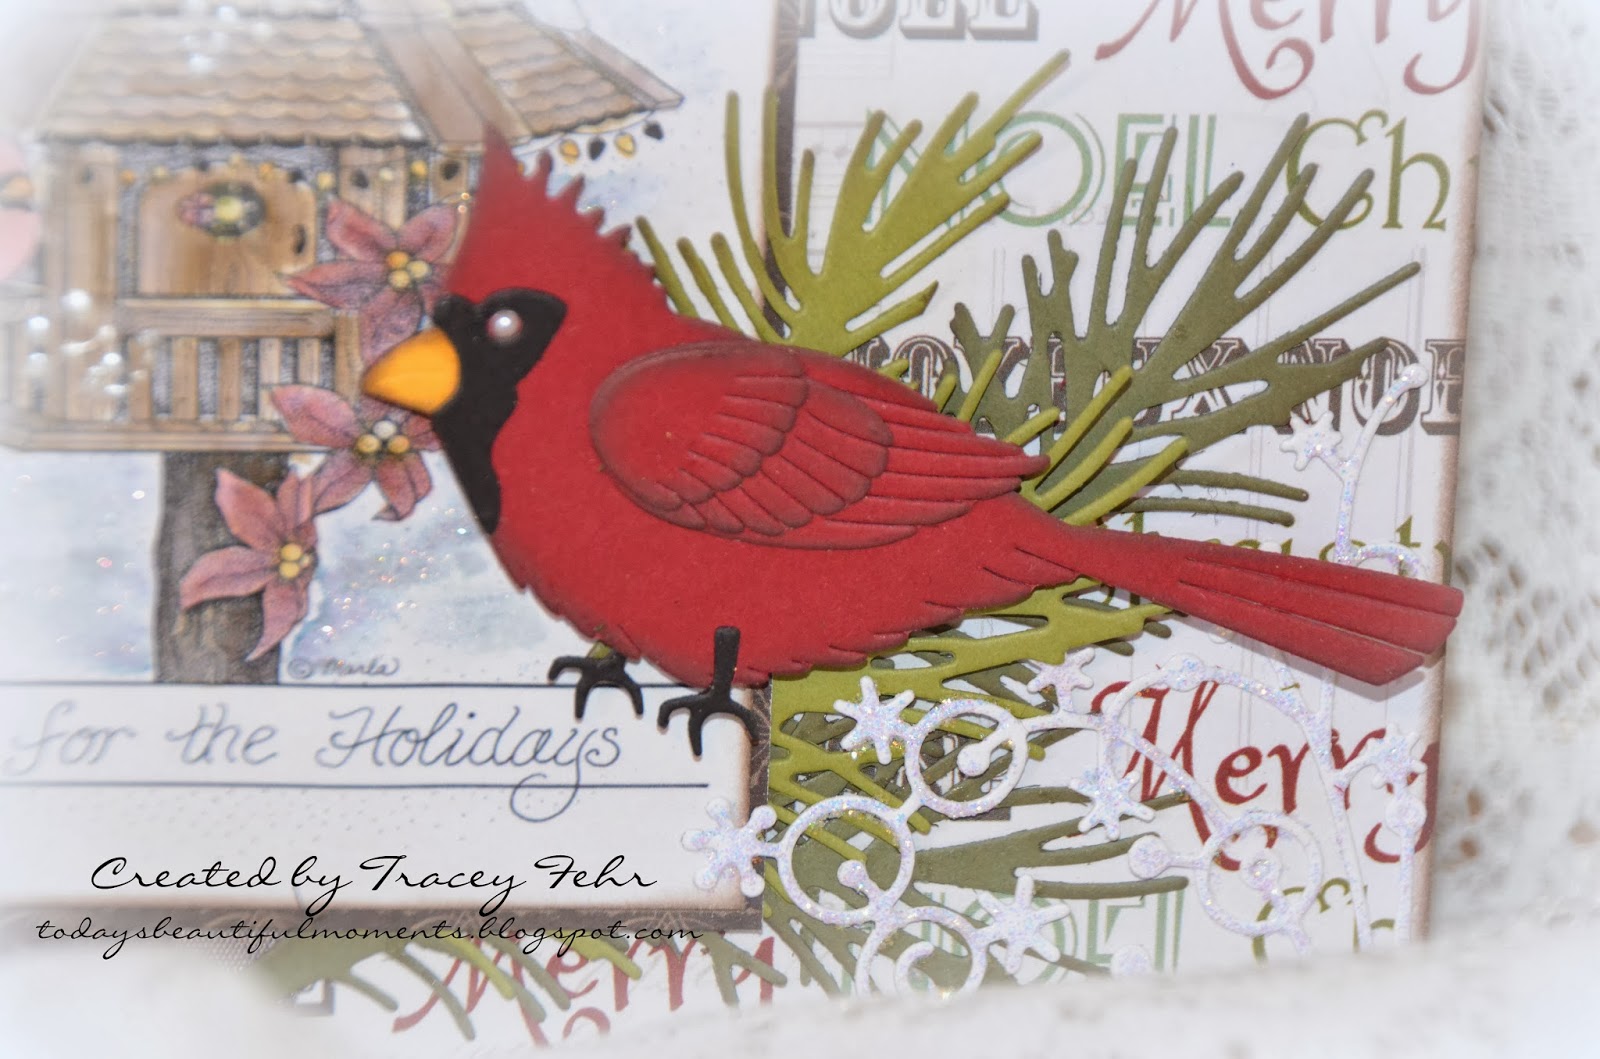
Now I must confess that I usually don't use card recipes as I find them absolutely challenging. However, I was kind of excited to be pushed out of my comfort zone this time.  I was so happy to be using the Squigglefly image "Cardinal Birdhouse".  I know... you're thinking why would you choose a Christmas image?  I have good reason, I need to keep preparing for the annual craft show I'm in and Christmas cards are my greatest sellers.
Here's a peek...and we'll go through the details in the next few photos...


As you can see, I managed to find two fantastic designer papers to use on this card!  I married them together with the ribbon to make nice joint where the two styles meet. 


I've colored up this gorgeous digi with my Tim Holtz Distress markers.  I added some glitter ritz around the birdhouse to give the illusion of shimmering snow...wish you could see it better.  Then I've added some liquid pearls for some dimension...and put 3 pearls on the background and one pearl for the cardinals eye.  That takes care of the 4 pearls or rhinestones portion of the recipe.  


Lastly, there were the 3 die cuts to take care of.  They are the cardinal, the pine leaves and in the very bottom corner you will see the snowflake swirl corner which I stickled in diamond Stickles to give it some shimmer.  
This came together quite quickly and I quite like the end result.  

Now, I hope I've encouraged you to tackle this recipe.  It was so much fun when I got down to it!  Don't forget to check out the projects the other DT members have created at The Crafter's Cafe.  We can hardly wait to see what you cook up!

Until next time...

This card has been shared in the following challenges...


Like to Read?

Hi!  Welcome Back!

I'm curious about something...do you like to read?  I love to read...just wish I had more time to do it!  My problem is that when I start a good book I accomplish nothing else until that book is finished cover to cover.  So you see why I reserve my reading for when we go camping...nothing but leisure time and housework and laundry don't suffer!  LOL
And, I must confess that I simply love books & the library!  New books, vintage books...it doesn't matter.  I love the textures, the smells...needless to say I would rather read a hand held book than read on one of my "i" devices or electronic reader. 

You may be wondering why I am talking to you about books and reading today.  Well, it ties in with our new challenge over at {Pin}spirational Challenges this week.

Are you ready for your {pin}spiring photo?
Take a look at this...


Isn't that just fantastic!  A few of the great classics!
We have some great sponsors again this week...


Bugaboo 
offering one lucky winner 7 digis of their choice!

...as well as...
A Day for Daisies 

 offering one lucky winner a $12 gift certificate!

and lastly...


Digital Delights
offering another lucky winner a $5 gift voucher!

A big shout out to our sponsors for being so generous and awarding such awesome prizes!

Now, let me explain to you where I drew my {pin}spiration from this week.  Of course it's the books...and of course...I had to go with a vintage styling 'cause you know that's my fave!  But I got to thinking about who taught me to read.  My mom always read to us and has always read to my children as well.  She always knew it was important for us to be good readers!  Thanks mom!  It's a tradition I've carried on with our children as well...and has helped them to become among the top in their classes.  Being a good reader just makes life better....any teacher will tell you that is why it's so important.  That led me to think about all the hard work teachers put into teaching kids to read.  I found an awesome digi stamp at TLC Creations and decided to couple that with my "bookshelf" mega stamp background.  I took the gold coloring from the {pin}spirational photo and decided to accent the card background, the matting for the digi image and color the globe hardware in gold as well.  I added some coloring to the globe with my Tim Holtz Distress Markers and then aged the images with brown ink, a touch of brown smooch spray and a touch of gold smooch spray over that!  The last finishing touch were the 3 black gem stones in the top and bottom corners.

Here's how it came out...


...and here's a close up of the digi stamp...


Now isn't that sentiment so true!

I hope that I've been able to get your creative juices flowing for this current challenge.  We would love to see your creation that this awesome photo has {pin}spired.  Don't forget to share with us over at the {Pin}spirational Challenges blog...you'll find more {pin}spiring creations there from the other design team members as well!

And hey, while you're at it, maybe there's a teacher you'd like to thank or write a little encouragement message to.  That's what my card will be used for!

Until next time...

This card has been shared in the following challenges...
Cards Galore Challenge Blog..."Add a Gem, Glitter or Candi"
One Crazy Stamper..."Anything Goes"
Dream Valley Challenges..."No Designer Paper" 
Digi Darla's Challenges..."Your Personal Style" (Vintage)
Paper Makeup Stamps Digi Makeover Challenges..."Anything Goes"
Without Words..."Occupations"


Let's Make a Mess!

It's been a little quiet around here lately!  I've been busy in the craft room, but have had little time to post lately!  Thanks for sticking by me and coming for a visit today!

Today marks the beginning of a new monthly challenge over at the Unstampabelles.  Our challenge is "Dare to Get Dirty"...and our twist was to document the mess along the way with pictures.

We have a wonderful sponsor for this challenge...

Sticker Store Craft Stickers
http://www.stickerstore.com.au/

Be sure to check out the Unstampabelles blog for the prize being awarded!

I will confess that I struggled with this one and wasn't sure which direction to go in.  It had been on my mind that my son needed Valentine's for his class party, and the store was not stocking anything that I felt was worthy of giving.  So, to get some inspiration I read over the "Ideas for Creations" which you can find on the tabs on the Unstampabelles challenge blog.  Well, the word "box" just jumped out at me.  I had a cutting file for my Silhouette from My Scrap Chick that I had been wanting to use which was a box treat card all in one! Now cutting with that machine can sure get messy with all the tiny pieces, and all the pieces need to be inked, glued, etc...but my version of "dirty" may be a little cleaner than others...I hope this works for you! 

Let me walk you through this "messy/dirty" process with a few pics...

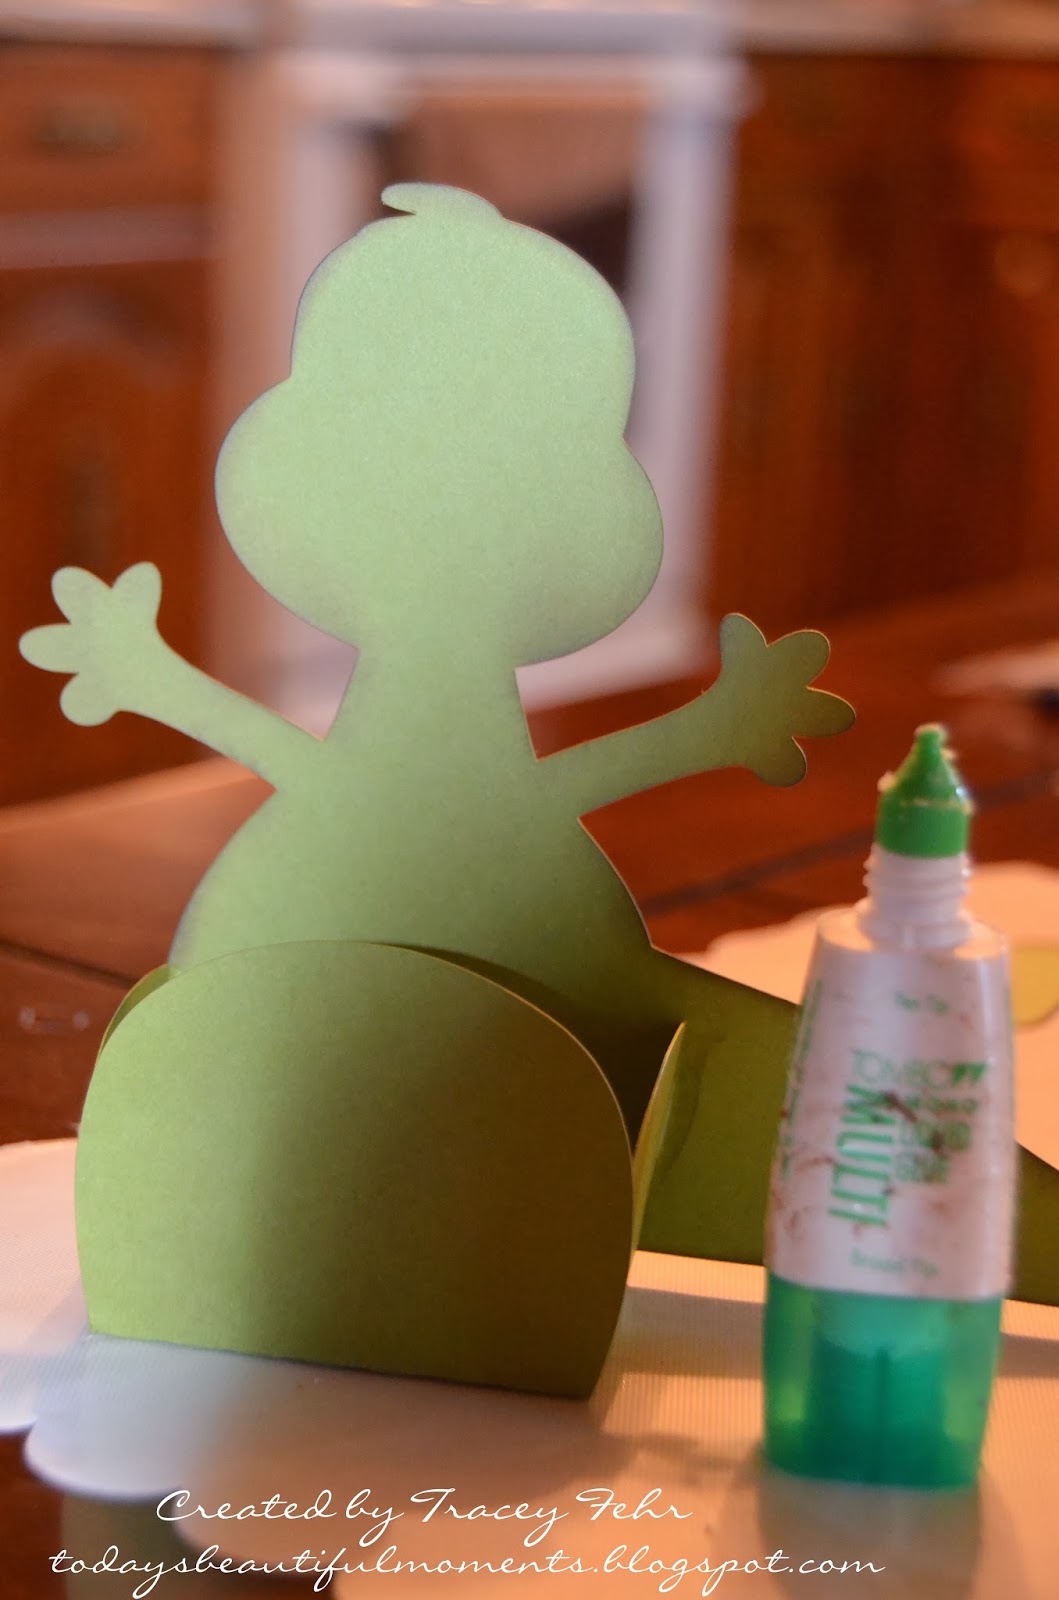
As you can see, it all starts out in little pieces in a somewhat organized mess...


The next step is to ink each piece individually...my fingers never stay clean in this process...


...and neither does my Splat Mat...


...and the glue...what can I say about this glue other than I despise it!  This glue is so sticky, my fingers are a complete mess by the time I'm done.  As you can see the glue bottle itself is is a complete mess...just from me handling it with the crazy stuff on my fingers.  And, it's almost impossible to wash off your hands when you're done...it sorta rubs off a while later.  But, I bought it...so I must use it!  LOL


We're getting closer to the finished creation...the shape is taking place...


Just let me get my fingers unstuck...I'll add some features and the remaining parts to this little guy....and...

 ...here's the finished project!


I'm happy to report our son loved this and is excited to be handing these one of a kind Valentine cards out in school at his party!  I guess I better get working because I have 16 more to make!

So, dig out those inks, paints, whatever you think you can make a creative mess with and get creating.  Don't forget to link up with us at the Unstampabelles so we can see your mess.  Remember our only rules are that your project needs to be a paper craft and you are not allowed to use any stamps on your creation.  Don't worry, it's not as hard as it sounds!

Until next time...

This creation has been shared in the following challenges...
Ladybug Crafts..."Be Mine"
Seemacrafts..."Valentine/Love"
A Gem of A Challenge..."All You Need is Love"
My Sheri Crafts..."Valentine - Use a Heart"
Open Minded Crafting Fun Challenges..."Show Some Love"
Delightful Challenges..."Anything but a Card...Love Theme"
Decorate to Celebrate..."Valentine Treat Bag"
Little Red Wagon..."Child's Play"
Challenges 4 Everybody..."Anything Goes"
Robyn's Fetish Challenge Blog..."Valentine Cards"

Thanks for visiting!

Thanks for visiting!