Hope in the Lord...

"But those who Hope in the Lord will renew their strength.
They will soar on eagles wings,
they will run and not grow weary
and they will walk and not be faint."
Isaiah 40:31

Is that not a wonderful promise?

This is the verse that I decided to create my latest Heartfelt Creations project around.
I decided that it would be perfect to create a canvas with.  A wonderful project to hang on your wall and be reminded daily of God's promise to us.
I've used the gorgeous Countryside Evening Collection paper pack, and this is where you will find this Bible verse along with more verse and occasion panels. 

Here's a peek at my canvas creation...


and here's a close up of the verse and bottom flower cluster...


I hope I'm leaving you inspired today!
Wouldn't a special handmade canvas be the perfect Christmas gift for someone this holiday season?
You still have time...and Heartfelt Creations store has so many beautiful paper packs to choose from!
Not to mention coordinating dies and stamps!

Be sure to check out all of the projects being shared by the design team today!
You'll never leave the Heartfelt Creations blog disappointed...well, maybe...but that's just because there aren't enough hours in the day to create each and every design!  LOL

Until next time...

HCPC3471 Tattered Collage PreCut Set
HCDP1229 Country Side Evening Collection Paper Pack
HCD752 Heartfelt Creations Cut Mat Create 2B Set (floral flourish & corner die)
HCPC3537 Sun Kissed Fleur Swirls PreCut Set
HCPC3533 Sun Kissed Fleur PreCut Set
HCD 734 Sun Kissed Fleur Die
273900 Zip Dry Paper Glue
048749 McGill Paper Shaping Tools and Piercing Mat
159223 McGill Paper Blossoms Molding Mat

Other Products Used:  scor tape adhesive, dollar store 7”x9” Artists Canvas, Zig 2 Way Glue Pen, Ranger Glossy Accents, Rangers Antique Linen Distress Paint, Spellbinders Majestic Squares Die Set, Memento Northern Pine Ink, Elmers Craft Bond Spray Adhesive, brown pine cone ink, BigShot Die Cutting Machine, 3D pop dots, Distress Markers (flowers – faded jeans, shaded lilac, stormy sky, old paper), distress markers (leaves – iced spruce, frayed burlap)

To begin with project, paint canvas and set aside to dry.  Choose two complimenting papers from the Country Side Evening Collection Paper Pack in the color scheme you wish to work with.  Also choose a sentiment from the verse/sentiment panels from the paper pack that you wish to feature in the center of your creation.  Cut the patterned paper (beige on my canvas) that you wish to have as your background to 8 ¾” x 6 ¾ “.  The second complimentary paper that you have chosen (blue in my example) will be cut to 8 ½” x 6 ½”.  Ink all edges of these papers including the sentiment panel with brown ink for an aged vintage feel.  Continuing to work with the smaller of the two background pieces, proceed to stamp the Tattered Collage PreCut stamp onto the center of the patterned paper with the Northern Pink Memento Ink.  Allow to dry.  Cut the largest die cut from the Spellbinders Majestic Squares die set in a coordinating solid color of your choice from the Country Side Evening paper pack.  Ink edges with the brown ink and adhere the sentiment panel to the die cut.  Now adhere the two background papers together.  Use a spray adhesive to adhere these assembled papers to the canvas.  Set aside to let adhesive set.  Moving back to the die cut and sentiment panel piece, apply 3D pop up dots to the piece.  Position and adhere to center of canvas. 
Cut 2 corner die cuts using the Cut Mat Create 2B Set from a soft cream color within the paper pack.  Adhere to bottom left corner, and top right corner (directions are looking at the canvas head on).  Moving along to the embellishing, stamp each image in the Sun Kissed Fleur Swirls PreCut set in the Northern Pine ink and allow to dry.  Once dried, color greenery and florals with distress markers listed above and fussy cut out the images.  Stamp Sun Kissed Fleur PreCut Set twice for the flowers shown on this sample.  Use the colors listed above to color the leaf and flower images (I have chosen to use two colors on some flowers and three on others to create depth and different looks).  Cut out images with the coordinating Sun Kissed Fleur Die.  Shape flowers using molding mat and shaping tools, creating as many dimensional flowers as you desire on your creation as well as leaving some just as single layer blooms. A few tiny flowers can be let unshaped and will be added to vines just as they are.  Working with the larger blooms, cover each petal and center with Glossy Accents to give them a beautiful shine.  Allow to dry.  (Leave smaller flowers that will go onto vines just as they are with no gloss added).  Snip apart the leaf die cuts to create 3 single leaves from each.  Die cut the floral flourish from the Cut Mat Created 2B Set three times with green patterned paper included in the collection.  One full die cut will be used on the bottom of the creation, the other two cut outs can be snipped to place them within the design on both top and bottom corners.  Ink each floral flourish die cut with the Northern Pine Memento ink trying not to be too careful as you want the green patterned paper to show through as well.  Now begin arranging your fussy cut images from the stamp set, the flowers, leaves and the flourishes until you are happy with the arrangement.  Once the final placement has been determined begin to adhere to the canvas.  Set aside for adhesive to dry.  Find the perfect spot on your wall to hang, or stand on easel stand!

Clean and Simple Vintage Fun

I'm back today with my last post for Pile it On Challenges.
I have enjoyed working with this wonderful group of ladies so much and this was such a tough decision to leave.

We have a fabulous challenge for you today...

"Vintage"

One of my faves of course.
I didn't have a lot of time to create this week, so I decided to go with more of a CAS style vintage.  The stamp set I received from Rogue Redhead Designs was just fabulous!  A big Thank You!
The ladies in this stamp collection reminded me of days gone by catalogue or pattern ads.
I wanted the image I chose to be the centre of the design.

Here's how it came out...


I've stamped her and the sentiments in black ink.  Once dried, I applied brown ink on the paper to give it an aged feeling.  I've chosen patterned papers that I felt represented eras gone by and that were quite feminine and complimented the gorgeous image.  I've added just a bit of color to the image, not coloring too perfectly as I wanted it to appear old.  All of the layered edges have been roughed up around the edges.  The final touch was the metal flower which so reminded me of a brooch from years ago when it was fashionable to be wearing them.

Our sponsor for the challenge this week is Rogue Redhead Designs!


They have some fabulous new stamps out for Christmas as well...be sure to stop by and check them out!

That's it for me today!
Hope you'll enjoy what's left of your weekend!
Be sure to take the time to check out the other wonderful creations at the Pile it On blog!
While you're at it, maybe take some time to play along!
I'd love to see your vintage creation!

 Until next time...

This card has been shared in the following challenges...


The Sweet Moment of the Season

Welcome Back!

It's Wednesday, which means it's a Heartfelt Creations inspiration day!
This week, the team was able to create with any Heartfelt Creations product line they desired!

I've had the Festive Christmas Collection sitting in my craft room for a bit now, and was excited to finally be able to dig into it!  This collection boasts beautiful shades of traditional Christmas colors with deep reds and gorgeous greens! 

And, not to mention the most traditional Christmas flower...the Poinsettia...I just could hardly wait to get creating those gorgeous holiday florals!
Were you aware that the shape of the poinsettia flower and leaves are sometimes thought as a symbol of the Star of Bethlehem which led the Wise Men to Jesus. The red colored leaves symbolize the blood of Christ, and the white leaves represent His purity!  There's also a fascinating Mexican legend behind this pretty Christmas flower...you can read up more on it here!  

Now, back to the business at hand!
Here's a look at what I was inspired to create this week...


...and a closer peek at the flowers...


I enjoyed myself so much creating this card!  Coloring, fussy cutting and creating beautiful flowers...it was just so much fun!
I hope I've been able to inspire you today!
There's still time to create some gorgeous Christmas cards...and this stunning product and paper line is sure to help you do that!

Thanks so much for stopping by today!
I do hope you'll take time to stop by the Heartfelt Creations blog to check out the fantastic inspiration projects the other talented design team members have created!
Settle in with a warm beverage, browse and become inspired!

Until next time...

  Products Used
 HCDP1 246 Festive Christmas Paper Collection
HCPC 3621 Dove of Peace PreCut Set
HCPC 3557 Christmas Poinsettia PreCut Set
HCD 734 Sun Kissed Fleur Die
273900 Zip Dry Paper Glue
048749 McGill Paper Shaping Tools and Piercing Mat
159223 McGill Paper Blossoms Molding Mat

Other Products Used:  white card stock, Spectrum Noir colored pencils 119, 117, 112, 058, 056, 047, 095, blending solution, Stampin Up Close to Cocoa Ink, Stampin Up Garden Green Ink, Stampin Up Cherry Cobbler Ink, Stampin Up More Mustard Ink,  Stampin Up Basic Black ink, Spellbinders Tapestry die, Ranger Stickles Champagne, paper doily, clear embossing powder, 3D pop dots, BigShot die cutting machine, Lindy’s Stamp Gang Bucket O Blood Red shimmer spray, heat tool, sponge daubers, premade 5”x7” card base

Instructions
Begin with a 5”x7” card base or create your own.  Select two coordinating background papers of your choice from the Festive Christmas Paper Pack Collection.  Cut both pieces to cover the card front.  The paper that you have chosen for the full background will remain in the 5x7 sizing.  The complimentary paper is to be die cut with the Spellbinders Tapestry die.  Once you have die cut the paper, cut down to the edges of the die cut portion making it a perfect size to mat against the background, ink both pieces of paper with brown ink, and adhere to the card.  Next adhere the doily to the center of the project. Choose a sentiment panel from the paper pack that you would like to use on the lower corner. Ink all edges of the piece with brown ink to give it an aged effect. Next, locate the premade scrapbook pages in the Festive Christmas Paper Collection and fussy cut the corner image with the poinsettias and baubles.  Also fussy cut the green round and red pointed dangling baubles from a second scrapbook page.  Ink all edges of the fussy cut items with brown ink.  Apply 3D pop dots to the corner die cut portion and position on card before adhering.  Position your sentiment panel as well before adhering.  Once happy with the placement of each of the pieces, secure onto the card. Proceed to adhere next fussy cut image with the round bauble covering the Merry Christmas sentiment bauble making sure to apply 3D pop dots to the pointed ornament so it flows with the rest of the dimensional images.   Begin with stamping the images you will need one dove image stamped on white card stock and as many flower images as you wish to create stamped on the light cream patterned paper from the Christmas collection.  On this creation I have used two stamp and cuts of the Poinsettia PreCut Set.  For the flowers, emboss with clear embossing powder while ink is still wet and set with heat tool.  Using the finger sponge daubers, apply the red ink and then a light coat of brown ink over it giving the flower a nice burgundy color. After inking, while ink is still wet, quickly remove a small amount between coats allowing a tiny bit of the cream colored paper to shine through. Use the yellow ink to give coloring to the center of the poinsettia.  Shape your flowers and layer as desired.  This creation has 3 various sized poinsettias that have two layers, and 2 poinsettias that have been layered three times.  Once flowers have been created, spray with shimmer spray and glitter centers.  Ink the die cut leaves with green ink and snip apart creating single leaves.  Set aside flowers and leaves and begin with coloring the dove image.  Once colored, apply dove image with 3D pop dots.  Then begin with flower arranging.  Once happy with your arrangement adhere to card.  Apply leaves among flower spray as desired.  Lastly, apply a few smaller flat poinsettia die cuts randomly around the sentiment portion of the card and glitter centers once adhered.  Send your card to a special friend or loved one for them to enjoy!

Love and Magic Filled Holidays

Welcome Back!

The snow is gently falling as I schedule this post, and thoughts of putting up the Christmas tree this week are filling my head!
It just all seems too early...and I'm just not quite ready for the white stuff!
But time just seems to keep flying by and there's no way of stopping it!

It seems like forever since I have been able to hide out in my craft room and just relax and put something together.  The stress of the craft sale is behind me and all went well, and now I'm just looking forward to working ahead on some of my various design team creations!

Speaking of design team creations, I want to share with you today the new challenge at Holly Jolly Christmas Challenges
You have lots of different ways to choose from to participate with us this go round.

We're having a...

"Color Combination Challenge"

There are six different color combinations for you to choose from...
(a) Red, Green, White
(b) Blue, White, Silver
(c) Red, Gold, Cream
(d) Blue, Brown, Cream
(e) Monochromatic
(f) Pink, Green, Kraft, White


I decided to go with the first combination...red, green and white.

Here's the card I created featuring those three colors...


I love this digi from Art by Miran.  It's called "Snow Kissed" and can be found in our sponsors Etsy store. 
The image has been colored with Spectrum Noir markers.  The cute heart die cuts are created with a Memory Box die and the BigShot.  The fabulous sentiment is none other than TLC Creations...love that digi shop as well!  Unfortunately, you cannot see it on the picture, but the falling snow on the image has been glittered with Glitter Ritz so the card has a gorgeous shimmer.  The patterned card base is a score I got at Michaels last year when they were blowing out their Christmas supplies!

As mentioned, we are sponsored this week by...


...who is offering one lucky winner 3 digis of their choice!

And we also welcome as a sponsor this challenge as well...


...who is offering another lucky winner 3 digis of their choice!
Terrific prizes to be won!

So, now the rest is up to you!
Choose the color combination that speaks to you and run with it!
Then, don't forget to link up with us at Holly Jolly!
Be sure to check out the other DT inspiration work as well and leave them some blog love!

Until next time...

This card has been entered in the following challenges...
 Love to Create Challenge Blog..."Anything Goes"
MelonHeadz Friends..."Add a Sentiment"
My Craft Creations..."Anything Goes"
Through the Purple Haze..."Use a Punch or Die"
The Kraftyhands Challenge Blog..."Christmas Cheer"
Alphabet Challenge..."T is for Traditional Christmas" (I've used traditional Christmas colors)
Creative Corner Challenges..."Christmas"
Art by Miran Challenges..."Anything Goes"
Winter Wonderland..."Frosty the Snowman"

New Heartfelt Creations Post

Good Morning Everyone!
Have you checked out the new blog post over at Heartfelt Creations yet?
There is tons of new inspiration being showcased by all of the new design team members!
There are several different collections that have been used, so you will get a great sampling of ideas!

Here's the card I've created that's being showcased today...


I absolutely love this Sunflower Collection!
I had so much fun hand coloring the shaped sunflowers and then die cutting them.
The paper in this collection just makes it so easy to put together a card!

Here's all the info on how this project was put together...

Butterfly Dreams Any Occasion Card

Products Used:

Project Instructions:

Other Products: tan colored cardstock, deep yellow colored cardstock, white cardstock, Ranger distress markers (mustard seed, wild honey, vintage photo, tea dye, rusty hinge, fired brick, dried marigold and spiced marmalade), brown ink, black ink, embossing powder, heat gun, Tombow glue, double sided tape, 5x7 pre folded card base, 3D foam dots, raffia ribbon, clear acrylic stamp block, BigShot die cutting machine, thin gold cording, scissors

Instructions:
Begin with a pre folded 5”x7” card base.  Select a large 5”x7” blank decorator panel from the Sunflower Paper Collection pack.  Select a smaller sunflower and butterfly image panel as well as a piece of designer paper to use as matting behind the sunflower image panel.  Lastly, choose a tag image that you wish to incorporate into the design as well as a sunflower strip and several leaves from a panel that you will fussy cut to use along the bottom of the creation and a sentiment.  Proceed with inking all of the edges of these pieces with a brown ink.  Put pieces aside and move on to stamping the large Classic Sunflower PreCut background.  Cover it with embossing powder, remove excess and then heat with heat gun.  Use distress markers to color flowers.  You will need one midsized double layer flower, two midsized single flowers and 2 small single sunflowers.   Shape flowers.  For an excellent instructional video on how to shape the flowers in this collection, please go here.  Set them aside and allow them to dry.  Shape the leaves you have fussy cut at this time as well.  Take two of the small ladybug images that have been die cut when you die cut the flowers from the background stamp, color them red and set them aside.  Stamp butterfly image twice and set aside to dry. 

Going back to the base card panels, take the sunflower image you have fussy cut and adhere to the bottom of the card background panel as pictured.  Then adhere the background to the 5”x7” card base. Taking the image panel and the matting designer paper which is just slightly larger than the image panel, proceed to adhere them together.  Measure out some thin gold cording by looping it around the image panel you have just matted approximately 4 times.  Tie tag on with cording.  Position the sentiment you have chosen above the sunflower image and adhere to panel.  Adhere the decorator panel to the card front with 3D pop up dots. 

Arrange shaped and dried flowers loosely on the card until you are happy with the arrangement, adding in several leaves you have fussy cut and shaped as well.  Adhere them to the card.  Adhere the two ladybug die cuts tucked in among the flowers and leaves.

Returning to the two stamped butterfly images, color them exactly the same with distress markers.  Attach one on top of the other by gluing only the body of the butterfly, allowing wings to bend up so the butterfly becomes 3D and resembles the insect in flight.  Place in the top corner of the card above the tag with 3D pop up dots as pictured. 

Send to a friend or loved one to enjoy!

Be sure to check out the other stunning DT projects on the blog!
You won't be disappointed! 

Until next time...


Box It Up

Good Morning, Afternoon or Evening depending where you are!

Today starts a new challenge over at Unstampabelles.
This month we are challenging you to ...

"Box It Up"

with the twist of doing a tutorial and showing us how you made it. 
Feel free to use pictures or video!
I just can't wait to see what you come up with!

We are sponsored this month by...


Be sure to check out the Unstampabelles blog for the prize being offered!
I needed to make a baby gift package the other day and I thought this would be the perfect challenge to do it with...I needed a box anyway!

I started browsing through my SVG cutting files and found the "Big Boutique Boxes" kit from SVG Cuts!  I love their cutting files!
For the real tutorial on this cutting file be sure to check out their website in the link above.
I promise that it is much better than the photo tutorial I'm about to show you!  LOL

First I must apologize for the poor quality photos...it was evening and I needed to get them done and the lighting was less than great.

Ready...

The first step was to get the Cameo humming!
I hope no one feels I cheated as I didn't make my box by hand!  LOL

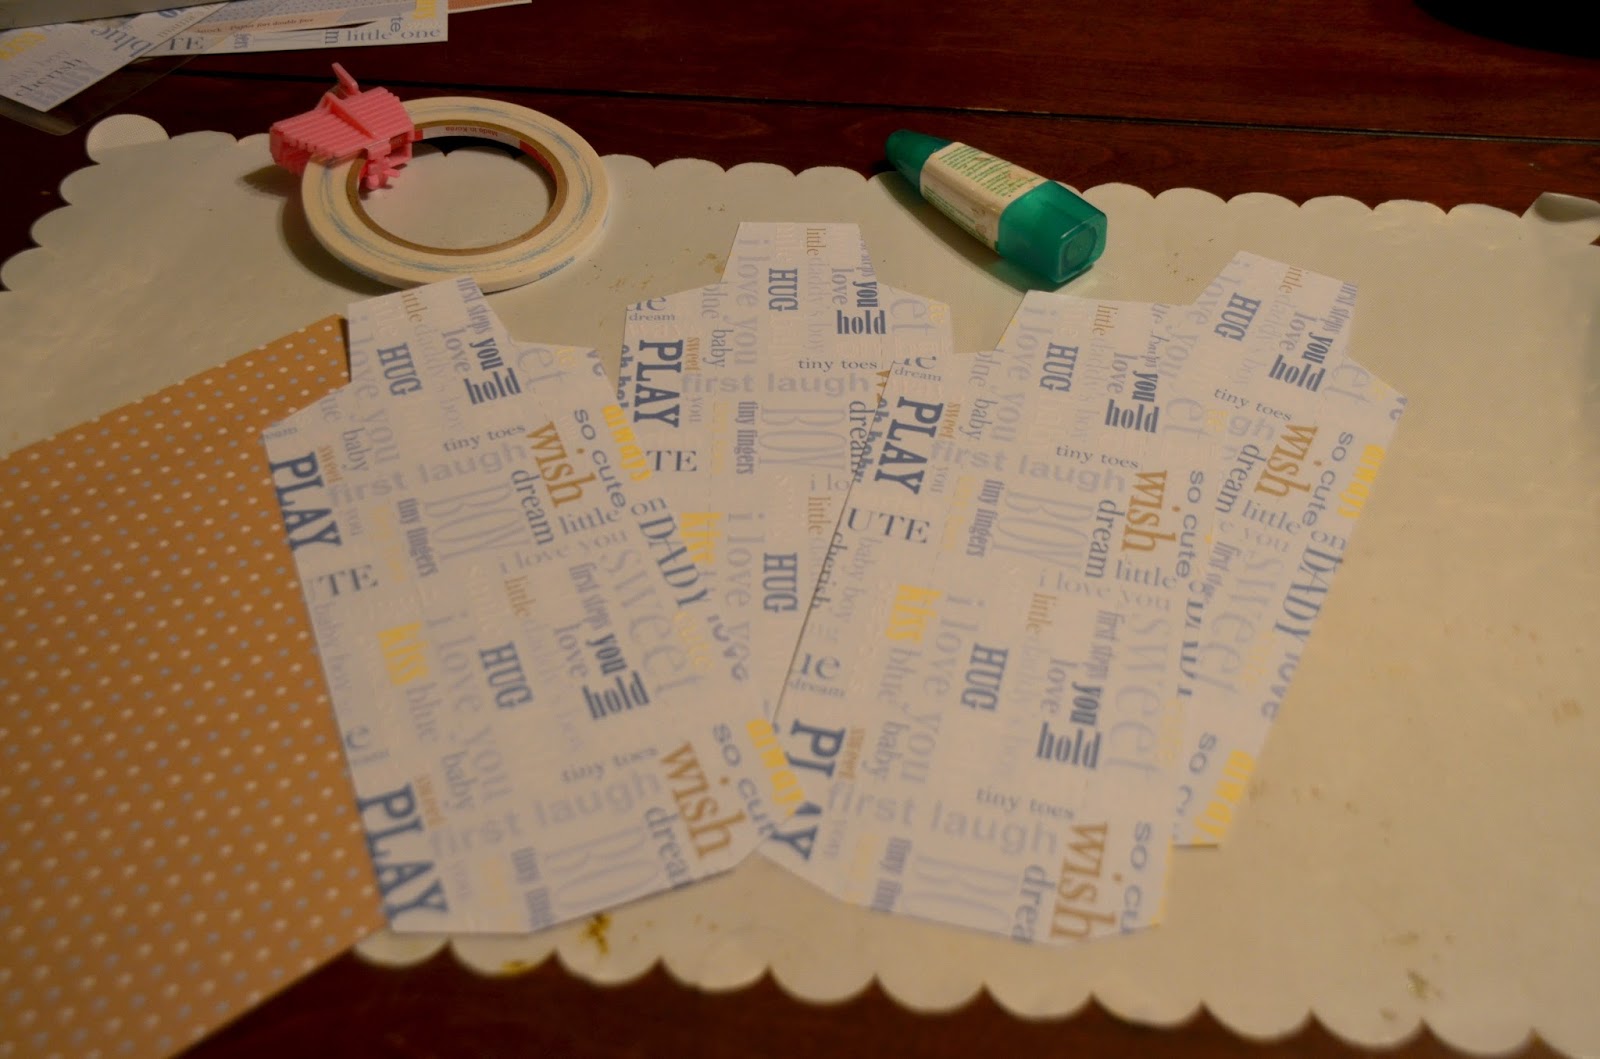
As the pieces were being cut I started setting them aside, separating them into box top pieces and box bottom pieces.  (I'll only show you the assembly of the box top as the bottom is a repeat and I'm sure you'll get it!)


Then it was time to start folding the pieces for the top of the box...


....and then the fun and gluing began...


The box skeleton started taking shape...


...and then came time to add the top panel to the creation...


....here's a shot of the top of the box glued and finished...


...and then the real fun began..
the embellishing!
I had a few baby files from the Silhouette Design Store and decided to created a baby banner as well as a pair of baby booties.  Topped off with some flowers and buttons...I thought it came out pretty cute!

Here's a look at the completed project...


and how about a close up of the embellishing...


I hope you've been inspired to create a box of your own. 
Then be sure to link it up with us at Unstampabelles...just remember NO stamping on the project!
It's really not as hard as it seems!
You only have time until the end of the month...so get working!

Until next time...

This creation has been entered in the following challenges...

Play it Cool...

Hi Again!

I'm hear with my Pile it On DT hat on!
We have a new challenge beginning today...and we are...

"Feeling Cool"

This week we want to see your winter/and or cool colored creations!

We are once again sponsored by...


...who are offering one lucky winner 3 digis!
Nice!

I found a cute digi that Dilly Beans was offering as a freebie.
I thought this bunch of snowmen would be perfect for this challenge.

Here's a peek at what I made...


I had a chance to use my new Spellbinders Icicle die and love it!  I've added Aleene's glitter snow to the top of the icicles and have actually used Crackle Accents on the pieces of ice themselves.  They shine like ice and have the tiny cracks you find in the real thing.  I've tried to stick to cooler tones of colors.
A fun and simple card!

Now it's your turn!  Create a cool themed Christmas card, use cool colors...the choice is up to you.
Be sure to check out the Pile it On blog to see the other fantastic creations created by the rest of the DT!

Until next time...

 This card has been shared in the following challenges...

A Fond Farewell...

A second posting today...WooHoo!

I'm back for the last time here with Christmas Stampin' All Year Long!
I have loved working with these very talented and wonderful ladies and am sad to say goodbye!
It's been a pleasure!

This week we have a sketch challenge for you...

https://blogger.googleusercontent.com/img/b/R29vZ2xl/AVvXsEiHAPb7xp1vMg_gMnZHI2ZgCwSwy8_6w5VqzJxb0GZ9qRZ22AcX5B-GDLwNRDAEtRMhKcii_xR3cfmJxyz7X7Cb7C7V1w0tLm_Li76vTHWZfNDjuWFCDWdZjE0VxYh63Hv9GpltVeSVVWXg/s1600/Mojo364Sketch.gif

We do not have a sponsor for this challenge, however one lucky winner will be awarded a Guest Designer spot in the month of November with CSAYL.
How fun!

I decided that I wouldn't stray from the sketch, but would keep it pretty much as simple as it is.

Here's my take...


I sat down and decided that I wanted to make one last simple card for my craft sale tomorrow.  I hauled out some of my Christmas papers and decided that I would like to use my Heartfelt Creations Christmas paper pack.
I love the picture panel.
The only embellishing I've done is to ink all of the edges with brown ink and to use some Glitter Ritz on the star!

It's not a hard challenge this week at CSAYL.  All you have to do is plan a card resembling the sketch!  Perfect to do a quick and easy creation...that's one less that you have to make when the busy holiday season starts!
I can hardly wait to see what you create!

Until next time...

This card has been shared in the following challenges...
Completely Christmas..."Anything Goes - Add a Sentiment"
Jingle Belles..."Not a Creature Was Stirring"

Holiday Confusion

Happy Friday...and Happy Halloween!

I'm back to share a card with you that I've created for the Scrapbooks by Design blog and online store!

Now I bet you're thinking I'm coming at you with a Halloween themed card...but no...I decided I was going to be like the local retailers and promote Christmas today!  Doesn't it seem strange to have the Halloween section and the Christmas section out in your local store at the same time?  LOL

I fell in love with Graphic 45's "Twas the Night Before Christmas" paper pack and think I actually had to wipe away a little drool!  I was so excited when it arrived in the mail!

Take a peek...

Twas The Night Before Christmas 12 x 12 Paper Pad 

Isn't it fantastic?
It's also available in several different sizes.  I've used the 12x12, and there are 8x8 and 6x6 paper packs as well.
Scrapbooks by Design also carries the coordinating decorative chipboard, stickers as well as tags and pockets.

I was pleasantly surprised when I opened the paper pack and saw that there were templates for several elements included on the front and back covers.  I decided to use the small envelope and tag templates and incorporate them into my card design.

Here's a look at the templates I used in my creation...


Here's how it came out...


After I created the envelope I cut off the closure flap so it would remain open for the tag to be inserted.  I fussy cut the Santa image and adhered it to the front of the envelope.  I cut the tag from a piece of the decorative paper and tied some green and red ribbon to the end.

Here's a close look with the tag peeking out...


I've fussy cut most of the elements on this card from the paper pack itself. All of the pieces have been inked with a brown ink to make the card seem aged. The snowflakes have been cut with my Silhouette Cameo and have then been glittered.  The Santa and reindeer in flight is created with a metal die and The BigShot, however I'm not sure of the maker.
The sequins are Lawn Fawn brand...and I noticed that they are no longer available in the Scrapbooks by Design Store.

Well, I hope I haven't created too much holiday confusion for you!
It really is Halloween today...so please keep a watch out for those little trick or treaters tonight!
In between answering the door and handing out treats, take time to check out the Scrapbooks by Design store...you're sure to find something to inspire you!

Until next time...

This card has been entered in the following challenges...

Thanks for visiting!

Thanks for visiting!