Showing posts with label rubber stamps. Show all posts

Sweet Treat Delivery for You...

Hello and Welcome!
I'm so glad you're here!

Today I have a fabulous share featuring the Sugarspun Collection from Heartfelt Creations!
This project is the little sweet treat creation that I shared recently in a Facebook LIVE on the Heartfelt Creations main page. 

I decided that a cute cupcake shaped note card really would be adorable delivered in a bakery style box...so I got to thinking that a shadowbox card base from the 6"x6" Foldout Cards - White assortment from Heartfelt Creations would be perfect! I could assemble a little scene on the inside so it looked like a little bakery front window, and then do a little accessorizing on the outside... and voila...would't this be so cute to deliver to someone special!

...here's how the project turned out... 


I decided to do some paper piecing and heat embossing to make these embellishments go quickly rather than taking the time to ink or color. Paper piecing is such a great option for using up scraps of paper and giving your stamped images a fun look! I opted to heat emboss with a white embossing powder to give the cupcake a "frosted" look!

...I put together a quick pictorial for you which shows how easy it is to paper piece...


While this project may look daunting, it really is quite quick and easy!
You can follow along with the LIVE video here if you're wanting to recreate this sweet treat and packaging!

...here's a quick peek at the adorable card that was place inside...


If you haven't already snatched up your Sugarspun Collection...be sure to!
This is such a fun collection to play with and will appeal to all ages...both the young and the young at heart!

Until next time...

Quilted Patchwork Daisy Greeting Card...


Welcome! 
I'm so glad you've stopped by today!

It's another Heartfelt Creations Wednesday, and today I have a project to share with you that I created with the Patchwork Daisy Collection!

Did you know that the Patchwork Daisy Collection and previously released Buttons and Blooms Collection pair together perfectly! They both have those charming patterned daisies which are just adorable!

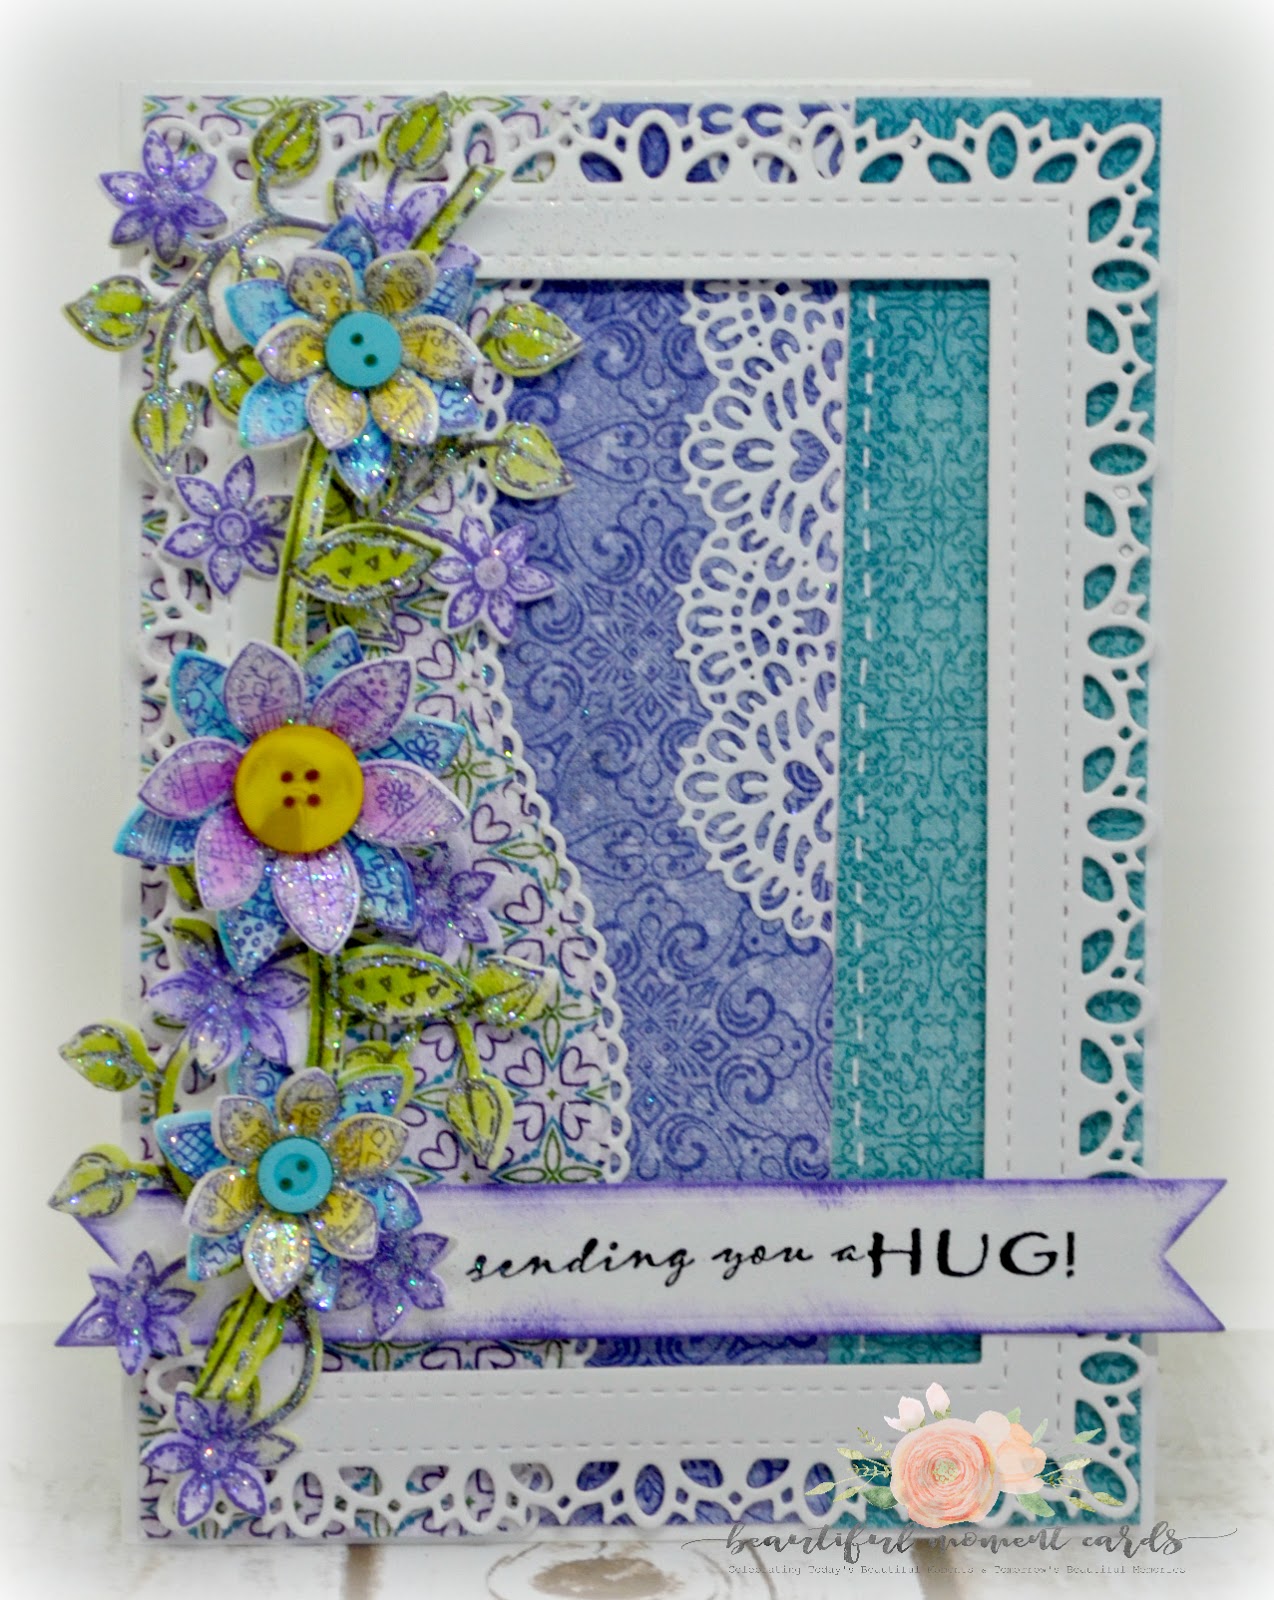
I opted to use the new border dies within the Patchwork Daisy Collection. I chose to snip it apart to use it as a free standing embellishment. As I was working with the dies, I decided that it might be fun to create a background with them...and throw in the lace like accent from the Sweetheart Borders Die.

...here's how that background came together...


I chose to use the outer frame portion from the Intricate Swirl Frames Die to frame up the background. I popped the frame up off of the card front with some foam tape. I then die cut the sentiment banner from the Arrows and Banner Die, stamped the sentiment and then inked the edges of the banner with Ranger Archival Ink Pad - Deep Purple. I adhered the sentiment strip to the card base using dimensional foam tape.

I stamped all of the floral images onto white card stock using Ranger Archival Ink - Deep Purple. Using my Stack and Store Daubers, I colored all of the images as seen above. I die cut the images using the coordinating dies, and then did a little bit of shaping with my Deluxe Flower Shaping Kit. I assembled the floral cluster as shown. (For more detailed instructions, please see end of blog post.)

...here's a closer peek at the papers I've used to create this project, as well as the pretty patterned flowers...


As my last and final step I used a designer dries clear adhesive to apply glitter to all of the leaves, flower petals and daisy flourishes!

I was pleased with how this card turned out...and I hope that you have been inspired to create your own backgrounds using decorative papers.

Be sure to check out the Heartfelt Creations blog to take in the rest of the creative projects the design team have designed for your inspiration!

Until next time...
Project Supplies and Instructions


Other Products Used: white card stock, paper trimmer, white gel pen, assorted buttons, scissors, foam tape 

For more tips on creating with the Patchwork Daisy collection, watch the tutorial at https://youtu.be/v5BEpcSlmoI.

Create a card base from white card stock measuring 5” x 7”. Next select the patterned papers you wish to use in your background. Die cut a curved eyelet edge onto one larger piece of paper using the Eyelet Border Basics Die. Next, measure out the approximate sizes you will need for the other two layering pieces, both will remain having straight edges.

Die cut an eyelet trim border piece from white card stock that coordinates with curve of the piece of patterned paper. Adhere it to the back of the patterned piece as a second eyelet layer using dries clear adhesive as shown.

Die cut the lace like accent piece from the Sweetheart Borders Die from white cardstock. Trim down to the size you wish to use as accent on background. Adhere to back of layering piece using a dries clear adhesive as shown.

Adhere your layering pieces to the card base as shown, beginning with the center most section so the other die cut accents overlap.


From white card stock, die cut the large frame from the Intricate Swirls Frame Die, and one banner from the Arrows and Banner Die. Using Ranger Archival Ink Pad – Jet Black, stamp sentiment found in the Cheerful Note Sentiments Cling Stamp Set. Using Stack and Store Dauber, ink all edges of banner using Ranger Archival Ink Pad – Deep Purple.

Using a dimensional foam or pop dots, adhere frame and sentiment banner to card front as shown.

Stamp one inking of each of the illustrations found in the Patchwork Daisy Border Cling Stamp Set, onto white card stock using Ranger Archival Ink – Deep Purple. Color leaves on all stamped images using Stack and Store Daubers and Ranger Archival Ink – Leaf Green. Color daisies on large border die cut using Stack and Store Daubers and Ranger Archival Ink – Forget-Me-Not. Color smaller daisy flourish flowers using Ranger Archival Ink – Deep Purple. Die cut all images using coordinating dies. For large daisy border embellishment, using a scissor, snip entire border free so you have a free standing embellishment. Shape all embellishments slightly using Deluxe Flower Shaping Kit.

Stamp one inking of the mid sized and smaller daisies found in the Buttons and Blooms Cling Stamp Set, onto white card stock using Ranger Archival Ink – Deep Purple. Color two smaller blossoms using Ranger Archival Ink – Buttercup, and one mid sized flower using Ranger Archival Ink – Cactus Flower. Die cut using coordinating dies, and shape slightly in the center using your Deluxe Flower Shaping Kit.

Adhere smaller daisy flourish to top of card front, and larger flourish to bottom. Adhere daisy border die overtop as shown. Layer small yellow daisy flowers over daisy images on top and bottom of border, and the larger pink flower in center.

Using a dries clear glue, apply glitter to all leaves and petals. Lastly, using a white gel pen, add stitching to straight background panel as shown.


Black Friday Fun with Heartfelt Creations...

Hello and Welcome!
Happy Black Friday!  Have you been busy shopping?
Have you been shopping for Christmas gifts, just great deals or perhaps a little treat for yourself?

Well, Heartfelt Creations has created a whole new line of products to join in on the fun for Black Friday!  Have you already seen all of them?  There are so many to choose from...ring bound journals with several different journal page options, new flower shaping molds, new cling stamp sets that can be utilized with the journal collection or on their own!  The options are endless to using all of these products!

Now, I know things have been a little slow here on the blog!
For several weeks I was out on the SnapOn truck with hubby as we were running our annual clothing promotion...it's a big job but something I always look forward to.  Life in general has been a little hectic but I knew that I wanted to take time out of my busy days to create something with one of the items in the Black Friday release no matter how simple it might be!

So, I headed down into my craft room and decided I would showcase one of the new stamps from the 
Words of Comfort Cling Stamp Set!  This set is just so wonderful for sending cards of comfort or encouragement! 

Here's how my project came together...

I also have used the new 3D Floral Basics Shaping Mold to create some lovely Flowering Dogwoods!
Those molds sure can assist you in creating a bunch of flowers quickly and without any strain on your hands.

If you look closely, you can also see that I've used the large swirling floral die cut from the Sweetheart Borders Die from the Heartfelt Love Collection!  I've layered it over top the large card creator background die to add a lacy and feminine look under the floral branch.

Here's a closer look at the floral cluster...


I've used some of the new string stamens!  They just add such a realistic look to the flower centers.
(Sorry...I know the photos for this post aren't the best as I couldn't get any decent sunlight!)

I've added some Crystal Clear to the petal tips on the shaped dogwoods and have added some glitter Nuvo drops in small clusters on various places the card!

I do hope you've enjoyed my quick and simple share here today!
I won't keep you from your Black Friday shopping any longer!  LOL
 Do be sure to stop by the Heartfelt Creations blog to check out the other amazing projects the rest of the design team have come up with to showcase all of the fantastic products being released today!

Until next time...
Project Supplies and Instructions
  
Other Products: Gemini Die Cutting Machine, Big Shot Die Cutting Machine, white cardstock, VersaFine Gray Ink, hot glue gun, paper trimmer, pencil, scor tape, water, spray bottle, Memento Dye Ink Pad – London Fog, Spellbinders Exquisite Labels Eleven Die, pop dots, MISTI, Nuvo Glitter Drops – White Blizzard

For more tips on creating with the flower shaping molds, watch the tutorial at https://youtu.be/FSdPL7nXvQE.

For more tips on creating with the Flowering Dogwood collection, watch the tutorial at https://youtu.be/gI8RqHAt3vE.

For more tips on creating with the foam paper & stamens, watch the tutorial at https://youtu.be/Oma6ctVmUD0.

Create a 5” x 7” tent card base. Locate a blue background paper within the Flowering Dogwood Paper Collection and cut to be just slightly smaller than card base – cut one for card front and one for inside of card. Ink all edges with Memento London Fog Ink and adhere to card base and inside of card.

Locate the grey and blue tinted small card panel with dogwood flowers within the paper collection, trace center of Spellbinders die onto decorative paper and cut using scissors. Ink all edges with Memento London Fog Ink.

Die cut large Spellbinders card front, midsized card inset and the large floral die from the Sweetheart Borders Die from white cardstock. Ink edges of both Spellbinder die cuts with Memento London Fog Ink. Adhere card front die cut to card base using a dries clear glue. Adhere Sweetheart Borders die cut to card base on the side where floral cluster will appear using pop dots matching edge of die cut to edge of Spellbinders die cut.
Stamp sentiment from Words of Comfort Cling Stamp Set onto white midsized Spellbinders die cut using VersaFine Gray Ink. Using pop dots layer sentiment onto dogwood printed die cut and then adhere to card base with pop dots.

Using VersaFine Gray Ink, stamp one inking of all flowers and foliage in the Flowering Dogwood Cling Stamp Set, and one inking of the dogwood branch from the Flowering Dogwood Branches Cling Stamp Set. Die cut using coordinating dies.

Color flowers using daubers and ColorBox Rouge and Lime Pastel inks, foliage using Lime Pastel and Olive Pastel inks, and the flowering branch using Rouge, Olive Pastel and Creamy Brown inks. Shape flowers using 3D Floral Basics Shaping Mold as per video link above. Shape foliage and flowering branch using a spritz of water and Deluxe Flower Shaping Kit. Create one large double dogwood blossom, one midsized double blossom and one small single blossom. Adhere flowering branch to side of sentiment. Adhere shaped dogwoods and foliage to floral branch as shown.

Using a dries clear adhesive, apply Crystal Clear to shaped flower petals. Lastly, add a touch of transparent glitter to preprinted images on decorative paper and single flowers on branch using a dries clear adhesive and finish with several clusters of White Blizzard Glitter Nuvo Drops as shown.

Thanks for visiting!

Thanks for visiting!