Birthday Greetings...

Hello my friends!
How are you doing?
I'm so happy to see you here today!

It's another Heartfelt Creations Wednesday, and I have one last project to share with you featuring the Lush Lilac Collection!  Actually, for this project, I've incorporated a couple of different collections!

Let's take a peek...


I was paging through the Heartfelt Love Paper Collection looking for a pretty sentiment that would work with the Lush Lilac Collection and came across these pretty birthday wishes. I decided I would cut it down to fit on the front of the card base and mat it with the same lilac patterned paper that I chose for the background mat. To add some extra elegance to the sentiment, I opted to top it with one of the decorative die cuts found in the Window Box Elements Die.

As I looked over the florals on the sentiment panel, I knew I wanted to try to duplicate the aster style flower and decided that perhaps the Enchanted Mum would be able to pull the look off if I pinched the ends on each of the petals giving them a pointed look.

Here's a little closer peek at how it turned out...


I love the bird cage die cut...it's so very elegant...and I thought it would be so pretty surrounded in a cluster of flowers. I've colored the lilacs with a hint of blue paired with a soft purple. All of the flowers have been stamped onto white card stock using a black permanent ink. They've been die cut using the coordinating dies and have been shaped using the coordinating 3D shaping molds and finished off with a hint of shaping by hand using the Deluxe Flower Shaping Kit. To tie the elegant theme together, I opted to use some half pearls for the lilac centers as well as clustered on the top and bottom corners of the card.

All of the die cuts have been hand colored using Derwent Inktense Water Color Pencils and the Tombow Dual Brush Marker. These pencils are just beautiful to work with and blend so easily.

Of course, the icing on the cake is always the glitter on these dimensional cards!
I've opted to use the Crystal Clear glitter on the petal tips on the Enchanted Mum and have used an ultrafine transparent glitter on the preprinted images as well as the lilacs.

Well, that pretty much sums up my share for today!
I sure hope you've enjoyed!  Thanks so much for visiting!

Be sure to head on over to the Heartfelt Creations blog as well to take in the magical spring time creations the rest of the design team have come up with for your viewing pleasure and inspiration!

Until next time...
Project Supplies & Instructions


Other Products: white card stock, Gemini Die Cutting Machine, BigShot Die Cutting Machine, paper trimmer, VersaFine Black Ink, half pearls – small, medium and large, VersaColor Pine Cone Ink, pop dots, Inktense Water Color Pencils, mister bottle, water

For more tips on creating with the flower shaping molds, watch the tutorial at https://youtu.be/FSdPL7nXvQE.

To see how to shape the Enchanted Mum, watch the video at https://youtu.be/jJBwQyyza6g.

For more tips on creating with the Lush Lilac collection, watch the tutorial at https://youtu.be/KDbdzC0MnAI.

Create a 5” x 7” card base from white card stock. Locate the lilac patterned paper in the Lush Lilac Paper Collection. Trim a background mat just slightly smaller than the card base. Ink all edges of the mat with VersaColor Pine Cone Ink.

Locate the sentiment card panel as shown in the Heartfelt Love Paper Collection. Trim down to fit onto card base. Trim a mat from the same lilac patterned paper used for the background mat slightly larger than the sentiment card panel. Ink all edges using VersaColor Pine Cone Ink. Adhere the smaller mat and the sentiment panel together and adhere to card base using pop dots.

Die cut the bird cage from the Lush Lilac Collection, as well as the decorative accent from the Window Box Elements Die from white card stock. Shape bird cage slightly and adhere to card base as shown. Adhere decorative accent over top sentiment.

Stamp one inking of the Lilac blossoms, Enchanted Mum, scroll, and flower spray included in the Lush Lilac and Umbrella Spray Cling Stamp Set onto white card stock using VersaFine Black Ink. Color all die cuts, as well as two smaller dragonflies from the Enchanted Mum Cling Stamp Set using Inktense Water Color Pencils and blend using Tombow Dual Brush Marker. Die cut using coordinating dies.

Shape the two smaller Enchanted Mum die cuts using Floral Basics Shaping Mold. For full instructions on how to use the shaping molds, please see video link listed above. Shape slightly with Deluxe Flower Shaping Kit after molding. Pinch each of the petal tips together to form pointed petals. Adhere mums together to create a double blossom. Adhere prills to center using a dries clear glue and set aside to dry.

Shape the Lilac blossom die cuts using the Lush Lilac Basics Shaping Mold. For full instructions on how to use the shaping molds, please see video link listed above. Shape slightly with Deluxe Flower Shaping Kit after molding. Set aside.

Shape flower spray and scroll slightly. Adhere to card as shown. Position flowers, as well as dragonflies as shown and adhere to card front. Add small half pearls to lilac blossom centers. Adhere clusters of pearls to top and bottom of card front as shown. Adhere Crystal Clear glitter to petal tips of mum using a dries clear glue. Apply dries clear glue using a fine metal tip on adhesive bottle to printed images as well as lilac blossoms and sprinkle with an ultrafine transparent Crystal glitter.


Have a Sweet Day...

Welcome crafty friends!
I'm so glad you're able to pop by for a visit today!
It's another Heartfelt Creations Wednesday, and I have another share for you today featuring the Lush Lilac Collection!

Let's take a peek....


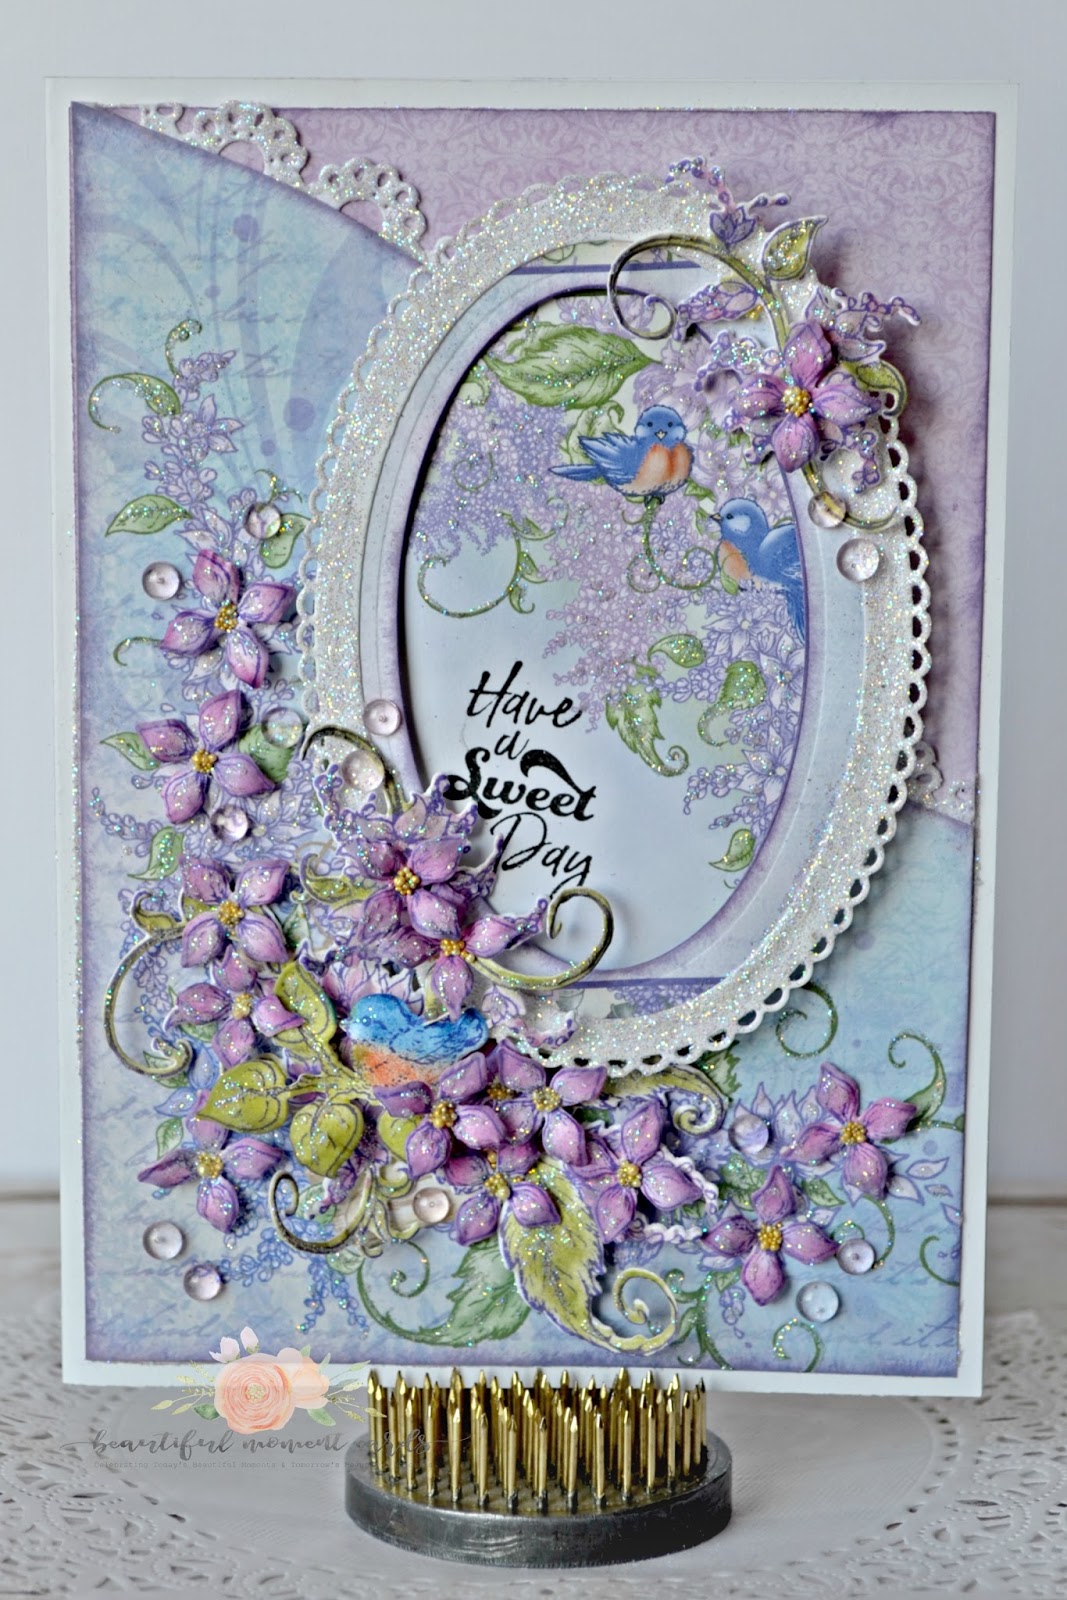
I fell in love with the premade card panel with the birds and thought it would make a great image for an any occasion card!  I used the Eyelet Oval Basics dies to cut out the main image and to create the frame for it. I glittered the frame using a Qtip along with a dries clear adhesive and transparent glitter. I adhered it to a smaller piece of decorative patterned paper to create the frame. I've then used pop dots to the back of the frame and adhered it to the focal image which I have stamped first with a sentiment from the Lush Lilac Collection.

Here's a closer look at the frame...


As you can see in the lower corner of the photo, I've also added a coordinating bird from the Singing in the Rain Collection. I've done two small lilac sprays on the top and bottom of the frame to give it some added interest.

To create the lilac cluster on the bottom of the card, I've used the floral cluster from the Lush Lilac and Umbrella Spray Cling Stamp Set as a background layering piece.  I've then added the small bird and my shaped lilac blossoms.  The Lush Lilac shaping mold makes shaping these delicate blossoms so quick and easy!

Here's a closer look at the lilac cluster on the bottom of the card...


I've added glitter everywhere on this card...in person the sparkle is magnificent!
I've also added some pink hued Dew Drops around the flowers to add some more visual interest!
I really wish this card would have photographed better as it is more beautiful in person...and the sun just wasn't cooperating with me to get these photos done!

Anyway, I hope that you've found a bit of creative inspiration here today!
To continue with more creative ideas, be sure to check out the Heartfelt Creations blog for a plethora of projects the rest of the design team have come up with for you!

Until next time...
Project Supplies & Instructions

white card stock, Gemini Die Cutting Machine, BigShot Die Cutting Machine, Dew Drops – Orchid, paper trimmer, scissors, pop dots, VersaFine Black Ink, Qtip,

For more tips on using the Lush Lilac Collection, please see this video
https://www.youtube.com/watch?v=KDbdzC0MnAI
 
Create a 5” x 7” card base from white card stock. Locate the layout page with the scroll and lilac cluster within the Lush Lilac Paper Collection as well as the designer paper with purple brocade style background. Cut the scroll image section to be just slightly smaller than your card base and die cut decorative edge using the Fleur Border Basics Die and your die cutting machine.  

Next, die cut the coordinating eyelet border from the Fleur Borders Basics Die from white card stock using your die cutting machine. Using a sponge or Qtip, spread some dries clear adhesive over the eyelet border and sprinkle with the Crystal Ultrafine Transparent Glitter. Adhere to back of matting piece with decorative edge/scroll image. Now cut and add the section of purple decorative paper to the back of the mat making sure that when they are adhered together they will measure just slightly smaller than your card base. Ink all edges of the card front panel you’ve just created with ColorBox Wisteria Ink. Adhere card front to card base.

Using the oval die cuts, create a frame using the eyelet oval and the oval the next size down. Next, continue with the oval dies and cut another frame one size down from the eyelet oval using your die cutting machine and a piece of coordinating decorative paper. Ink the inside edge of the decorative paper frame with ColorBox Wisteria Ink. Adhere frames together, and using a sponge or Qtip add Designer Dries Clear Glue to outer white frame and sprinkle with Crystal Ultrafine Transparent Glitter.

Locate the premade card panel with the bird image within the paper collection as shown. Using the two sets of Eyelet Oval & Basics dies, die cut the bird image from the card panel so it will fit behind the oval frame you have created. Ink all edges of the oval with ColorBox Wisteria Ink. Using VersaFine Black Ink, stamp sentiment onto oval bird panel. Using pop dots, adhere bird panel to back of frame. Adhere frame to card front as shown.

Next stamp two inkings of the smallest lilac cluster from the Lush Lilac Cling Stamp Set, and one inking of the lilac cluster from the Lush Lilac and Umbrella Spray Cling Stamp Set onto white card stock using ColorBox Concord Ink. Die cut using die cutting machine and coordinating dies. Color all lilac images and blossoms using Stack and Store daubers with a combination of ColorBox Wisteria and Memento Lilac Posies inks. For foliage color using combination of ColorBox Olive Pastel and Lime Pastel inks. 
Stamp one inking of the bird image from the Songs of Spring Cling Stamp Set, die cut using coordinating die and color using Memento Danube Blue and Morocco inks.
 
Shape stamped embellishment background pieces using Deluxe Flower Shaping Kit. Shape lilac blossoms using 3D Lush Lilac Shaping Mold and Deluxe Flower Shaping Kit as shown in video link above. 
Adhere the two smallest lilac clusters to oval frame as shown. Adhere large stamped lilac cluster image over where scroll appears on the decorative paper. Add shaped lilac blossoms to small clusters on frame and to large cluster on bottom corner of card as shown. Trim off the bit of branch under the birds tail and tuck into cluster as shown. 

For finishing, using fine metal glue tip with Designer Dries Clear Adhesive, apply Crystal Ultrafine Transparent Glitter to all pre-printed imagery on card front as well as all shaped lilac blossoms. Adhere dew drops around flower clusters and prills to shaped flower centers.

Thanks for visiting!

Thanks for visiting!