Hello my friends!
I'm so glad you could join me today! Grab a cuppa and let's have a peek at the newest card I've created with the newly released Floral Sentiments Collection from Heartfelt Creations!
This week I decided to use the last stamp set from the Floral Sentiments Collection that I hadn't had a chance to use yet! The beautiful Special Floral Sentiments Cling Stamp Set!
Let's begin with a look at the project...

I wanted to keep this 5"x7" card simple and fuss free, so I began with some simple matting using white card stock and some pretty papers from the Floral Sentiments Paper Collection. I also wanted to keep the design super mailable as there are definitely times we need a card that has only a little dimension and this new release is absolutely perfect for this purpose!
I decided that I needed a pretty die cut to anchor the gorgeous sentiment! It gave me the chance to play with the Slim Lattice Oval Die which I'd been eyeing up in my craft room, but not used yet! Because this is a slimline die cut, I knew that I'd have to trim off the ends as my card measures 5"x7". Using my Dries Clear Adhesive and Fine Metal Glue Tip, I adhered the die cut to the card panel....making sure that I didn't apply glue right to the ends, as they were going to be trimmed!
As I wanted the sentiment to be the focal point of the card, so I stamped it in black and then die cut the outer edge of the image with the outer portion of the coordinating die. I've then adhered it to the center of the card with dimensional foam tape.
Next, I stamped the image twice onto bristol smooth marker paper and colored both images using Zig markers. I opted to go with a red hue for the flowers to match the reddish paper I'd used as a matting background from the Floral Sentiments Paper Collection.
Here's a close up of the colored florals...

These images are so very quick and easy to color...the whole collection is just perfect for creating a quick card!
I die cut each of the images, this time using the inner and outer portion of the coordinating die...this way I had two frames. One frame I used to cut the floral pieces into sections and shaped them with my Deluxe Flower Shaping Kit. This will give the card a subtle hint of dimension when the flowers are layered.
The other colored frame I left as is. I then die cut two more of the same without the stamped image and layered them onto the back of the colored frame. When placed over top of the sentiment, this will give it a nice framed/inset appearance.
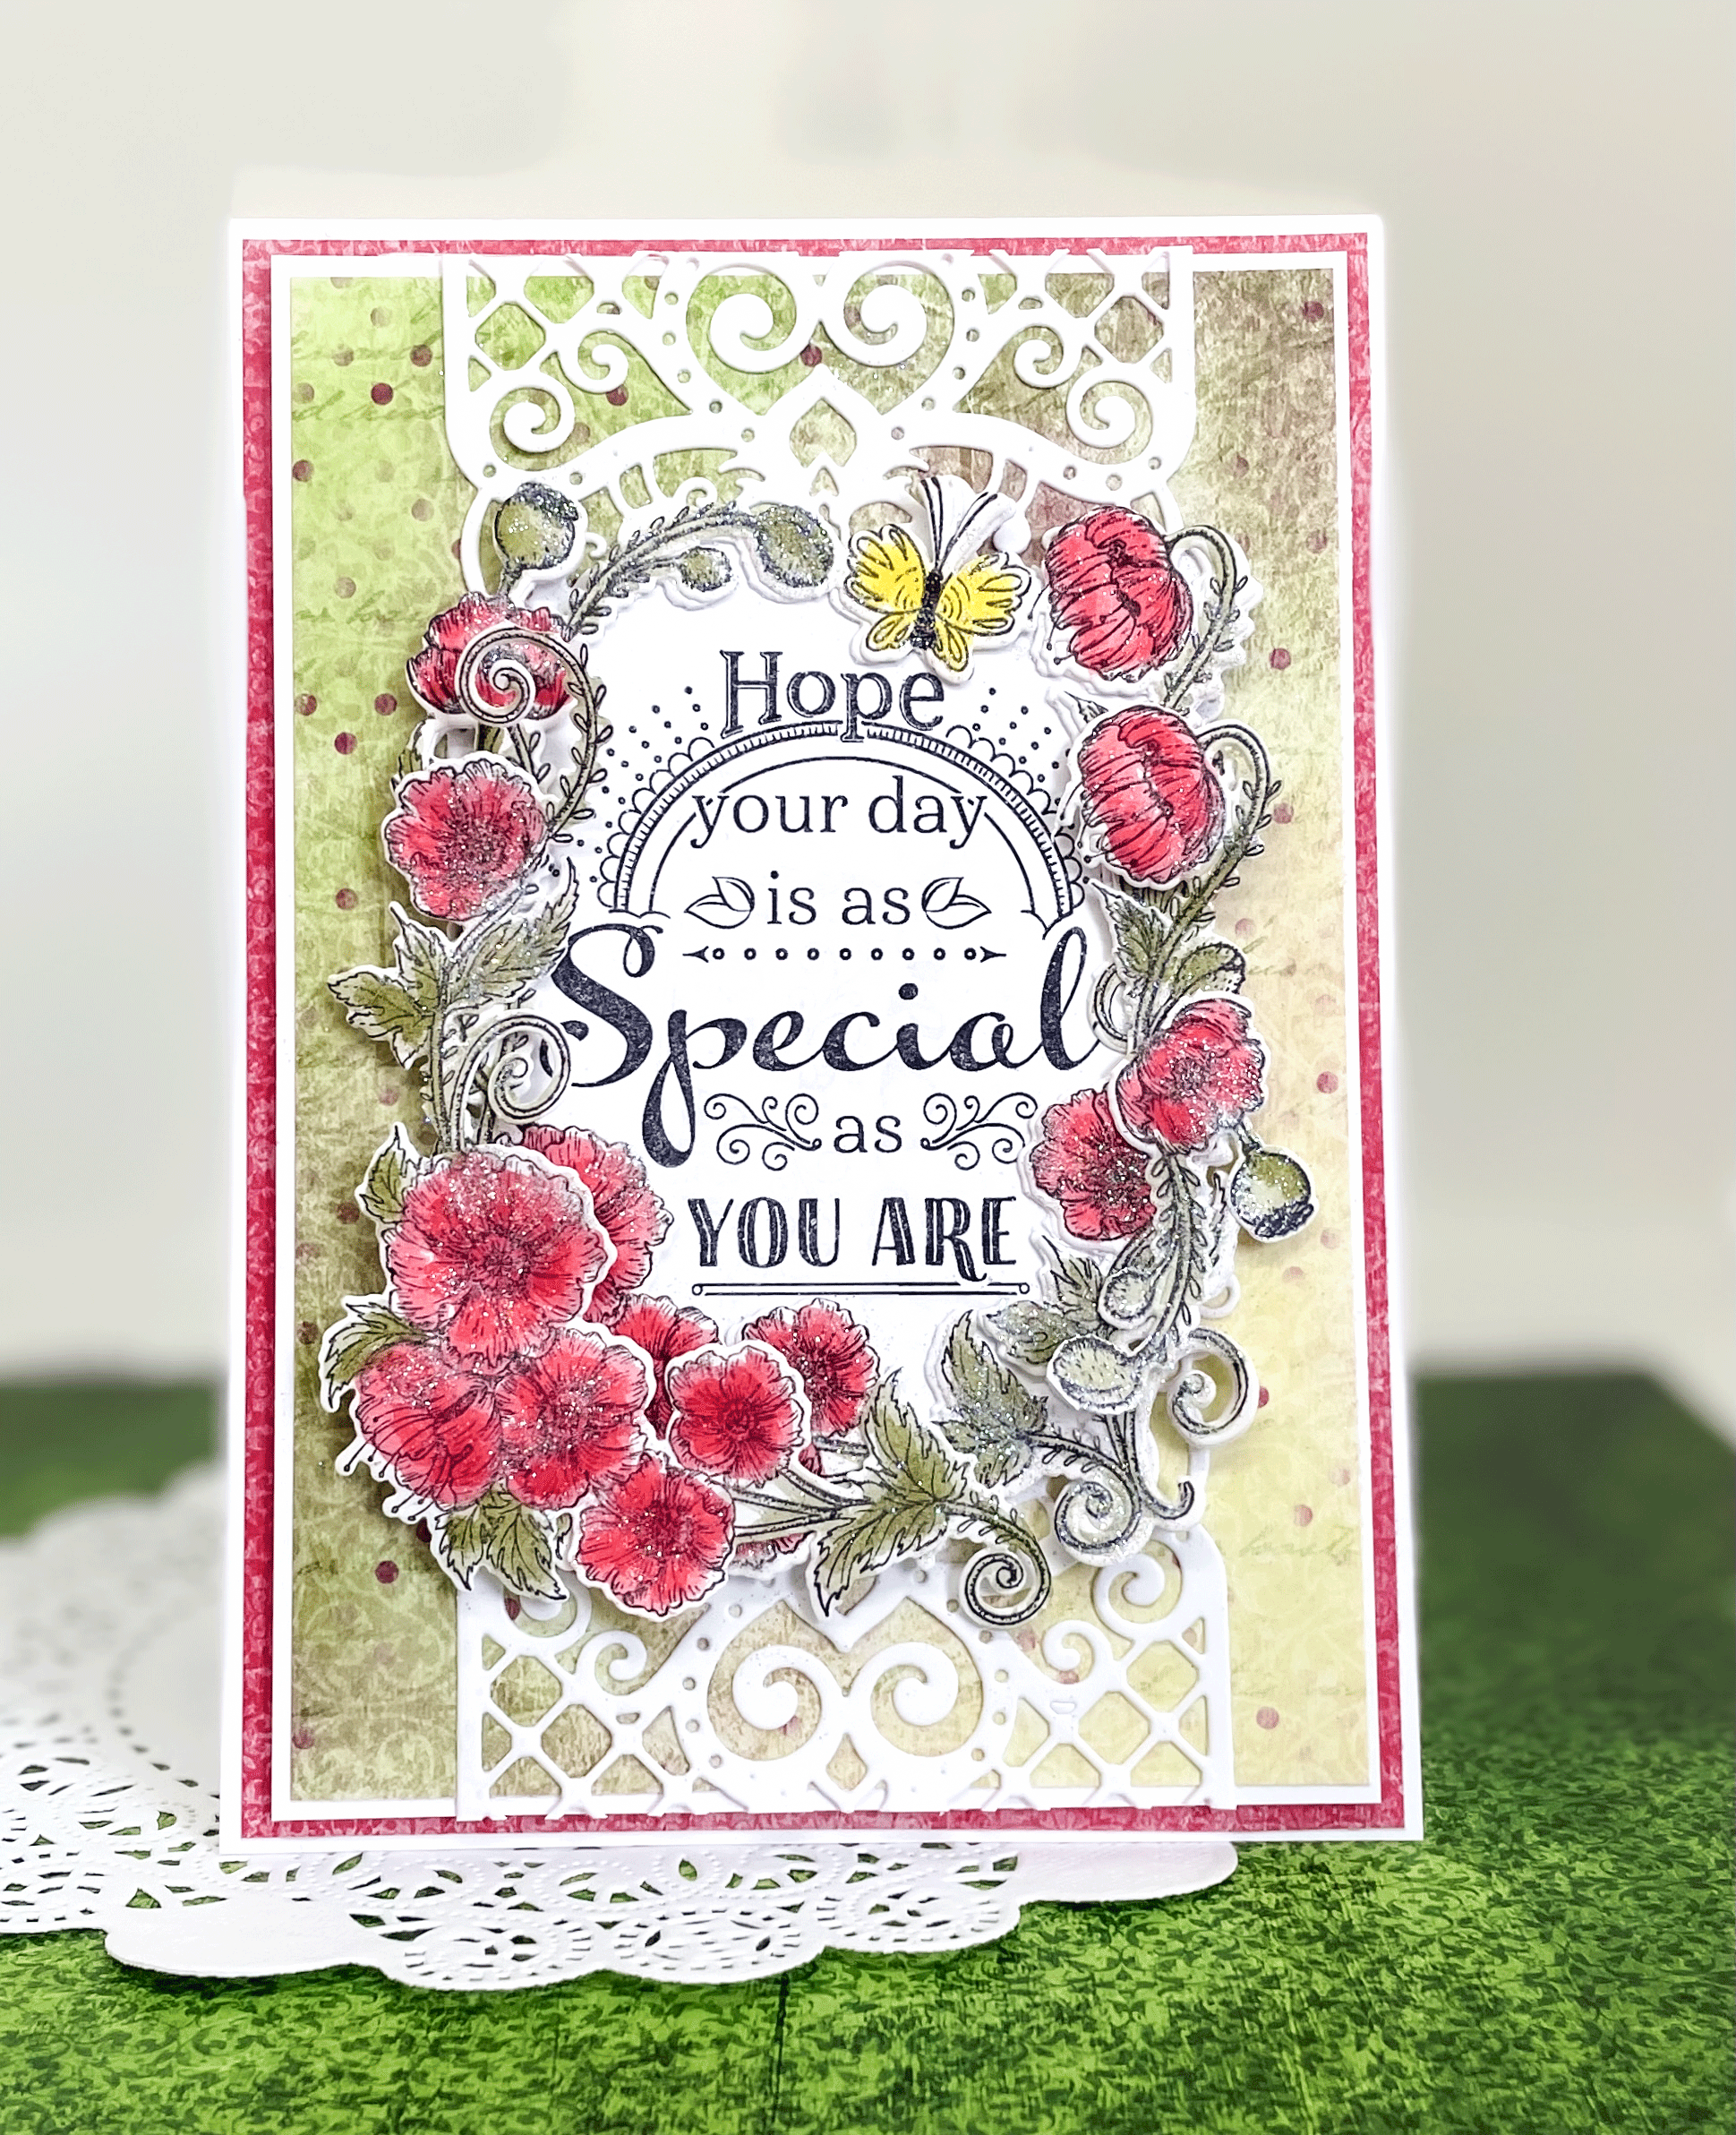
After adhering the colored frame overtop the sentiment, I adhered the shaped florals and added them into the frame giving it a slight dimensional appearance. A hint of glitter and the card was complete!
I do hope you've enjoyed today's share! I've included the link for the full instructions here! Be sure to check out the other design team members creations over on the Heartfelt Creations blog...they never fail to impress!
Until next time...


No comments
Post a Comment